Vanilla Cream Bars How to Bake Bliss
There’s something about pulling out this zucchini lemon drizzle cake that instantly takes me back to my grandma’s kitchen. I remember the smell wafting through the house, a comforting warmth mixed with the zing of fresh lemon. It’s incredibly satisfying—soft, moist, with just a hint of sweetness—and yet it’s so simple to make, I always do this when I want a little slice of happiness after a long day. Honestly, this cake is my secret weapon—perfect when you’re craving something sweet at 10pm but don’t want to turn the oven into a sugar furnace. And the best part? You probably have all the ingredients lurking in your fridge or pantry right now. This one’s a lifesaver on busy nights or whenever friends drop by unexpectedly. Trust me, once you try it, it’ll become a staple in your home bakery, just like it is in mine!
What is Zucchini Lemon Drizzle Cake?
This zucchini lemon drizzle cake is basically your new best friend—think of it as the lovechild of a moist quick bread and a tangy, bright lemon cake. The zucchini, shredded finely, keeps the cake incredibly tender and a little sneaky—your kids won’t even notice it’s there! The lemon adds a fresh, citrusy punch that lifts this cake from simple to spectacular. It’s essentially a cross between a cozy family dessert and a summery brunch treat. The name might sound a little fancy, but don’t be fooled—this is one of the easiest cakes you’ll ever make. I’ve tested it with a few variations, but honestly, the classic flavor combo just can’t be beaten. Plus, it’s a brilliant way to sneak some extra veggies into your kids’ diet without any fuss.
Why you’ll love this recipe?
What I love most about this zucchini lemon drizzle cake is how it manages to be both comforting and lively at the same time. The flavor profile really punches through with that bright lemon zest, balanced perfectly by the subtle sweetness and richness of the cake itself. It’s not overly sugary, which makes it a hit with my kids—they often ask for seconds, especially once I drizzle that sweet lemon glaze on top. This cake is also a total winner in the simplicity department. You don’t need complicated techniques or fancy ingredients. Just pantry staples, a handful of fresh lemon, and a couple of zucchinis—easy peasy! And because it’s budget-friendly, I often make a double batch, freezing half for when I need a quick dessert or breakfast (yes, breakfast—you’re gonna love this in the morning with a cup of coffee). I’ve made this for birthday parties, weekend brunch, and even quick weeknight desserts, and it always disappears in minutes at my house.
How do I make Zucchini Lemon Drizzle Cake?
Quick Overview
This cake comes together in under an hour and requires minimal prep—just a few minutes grating zucchini and mixing the batter. The trick is to keep everything light and avoid overmixing, which keeps the crumb soft and fluffy. Bake it until golden, then let it cool just a bit before drizzling with that lemon glaze. The glaze is optional but totally worth it—adds that perfect final touch of tart sweetness. It’s a pretty forgiving recipe, so don’t stress if your zucchini is a little watery or your batter looks slightly lumpy. Trust me on this one—it always turns out delicious!
Ingredients
For the Main Batter:
- 2 cups grated zucchini (about 2 zucchinis, shredded finely)
- 1 1/2 cups all-purpose flour (I like using unbleached for extra flavor)
- 1 teaspoon baking powder
- 1/2 teaspoon baking soda
- 1/4 teaspoon salt
- 1/2 cup granulated sugar
- 1/2 cup packed light brown sugar
- 1/2 cup vegetable oil (or melted coconut oil)
- 3 large eggs
- Zest of 2 lemons
- 2 tablespoons fresh lemon juice
- 1 teaspoon vanilla extract
For the Filling (Optional but makes it special):
- 1/2 cup chopped walnuts or pecans (to sprinkle on top)
For the Lemon Glaze:
- 1 cup powdered sugar
- 2-3 tablespoons fresh lemon juice (adjust for desired consistency)
- Extra lemon zest for garnish (optional)
Step-by-Step Instructions
Step 1: Preheat & Prep Pan
Preheat your oven to 350°F (175°C). Grease a 9-inch round cake pan or line it with parchment paper. I always do this to make sure the cake comes out easy and clean—nothing worse than fighting with a stuck cake!
Step 2: Mix Dry Ingredients
In a medium bowl, whisk together the flour, baking powder, baking soda, and salt. This step ensures even distribution of the leavening agents, so your cake rises beautifully and isn’t dense. I’ve learned the hard way—overmixing the flour mixture can make the cake tough, so just give it a gentle whisk and move on.
Step 3: Mix Wet Ingredients
In a large mixing bowl, beat the eggs with both sugars until smooth and slightly frothy. Then, stir in the vegetable oil, lemon zest, lemon juice, and vanilla. The smell alone of lemon and vanilla together is enough to make you happy—I tested this with almond extract once, and it was pretty good, but lemon is truly where it’s at here.
Step 4: Combine
Gradually add the dry ingredients to the wet mixture, gently folding just until no streaks remain. Overmixing can activate the gluten in the flour and make the cake dense, so be gentle—think of it as a delicate dance. If your batter looks a little lumpy, don’t worry—just don’t beat it into submission.
Step 5: Prepare Filling
If you’re adding walnuts or pecans, fold them into the batter now or sprinkle on top before baking. I love the crunch they add—a nice contrast to the soft crumb. You can also skip this step if you prefer a simpler cake.
Step 6: Layer & Swirl
Pour your batter into the prepared pan. If you’re feeling fancy, you can swirl in a spoonful of berry jam or lemon curd before baking—just a hint of extra flavor. I often do this because it looks pretty and adds a little surprise center.
Step 7: Bake
Bake for 40-45 minutes, or until a toothpick inserted in the center comes out clean. I always set my timer for 40, then check for doneness—every oven is different! The top should be golden and slightly cracked—just like a traditional loaf, and filling your kitchen with that irresistible citrus scent.
Step 8: Cool & Glaze
Let the cake cool in the pan for about 15 minutes, then transfer to a wire rack. While it’s still warm, drizzle with your lemon glaze—this melts into the cake, creating another layer of flavor. Remember, if you wait too long, the glaze won’t sink in as prettily.
Step 9: Slice & Serve
Once completely cooled, slice with a sharp serrated knife—this cake is so moist, a gentle sawing motion works best. Serve on a pretty plate with a dusting of extra lemon zest or some fresh berries for decoration. It’s perfect with a scoop of vanilla ice cream if you’re feeling decadent!
What to Serve It With
This cake is so versatile, it can be a breakfast, a brunch centerpiece, or a show-stopping dessert. In the mornings, I love pairing it with my favorite mug of black coffee or a glass of sparkling water with lemon. The bright citrus cuts through the richness of the coffee—so good after a sleepy weekend wake-up call. For brunch, serve slices alongside a steaming plate of scrambled eggs and some crispy bacon. The lemon’s freshness pairs beautifully with savory sides. As an after-dinner dessert, I like to serve it with a dollop of whipped cream or a drizzle of honey—something to turn it into a showstopper. And honestly, it’s become my go-to snack during lazy afternoons; I’ll just slice a piece and enjoy it with a cup of tea. My family especially loves it when I make mini muffins with the same batter—they’re perfect for little hands and grab-and-go mornings.
Top Tips for Perfecting Your Zucchini Lemon Drizzle Cake
After making this cake countless times, I’ve picked up a few tricks that really take it from good to great. First, when grating the zucchini, I always squeeze out excess moisture with a clean cloth or paper towel. It sounds simple, but too much moisture can cause the batter to be watery, and nobody wants a soggy cake—I learned that the hard way! Also, when mixing the wet ingredients, make sure your eggs are at room temperature; it helps everything emulsify better. If you want an extra punch of lemon, add a splash more lemon juice or zest—just don’t overpower the delicate balance. I tested baking this at a slightly lower temperature (around 340°F) for a little longer, and it came out even more tender. For the swirl pattern, I recommend using a skewer or toothpick to create a gentle swirl—more about the visual impact than perfection. As for ingredient swaps, I’ve experimented with coconut oil for a subtle tropical vibe, and it worked beautifully. Trust me, don’t skip the glaze—adding it while the cake is still warm lets it soak in and makes every bite extra flavorful. The biggest lesson? Always let the cake cool just enough so the glaze doesn’t slide off—but don’t wait too long, or it won’t sink in as prettily. Perfecting this cake is all about small tweaks, and honestly, I’ve loved every trial and error—I promise it’s worth it!
Storing and Reheating Tips
This cake keeps surprisingly well—moist and fresh even a day or two after baking, if stored properly. For short-term storage, wrap it tightly with plastic wrap or keep it in an airtight container. It’s best enjoyed within 2-3 days to keep the texture soft and flavorful. If you’re planning to keep it longer, I recommend refrigerating it—just make sure it’s covered well, as the lemon flavor does tend to intensify and infuse throughout. To reheat, a quick 10-second blast in the microwave restores its warmth and softness—perfect for breakfast or an afternoon treat. If freezing, wrap the entire cake or slices tightly with foil and store for up to 3 months. Thaw at room temperature for a few hours or in the fridge overnight. Keep in mind, the glaze is best added fresh; if you’re freezing the cake, wait to glaze until before serving for maximum shine and flavor retention. I’ve also tried adding the glaze directly after refrigerating—trust me, it still looks gorgeous, just give it a gentle gentle stir to loosen it up. No matter how you store it, always serve at room temperature for that perfect balance of moist crumb and bright citrus flavor—don’t rush the waiting; patience makes all the difference!
Frequently Asked Questions
Final Thoughts
This zucchini lemon drizzle cake has truly become one of my all-time favorite desserts to whip up. It’s hygge in every bite—moist, tender, and bursting with fresh citrus brightness. I love how simple it is to make, yet it looks like dessert royalty when you slice into it. Whether it’s a casual get-together, an afternoon snack, or a cozy weekend breakfast, this cake never disappoints. Plus, it’s a sneaky way to get some veggies into the mix—a little win for moms, dads, and anyone trying to eat more greens! If you try it out, I’d love to hear how it turns out. Don’t forget to comment below, rate it, and share your variations. Happy baking—and enjoy every moist, zesty bite!

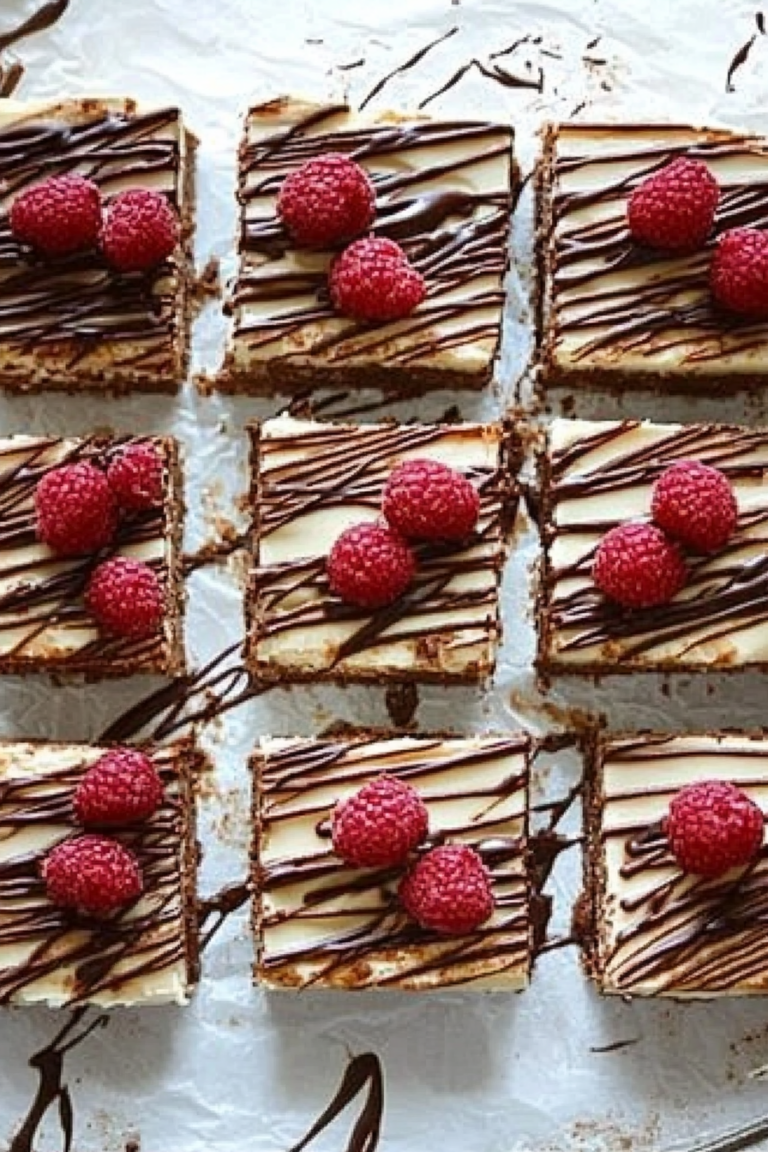
vanilla cream bars
Ingredients
Method
- In a large bowl, mix together the cake mix, one egg, and the oil until a crumbly consistency. Set aside 1 cup of the crumb mixture for later.
- Preheat oven to 350°F. Grease a 9x13 inch baking pan and pat the remaining crumb mixture into the bottom. Bake for 10 minutes.
- In a large bowl, beat the cream cheese until smooth. Add sugar, eggs, and vanilla, then beat until well combined. Spread evenly over baked crust.
- Sprinkle the reserved crumb mixture on top of the cream cheese layer.
- Bake for 15 to 18 minutes until topping is golden. Cool and sprinkle with powdered sugar before serving.