Stacked Cabbage Rolls How to Make Them
There’s something about sinking your teeth into a warm slice of banana bread that feels like a hug from the inside out. But add zucchini into the mix? That’s like winning the flavor and health jackpot all at once. I remember the first time I made this recipe — I had a bunch of ripe bananas that I didn’t want to waste, and my garden was overflowing with zucchinis. I threw them together without much thought, honestly expecting a decent loaf. But what I got blew my mind—moist, tender, slightly sweet with a hint of nuttiness from the zucchini, and packed with that comforting banana aroma. It disappears in minutes at my house, and the best part? It’s so simple to make, I could do it with my eyes closed (well, almost). This one’s a lifesaver on busy nights when I need a quick dessert or a cozy breakfast. Plus, it’s a sneaky way to get picky eaters to enjoy veggies—they never suspect a thing! If you love recipes that feel like a warm hug, trust me on this—your kitchen is about to become your new favorite bakery. Let’s dive into how you can make this homemade zucchini banana bread that’s as tasty as it is wholesome.
What is Moist Zucchini Banana Bread?
This moist zucchini banana bread isn’t your average quick bread. Think of it as a cozy, slightly healthier tweak on classic banana bread — with grated zucchini folded in, it’s got that extra moisture and a little hidden veggie kick. The name’s pretty straightforward: “moist” because, well, it stays beautifully soft and tender, no dry bites here, and “zucchini banana bread” because that’s exactly what it is—a tasty loaf made with ripe bananas and fresh zucchini, baked into a sweet, crumbly treat. It’s essentially a bread that feels like a warm hug, thanks to the bananas’ natural sweetness and the zucchini’s subtle earthy flavor. I like to think of it as a family secret, a way to sneak in some veggies without anyone noticing. Think of it as your new go-to for breakfast, snacks, or even a casual dessert. It’s versatile, comforting, and — if you’ve got a few extra zucchinis lying around — absolutely worth giving a try. My kids actually ask for this all the time — it’s become part of our weekend brunch lineup, and I love knowing I’m feeding them something that’s both delicious and a little better for them.
Why you’ll love this recipe?
Honestly, I could keep listing reasons, but I’ll stick to what matters most—and why I keep coming back to this zucchini banana bread over and over again. First off, the flavor profile is just *so* good. The bananas add a natural sweetness that doesn’t need much extra sugar, and the zucchini brings a moisture that makes every bite melt in your mouth. It’s a little like a comforting hug, but with a sneaky veggie twist that makes me feel good about serving it to my family. And speaking of good, this recipe is crazy easy — no complicated techniques or fancy equipment needed. I always do this when I’m short on time but craving something homemade and satisfying. Plus, it’s super budget-friendly: simple pantry staples like flour, bananas, zucchinis, eggs, and a bit of sugar. The versatility? You can jazz it up in so many ways—add nuts, chocolate chips, dried fruit, or even swap in gluten-free flour if that’s your jam. What I love most about this is that it’s kid-approved, adult-tested, and always hits the spot. It’s perfect for breakfast with coffee, served warm for after-school snacks, or sliced thick and enjoyed as dessert. My family asks for it all the time, and I love how the smell alone draws everyone into the kitchen—nothing beats the cozy aroma of baking bread. Honestly, it feels like sharing a piece of my heart every time I bake this — and I hope it does the same for you.
How do I make Moist Zucchini Banana Bread?
Quick Overview
This zucchini banana bread is all about simplicity and flavor. You start by grating the zucchinis and mashing the bananas, then mix the wet ingredients together. Meanwhile, you combine the dry stuff—flour, baking soda, a pinch of salt, and spices if you like. Mix the wet and dry just until combined, don’t overmix, or your bread might turn dense. Fold in your grated zucchini, pour it into a loaf pan, and bake until golden and a toothpick comes out clean. The result is a tender, moist loaf that’s perfect to slice and enjoy anytime. I love that you can customize the add-ins—chocolate chips are a personal favorite—and it’s a great way to use up those extra zucchinis from the garden. Plus, it’s so straightforward, I’ve made it with kids helping in the kitchen, and they love dumping in the ingredients and stirring. Believe me, once you try this, it’ll become part of your regular baking rotation!
Ingredients
For the Main Batter:
– 2 cups all-purpose flour (or gluten-free blend if you prefer)
– 1 tsp baking soda
– 1/2 tsp baking powder
– 1/2 tsp salt
– 1 tsp ground cinnamon (optional but adds warmth)
– 1/2 cup granulated sugar (can reduce for less sweetness)
– 1/4 cup brown sugar (adds richness)
– 2 ripe bananas, mashed
– 1/3 cup vegetable oil or melted coconut oil
– 2 large eggs
– 1 tsp vanilla extract
– 1 cup grated zucchini (squeeze out excess moisture for best results)
For the Filling:
– Optional: 1/2 cup chocolate chips, walnuts, or dried fruit
– For a more indulgent touch, add a handful of mini chocolate chips right into the batter or on top for that melty goodness.
For the Glaze:
– 1/2 cup powdered sugar
– 1-2 tbsp milk (dairy or plant-based)
– 1/2 tsp vanilla extract
*Tip:* Adjust the glaze thickness by adding more or less milk. Want extra flavor? Mix in a pinch of cinnamon or a splash of lemon juice.
Step-by-Step Instructions
Step 1: Preheat & Prep Pan
Set your oven to 350°F (175°C). Grease a standard loaf pan with butter or line it with parchment paper—trust me, this makes cleanup so much easier and ensures your bread comes out perfectly. If you like a crusty top, sprinkle a little sugar on top before baking.
Step 2: Mix Dry Ingredients
In a medium bowl, whisk together the flour, baking soda, baking powder, salt, and cinnamon. Doing this first helps distribute the leavening agents evenly—they work better when spread out, giving your bread that perfect rise. I’ve learned that sifting isn’t necessary but whisking well makes a noticeable difference, especially with whole wheat or gluten-free flours.
Step 3: Mix Wet Ingredients
In a larger bowl, mash the bananas with a fork until smooth. Add the oil, eggs, vanilla, and sugars—stir until everything is nicely combined. I like to give the bananas a good mash first; it prevents clumps and gives a smoother batter. When mixing the wet ingredients, do it gently—overmixing can make the bread dense.
Step 4: Combine
Gradually add the dry ingredients into the wet mixture, folding just until everything’s moistened—you want the batter to be a little lumpy, not overdone. If you overmix, your bread might turn dense or tough. This is the part where patience really pays off. Proofread your batter—it should be thick but spreadable.
Step 5: Prepare Filling
If you’re adding chocolate chips, walnuts, or dried fruit, fold them gently into the batter now. For a fun variation, sprinkle some on top before baking for that pretty finish. I’ve tested with sunflower seeds too—amazing for a crunch factor!
Step 6: Layer & Swirl
Pour half of the batter into your prepared pan. Add your filling, then top with the remaining batter. If you want a pretty swirl, take a knife and gently swirl the batter—this makes those beautiful marbling patterns. Don’t overdo it though—just a few gentle swirls for that rustic look.
Step 7: Bake
Pop it into the oven and bake for about 50-60 minutes. Start checking at 50 minutes—insert a toothpick in the center; if it comes out clean, you’re good to go! Ovens vary, so don’t be alarmed if yours takes a little extra or less time. The top should be golden brown and fragrant—wait until you see that, the smell alone is worth the wait.
Step 8: Cool & Glaze
Let the bread cool in the pan for about 10 minutes, then transfer to a wire rack. If you’re glazing, wait until it’s completely cool or slightly warm—otherwise, the glaze might melt right off. Drizzle or spread it on top, then let it set for about 15 minutes. The glaze adds that extra touch of sweetness and shine, making the slices extra indulgent.
Step 9: Slice & Serve
Slice with a serrated knife when fully cooled—you want clean cuts without squishing the loaf. Serve plain, with a pat of butter, or a smear of cream cheese. It’s also fantastic toasted the next day. Honestly, this bread makes any coffee break feel special. Plus, leftovers keep well in an airtight container for a few days, though it’s usually gone way sooner!
What to Serve It With
This zucchini banana bread is versatile enough to shine at any time of day. For breakfast, I love it with a cup of strong coffee or a glass of milk. My kids enjoy it toasted with a bit of butter, and sometimes I add a drizzle of honey or jam—their face lights up every time. At brunch, pair it with some fresh fruit, yogurt, or even eggs for a more substantial feast. When I serve it as dessert, I like to dust it with powdered sugar or top with a dollop of whipped cream. If you’re feeling fancy, serve it warm with a scoop of vanilla ice cream for an epic treat. As a cozy snack, it’s perfect for grab-and-go mornings or afternoon pick-me-ups. Trust me, the aroma alone will make everyone come running to the kitchen. This bread has become our family’s feel-good staple, and I hope it becomes one of yours too.
Top Tips for Perfecting Your Moist Zucchini Banana Bread
The more you bake this, the more you’ll see what tweaks work best for your oven and taste buds. Here are some tips I’ve picked up over countless batches:
- Zucchini Prep: Always squeeze out excess moisture after grating. Otherwise, your bread might turn out too soggy or dense. I’ve tried best to use fresh zucchini and grate it finely—coarse shreds can make the loaf crumbly.
- Mixing Advice: Overmixing is the enemy here; it can lead to tough bread. Fold gently—think of it as giving your ingredients a warm hug rather than a vigorous workout. If the batter looks lumpy, that’s perfect.
- Swirl Customization: Want pretty marbling? Use a skewer or butter knife to gently swirl the batter after pouring into the pan. Keep it simple—don’t overdo it, or the patterns might get muddled.
- Ingredient Swaps: Swap mashed avocado or applesauce for some of the oil to cut fats. Or, for a sweeter loaf, add an extra tablespoon of honey or maple syrup. Just remember, these changes can affect texture.
- Baking Tips: Every oven bakes differently—keep an eye and start checking doneness around 50 minutes. Use a skewer or toothpick test—if nothing sticky sticks to it, it’s ready.
- Glaze Variations: Switch up the glaze flavor by adding lemon zest, almond extract, or even a splash of bourbon. It’s a quick way to dress up your loaf for special occasions.
Learning from my mistakes—like overmixing once and ending up with a dense loaf—has taught me that patience and gentle handling make all the difference. Also, don’t forget to savor the scent while baking; it’s a warm reminder that you’re creating something special and homemade. Play around with add-ins and flavors—you’re the artist here. And trust me, that first slice warm from the oven will make all the effort worth it. My best advice? Keep tasting as you go, make notes, and enjoy the process. This bread is more than a recipe; it’s a little piece of home, baked fresh just for you.
Storing and Reheating Tips
Once you’ve sliced and enjoyed your zucchini banana bread, you’ll want to keep it fresh. Here’s how I do it: for short-term storage, wrap slices tightly in cling film or store in an airtight container at room temperature—up to two days. For longer keeps, pop the loaf into a zip-top bag or airtight container and refrigerate. It’s surprisingly good chilled or at room temp, but I prefer gently reheating slices in the microwave for about 10-15 seconds—just enough to warm through without drying out. If you want to keep it for longer, freezing slices individually in plastic wrap and then in a freezer bag works beautifully. Thaw at room temp or microwave, and you’ll get a nearly-fresh experience. Keep the glaze separate and add it before serving if you stored the bread chilled or frozen—this way, it stays nice and glossy. Trust me, this bread is almost better the next day when all those flavors have had time to develop. Just make sure to consume within a week for the best taste and texture, and always look for signs of dryness or mold—freshness is king for baked goods!
Frequently Asked Questions
Final Thoughts
There’s nothing quite like pulling a warm loaf out of the oven that fills your whole house with its comforting aroma. This zucchini banana bread has become a family favorite because it’s not just delicious, but also a little healthier and infinitely adaptable. I love the way the zucchini keeps the bread moist and the bananas add natural sweetness — it’s like a hug wrapped in bread. Plus, it’s so forgiving: you can tweak ingredients, add your own favorite mix-ins, and still get a lovely result every time. I’ve made this so many times, and each batch brings a little happiness to my home—sometimes extra nuts, sometimes with chocolate, always with good memories. I encourage you to try it, experiment, and make it your own. I promise, once you taste that first slice, you’ll want to bake it again and again. Happy baking, friends—can’t wait to hear how yours turns out! And don’t forget to leave a comment or share your creative twists. Sharing recipes like this is what makes cooking so special, isn’t it?
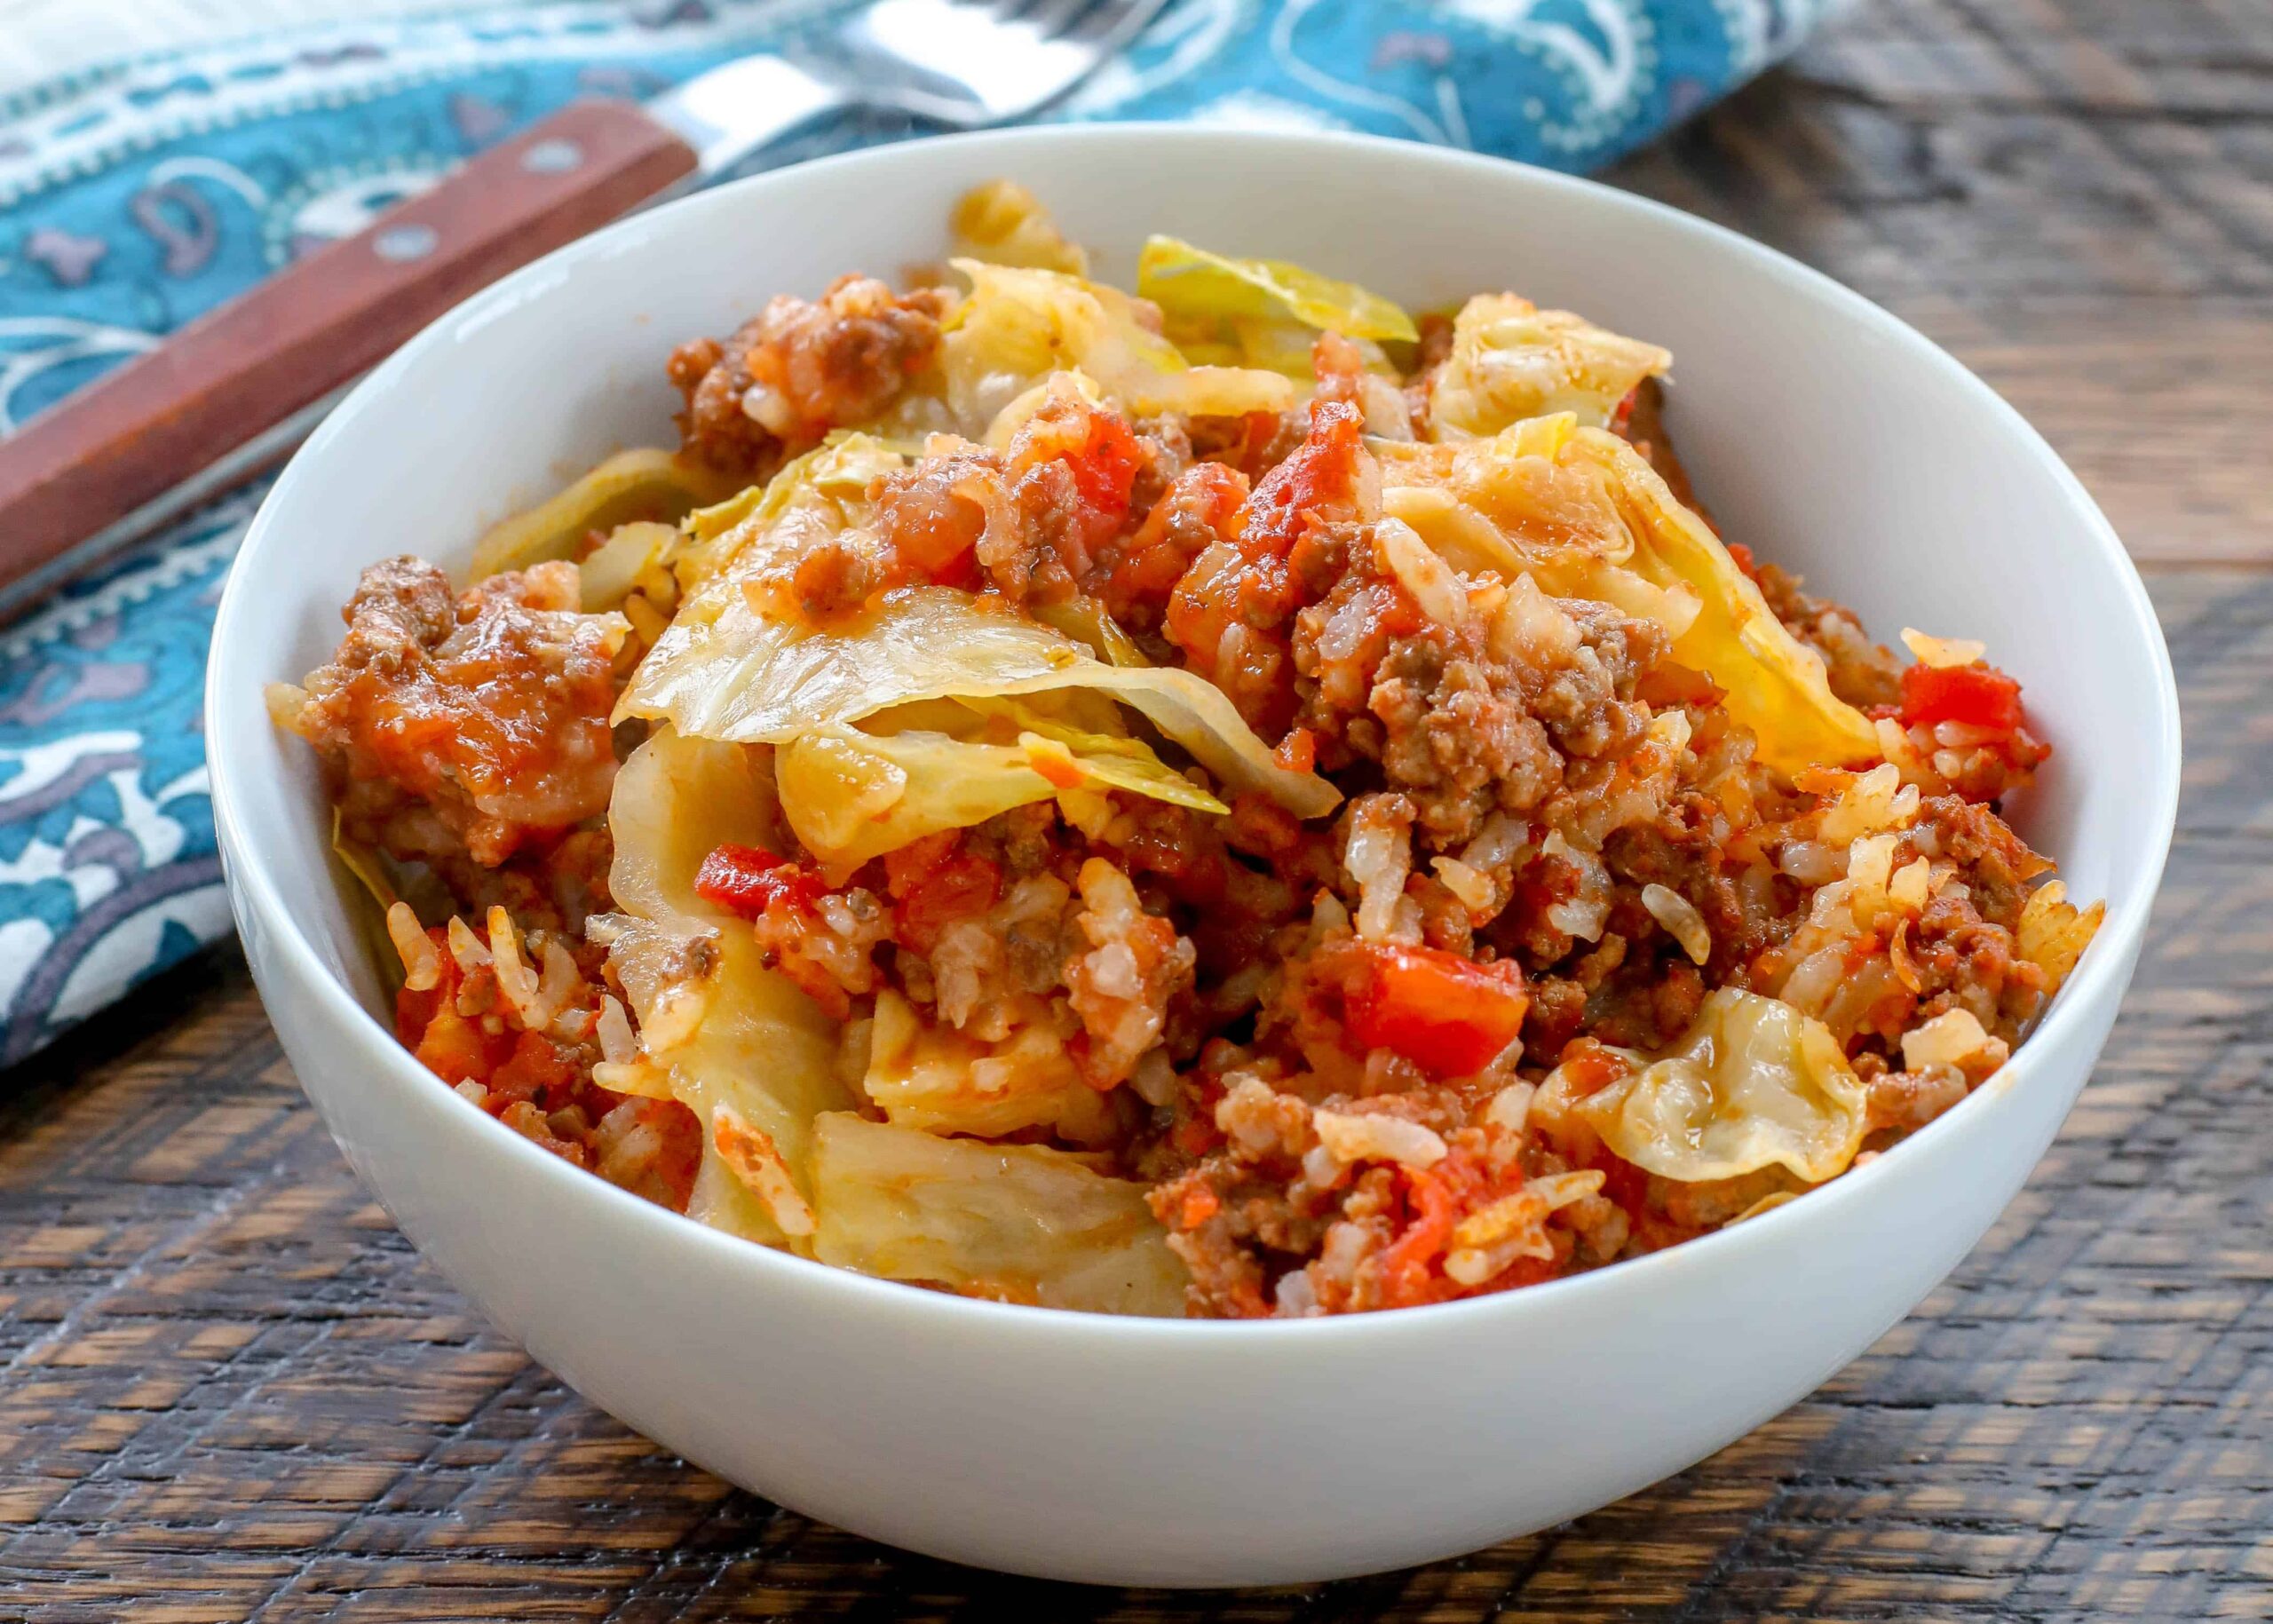
cabbage rolls
Ingredients
Method
- Preheat the oven to 350°F. Spread the cabbage across the bottom of a 9x13 inch dish. In a large skillet, cook the ground beef with chopped onion over medium heat until browned.
- Drain excess grease from the skillet. Add uncooked rice, chili powder, garlic powder, salt, and pepper to the beef mixture. Stir in crushed tomatoes. Spread the mixture evenly over the cabbage in the baking dish.
- Mix together tomato sauce, brown sugar, and white wine vinegar. Pour this sauce over the beef and cabbage layers. Cover with foil and bake for 90 minutes. Uncover and let rest for 5-10 minutes before serving.