Dark Chocolate Whoopie Pies How to Bake
I remember the first time I made this zucchini chocolate swirl cake—my grandma’s old recipe, spruced up with a secret twist. The smell alone brings me right back to Sunday afternoons in her cozy kitchen, the kind where the air is thick with cinnamon and warm chocolate. It’s kind of funny, isn’t it? How a simple cake made with hiding vegetables can taste so indulgent while sneaking in a little health bonus. My kids actually ask for this all the time, and I love how it’s a win-win: they get their veggies without a fuss, and I get a slice of something totally divine at the end of a busy day. It’s easy enough for a rushed weekday bake, yet fancy enough for a weekend treat. Trust me on this one—it’s a crowd-pleaser, and I’ve made it countless times, tweaking little things here and there, and it never fails to disappear in minutes at my house. I’ll walk you through every step, so you can get this just right—because once you do, you’ll be hooked, just like I am.
What is Zucchini Chocolate Swirl Cake?
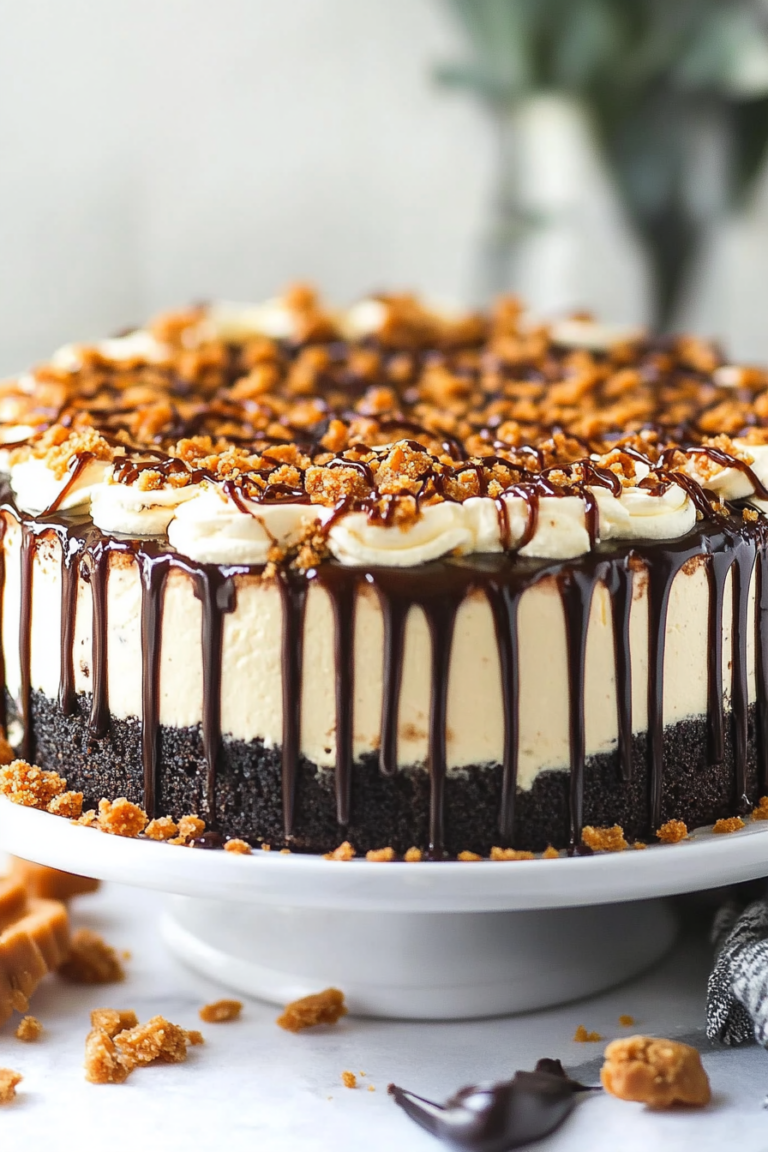
This zucchini chocolate swirl cake is essentially a moist, flavorful cake layered with a luscious, creamy swirl of chocolate goodness. Think of it as a cake that’s secretly healthy—thanks to the zucchini, which keeps it super tender and adds a subtle, fresh flavor. The name might sound fancy or even a little confusing—”swirl” just means you’re alternating layers or ribbons of the batter and chocolate to create a beautiful marbled effect. It’s a terrific way to incorporate vegetables into baked goods without sacrificing taste, and honestly, it’s become a family favorite for lazy Sunday afternoons and birthday celebrations alike. The best part? It’s so straightforward that even if you’re not a seasoned baker, you’ll find this remarkably easy to pull off. The ingredients are simple, affordable, and almost always in my pantry. Plus, the kid-approved factor on this one is sky-high, which makes it a regular on our dessert rotation.
Why you’ll love this recipe?
What I love most about this zucchini chocolate swirl cake is how it balances indulgence and nutrition without feeling like a compromise. The first thing you notice is the incredible flavor—moist, tender crumbs bursting with the earthy sweetness of zucchini, contrasted beautifully by rich, gooey chocolate streaks. It’s literally like a chocolate lover’s dream with a little healthy twist tucked inside. And get this—it’s insanely simple to make. I always do this when I need an impressive dessert but only have a little time: toss everything into a bowl, swirl in the chocolate, and bake. No complicated frosting or fancy piping, just pure, homey goodness. Plus, it’s budget-friendly — using everyday ingredients like flour, sugar, and cocoa powder, which I always have on hand. I’ve tested this with almond milk, and it actually made the cake even creamier, so feel free to experiment. This one’s a lifesaver on busy nights or when I want something sweet without too much guilt. The versatility is a bonus, too—you can serve it with coffee, as a dessert, or even as a casual snack by a warm fire. Trust me, once you try this, it’ll become part of your regular rotation—because it’s just that good.
How do I make Zucchini Chocolate Swirl Cake?
Quick Overview
This cake is my go-to for fuss-free baking. You start by grated zucchini—squeeze out excess moisture so your cake isn’t soggy—and mix it into a simple batter of flour, sugar, eggs, and oil. While that’s coming together, you melt some chocolate and create a rich swirl. It’s then just a matter of layering the batter and chocolate, giving it a few gentle swirls to create a marbled effect. Into the oven it goes—all that’s left is to wait for that beautiful crackly top and fragrant aroma to fill your kitchen. The magic trick is not overmixing—keep it light and gentle, and you’ll get the softest crumb. Once baked, I like to let it cool just enough before drizzling with a quick chocolate glaze—because honestly, a little extra chocolate never hurts.
Ingredients
For the Main Batter:
– 2 cups grated zucchini (squeeze out excess water—trust me on this!)
– 1 1/2 cups all-purpose flour (or sub with almond flour if you want gluten-free)
– 1 cup sugar (white or organic brown sugar works beautifully)
– 1/2 cup vegetable oil or melted unsalted butter
– 3 large eggs
– 1 teaspoon vanilla extract
– 1 teaspoon baking powder
– 1/2 teaspoon baking soda
– 1/4 teaspoon salt
For the Filling:
– 100g dark chocolate, chopped or chips
– 2 tablespoons milk (any kind—almond, oat—works too)
– 1 teaspoon espresso powder (optional but makes the chocolate pop!)
For the Glaze:
– 1/2 cup dark chocolate or chocolate chips
– 2 tablespoons cream or milk
– 1 teaspoon honey or maple syrup (for a glossy finish and extra flavor)
Step-by-Step Instructions
Step 1: Preheat & Prep Pan
Set your oven to 350°F (175°C). Grease a 9-inch round cake pan or line it with parchment paper—it helps a lot with the clean-up. If you want a taller cake, you can use a loaf pan or even two smaller pans.
Step 2: Mix Dry Ingredients
In a large bowl, whisk together the flour, sugar, baking powder, baking soda, and salt. Doing this ensures everything gets evenly distributed, which is key for a light, fluffy cake. I always sift mine just to make sure there are no lumps, but a quick whisk works fine too.
Step 3: Mix Wet Ingredients
In a separate bowl, whisk the eggs, oil, and vanilla until smooth. Then stir in the grated zucchini. It might seem a little watery at first, but that’s okay—just make sure to squeeze out as much moisture as you can from the zucchini beforehand. I like to use a clean kitchen towel or cheesecloth for this step. This keeps your batter from getting soggy.
Step 4: Combine
Pour the wet mixture into the dry ingredients, folding gently with a spatula. Don’t overmix—just until everything looks combined and just a little lumpy. Overmixing can make the cake dense, and nobody wants that!
Step 5: Prepare Filling
In a small bowl, melt the chocolate with milk—either in the microwave in bursts or using a double boiler on the stove. Stir until smooth. Add a pinch of espresso powder if you want a richer chocolate flavor. I like to keep this slightly thick, so it stays in ribbons when swirled.
Step 6: Layer & Swirl
Pour half of the batter into your prepared pan. Dollop spoonfuls of the melted chocolate across the surface. Then gently spread the remaining batter on top. Using a skewer or a butter knife, swirl through the batter and chocolate to create a marbled effect—don’t overdo it; just a few gentle swirls will do.
Step 7: Bake
Pop it into the oven and bake for 40-45 minutes, or until a toothpick inserted in the center comes out clean. Keep an eye on the top—if it starts to get too dark, you can tent it with foil. The smell alone will make your kitchen feel like a bakery!
Step 8: Cool & Glaze
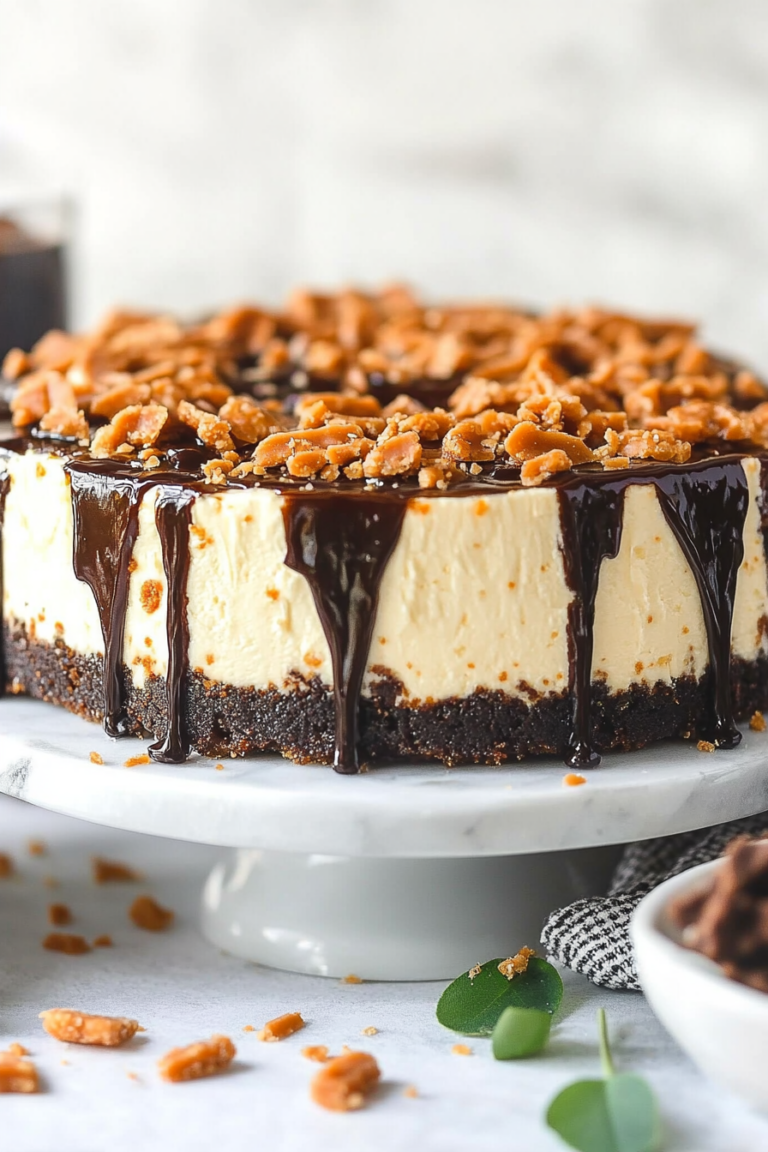
Allow the cake to cool in the pan for about 10 minutes, then transfer to a wire rack. While it cools, melt your chocolate glaze ingredients until smooth. Pour over the cake, letting it drip down the sides for a gorgeous finish. The glaze sets pretty fast, so I recommend glazing it while it’s just warm enough.
Step 9: Slice & Serve
Once cooled completely, slice with a sharp knife. The key is to wipe your knife clean between cuts to keep the slices neat. I love serving it slightly warm with a tiny scoop of vanilla ice cream or a dollop of whipped cream. It’s just foolproof comfort in every bite.
What to Serve It With
This cake is pretty versatile. For breakfast or brunch, I love slicing it and serving alongside a strong cup of coffee or a tall glass of milk. My family enjoys it with a drizzle of caramel and fresh berries on top—perfect for a lazy Sunday brunch. As a dessert, a scoop of vanilla bean ice cream balances the richness beautifully, or you can dust it with powdered sugar for an elegant finish. I’ve even taken slices on picnics—wrapped in foil, it travels well and stays moist for hours. It’s also a hit at potlucks or a quick afternoon treat when the kids come home craving something sweet but I don’t want to turn on the oven for hours. We’ve made this for birthdays, too, although I tend to double the recipe because everyone asks for seconds. It’s such a crowd-pleaser, and honestly, it’s become a bit of a tradition in my family now—kind of like our little secret to sneaking in some veggies with dessert.
Top Tips for Perfecting Your Zucchini Chocolate Swirl Cake
Every time I make this, I learn a little more. Here are some tips that help me get it just right:
- Zucchini Prep: Always squeeze out as much moisture as possible—this keeps your cake from turning watery. Using a fine grater helps because the zucchini melts right into the batter, making every bite perfectly tender.
- Mixing Advice: I’ve overmixed this before and ended up with a dense cake. Gently folding everything just until combined keeps the crumb light and fluffy. Trust me, less is more here.
- Swirl Customization: Experiment with more chocolate ribbons or even swirl in peanut butter or caramel instead. Visuals are everything—try to create nice, distinct ribbons without overmixing.
- Ingredient Swaps: I’ve replaced regular sugar with coconut sugar, and it’s delicious—just remember it might slightly alter the sweetness level. Almond flour makes it more moist and nutty if you want gluten-free but keep an eye on the batter’s consistency.
- Baking Tips: Always check the cake a few minutes before the timer. Oven temps vary, and overbaking can dry it out. I prefer testing with a toothpick—when it comes out clean, you’re golden!
- Glaze Variations: For a different flavor, try adding a splash of orange liqueur or a teaspoon of cinnamon to your glaze. It’s all about customizing to your taste.
From experience, I’ve learned that patience and gentle mixing are key. Also, letting the cake cool completely before glazing ensures your chocolate doesn’t melt into a puddle—it sets beautifully, giving that glossy finish I love. Don’t worry if your swirl isn’t perfect; even my first attempts had little imperfections—and they still tasted incredible. Feel free to experiment with the filling and even try different chocolates; I once added a dash of chili powder to make it spicy and it was a game-changer!
Storing and Reheating Tips
This cake keeps surprisingly well, and I often make it ahead of time. For room temperature storage, keep it covered loosely with foil or a clean towel—this prevents it from drying out. It’s best eaten within 2 days, but it stays moist and flavorful longer in the fridge. I usually wrap slices tightly in plastic wrap or store them in an airtight container to keep freshness. Reheating is simple—just pop a slice in the microwave for about 15-20 seconds, enough to bring back that warm, comforting flavor. I’ve tried freezing slices, wrapped well in plastic and layered with parchment, and they’re surprisingly good after thawing. Just allow it to sit at room temperature for a few minutes before slicing. A quick reheat often makes it taste as fresh as day one, especially with that melted glaze on top. If you want to add the glaze after reheating, just warm it slightly in the microwave for a thin pour. Honestly, this cake is adaptable—makes great leftovers, even better when fresh, and always a hit at my table.
Frequently Asked Questions
Final Thoughts
This zucchini chocolate swirl cake is more than just a dessert—it’s a little slice of my family memories and practical baking. It’s a perfect example of how simple ingredients, love, and a sprinkle of creativity can come together to create something truly magical. Every time I pull it out of the oven, I feel a little rush of pride, knowing I’ve whipped up a treat that’s wholesome, beautiful, and downright delicious. Whether it’s for a special occasion or just a cozy night in, this cake never disappoints. I hope you give it a try and experiment with your own twists—maybe a dash of cinnamon or a handful of walnuts? The best part of baking is making it your own. Don’t forget to share your photos and tips—I love hearing how it turns out in other kitchens. Happy baking, everyone! And remember, the only mistake you can make is not trying—so go for it!
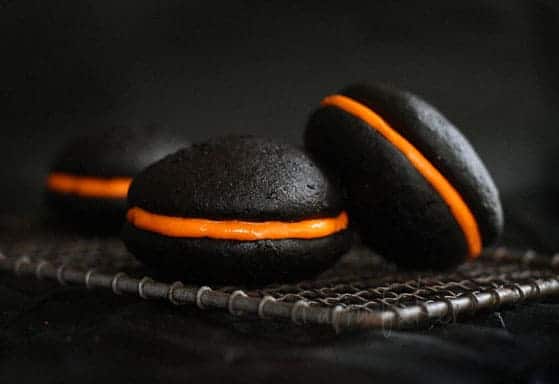
Black Velvet
Ingredients
Method
- Preheat the oven to 350°F. Line a baking sheet with parchment paper.
- In a large bowl, mix cake mix, water, cocoa powder, oil, food coloring, eggs, and vanilla. Beat until just combined.
- Spoon batter onto the lined baking sheet, about 2 tablespoons per cookie, spacing them apart.
- Bake for 8 minutes, then let cool on the baking sheet for 1 minute before transferring to a wire rack.
- Prepare buttercream frosting by beating butter until fluffy, then adding vanilla, powdered sugar, milk, and food coloring. Mix until smooth.
- Assemble by spreading frosting on one cookie and topping with a second cookie. Repeat with remaining cookies.