Brownie Cookie Bars How to Make Them
There’s something about pulling a warm loaf out of the oven that instantly transports me back to my grandma’s kitchen — the smell of cinnamon and ripe bananas filling the air, childhood giggles echoing off the counters. I always do this when I need a little cozy boost — bake myself a batch of zucchini banana swirl bread. It’s honestly my secret weapon for busy mornings or lazy weekends. My kids ask for this all the time, and honestly, I don’t mind at all because it’s the kind of treat I can feel good about. It’s slightly sweet, insanely flavorful, and the swirl gives it this gorgeous marbled look that makes it feel so special. Plus, I’ve tested it with everything from almond milk to honey and it’s still a hit. Trust me, if you love quick bread that’s full of flavor and comforting vibes, this one’s a lifesaver on busy nights or whenever you’re craving something sweet and wholesome. You’re about to fall in love—promise!
What is Zucchini & Banana Swirl Bread?
Think of this as a cozy, crunchy-on-the-outside, moist-on-the-inside loaf that combines two of the most unlikely but perfect partners — zucchini and bananas. It’s essentially a mashup of classic banana bread and a veggie-packed twist, with a gorgeous swirled pattern that makes it look just as pretty as it tastes. The name might sound fancy, but honestly, it’s super simple to make. I developed this recipe thinking of those days when I want something sweet but don’t want to mess around with complicated frosting or toppings. The zucchini keeps the bread super moist without overpowering, while the bananas add sweetness and depth. And that swirl—oh, the swirl! It’s like a little work of art that I actually look forward to slicing open. It’s friendly enough for breakfast, elegant enough for brunch, and perfect as an everyday treat.
Why you’ll love this recipe?
What I love most about this zucchini banana swirl bread is how it hits all those comfort notes while being ridiculously easy to make. The flavor is divine — the bananas add that rich, sweet aroma that makes your kitchen smell like home, and the zucchini ensures each bite is coated in moisture without feeling heavy. Plus, it’s budget-friendly since I use ingredients you probably already have — simple flour, eggs, mashed bananas, and grated zucchini. And if you’re into customizable recipes, this one’s the queen — you can swap out ingredients, add nuts, or toss in chocolate chips for a little extra kick. This bread is a real chameleon; it’s equally good toasted with a smear of butter or enjoyed plain with a cup of coffee. Honestly, I’ve made this countless times, and it never fails to bring a little joy to everyone who bites into it. Plus, it’s a sneaky way to get kids to eat their veggies, as I’ve learned from years of baking this for my own family.
How do you make Zucchini & Banana Swirl Bread?
Quick Overview
This bread is a snap to put together — the secret is in the simple step-by-step process that’s foolproof. First, you’ll prep your zucchini and bananas, then mix your dry and wet ingredients separately before bringing them together. The magic happens when you layer the batter with the cinnamon-sugar-spiked filling and swirl it into a beautiful marble pattern before baking it all to perfection. While the oven does its thing, the house fills with that warm, inviting smell of cinnamon and fruit, which is honestly my favorite part. Just keep an eye on the baking time because every oven is a little different, but don’t worry, it’s hard to mess this one up.
Ingredients
For the Main Batter:
– 2 cups all-purpose flour (preferably unbleached for a richer flavor)
– 1 teaspoon baking soda
– ½ teaspoon baking powder
– ¼ teaspoon salt
– 1 teaspoon ground cinnamon (because cinnamon makes everything better)
– ⅓ cup honey or maple syrup (for a natural sweetness)
– ½ cup vegetable oil (or melted coconut oil for a richer taste)
– 2 large eggs
– 1 teaspoon vanilla extract
– 2 ripe bananas, mashed (trust me, ripe bananas make a world of difference)
– 1 cup grated zucchini (squeeze out excess moisture but don’t peel — the skin adds nutrition!)
For the Filling:
– ¼ cup brown sugar or coconut sugar
– 1 teaspoon ground cinnamon
– 2 tablespoons all-purpose flour (to keep the swirl setting nicely)
For the Glaze (Optional but recommended):
– ½ cup powdered sugar
– 1-2 teaspoons milk or cream
– A dash of vanilla or lemon zest for brightness
Step-by-Step Instructions
Step 1: Preheat & Prep Pan
Set your oven to 350°F (175°C). Grease your loaf pan really well — I like lining it with parchment paper for easy removal. And if you want a crispy crust, brush a little melted butter or oil over the top before baking. Having everything prepped makes the process so much smoother, especially when you’re eager to pop that loaf in the oven.
Step 2: Mix Dry Ingredients
In a big bowl, whisk together the flour, baking soda, baking powder, salt, and cinnamon. I always do this first so the leaveners get evenly distributed — trust me, it helps avoid weird lumps or pockets of baking soda in your batter. The dry mix should look uniform, like a little fluffy cloud.
Step 3: Mix Wet Ingredients
In another bowl, mash your bananas until smooth — I use a fork, but the little mashers work too. Then, whisk in the eggs, oil, honey, and vanilla until silky. I like to do this step right next to my dry ingredients, so I can combine them seamlessly later. If your eggs are straight from the fridge, give them a quick whisk first to bring everything to room temp, which helps the batter come together more smoothly.
Step 4: Combine
Pour the wet mixture into the dry ingredients and gently fold until just combined. Don’t overmix — a few lumps are fine. This keeps your bread nice and tender. Now, fold in the grated zucchini gently; it adds moisture and texture. Be sure to squeeze out excess moisture from the zucchini beforehand — this prevents your batter from turning into a soggy mess.
Step 5: Prepare Filling
In a small bowl, mix together the brown sugar, cinnamon, and flour. This sweet, spicy mixture will become your swirl layer. Feel free to add chopped nuts or mini chocolate chips if you’re feeling indulgent. I’ve tried both, and yes, they’re fabulous.
Step 6: Layer & Swirl
Pour half of the batter into your prepared loaf pan. Sprinkle evenly with half of the cinnamon-sugar mixture. Then top with the remaining batter, spreading it gently. Now, sprinkle the rest of the cinnamon-sugar on top, and using a butter knife or skewer, swirl through the batter to create beautiful marbled swirls. Think of it as doodling with batter — no perfect pattern needed, just a gentle zigzag or figure-eight motion.
Step 7: Bake
Pop it into the oven and bake for about 50-60 minutes. I always start checking around 50 minutes — insert a toothpick in the center, and if it comes out clean, your bread is ready. If it’s a little wet, give it another 5-10 minutes. Every oven is different, so don’t stress if your timing varies a bit; just keep an eye on that lovely golden top.
Step 8: Cool & Glaze
Allow the bread to cool in the pan for about 10 minutes before transferring it to a wire rack. It’s tempting to cut into it right away, but patience rewards you with slices that hold together perfectly. Once cooled slightly, mix up the glaze — powdered sugar with a splash of milk and a bit of vanilla. Drizzle over the top while the bread is still warm for that glossy, irresistible finish.
Step 9: Slice & Serve
Use a sharp serrated knife for neat slices. Pair it with your morning coffee, a dollop of yogurt, or simply enjoy it all by itself. This bread tastes even better the next day and keeps well for up to three days in an airtight container. If you want leftovers to stay fresh longer, pop slices in the refrigerator or freeze individual pieces for quick snacks later.
What to Serve It With
This dreamy zucchini banana swirl bread is super versatile — it’s your best buddy for breakfast, brunch, or a cozy snack. I love slicing it thick and spreading a little butter or ricotta on top. On weekends, I like serving it with a fresh fruit compote or a dollop of Greek yogurt, which adds a bright contrast to the moist bread. For a brunch sit-down, a pot of good coffee or tea paired with a fresh citrus salad makes it stand out. It also doubles as a fantastic dessert when drizzled with caramel sauce or sprinkled with chopped nuts. Honestly, my family can’t get enough — especially when I make it for picnics or school lunches. The kids love the swirl pattern, and I love knowing they’re eating a little secret vegetable boost with their sweet treat. It’s that rare combo of comfort food and sneaky health boost — a win-win all around.
Top Tips for Perfecting Your Zucchini & Banana Swirl Bread
Over the years, I’ve learned a few tricks to make this bread absolutely foolproof. First, always squeeze excess moisture out of your zucchini; otherwise, the batter might turn too wet, and the bread will sink in the middle. Use a clean dish towel or cheesecloth to gently wring out the shredded zucchini if it looks extra juicy — this step is worth the extra minute, trust me. When mixing, avoid overworking the batter — a gentle fold keeps the bread tender. If you’re feeling adventurous, try swapping out the bananas for overripe plantains or adding a teaspoon of ground ginger for an extra kick. The swirl technique is my favorite part — I sometimes alternate colors or add a swirl of nut butter for variation. Baking at the right temperature is key — I place my oven rack in the center and bake on the middle shelf, which gives even heat distribution. Keep an eye on the timing; every oven is different, so start checking doneness around the 50-minute mark. For the glaze, if you want it thicker, add more powdered sugar; for something lighter, mix in a splash of lemon juice instead of milk. Trust me, a little practice makes perfect, and I’ve had plenty of tiny mishaps — like overmixing or underbaking — but each one’s a lesson in how to get even better. Embrace your imperfections, and enjoy the process — this bread always turns out delicious, even if it’s not picture-perfect!
Storing and Reheating Tips
This bread keeps surprisingly well, making it a great make-ahead treat. Leftover slices stay fresh at room temperature for about two days if covered tightly with foil or stored in an airtight container — just make sure to keep it away from direct sunlight or humidity. For longer storage, pop slices into a zip-top bag or airtight container in the refrigerator; they’ll last up to five days. To reheat, I toss slices in the toaster or warm them in the microwave for about 15 seconds — perfection! If you like your bread extra soft, wrapping it in foil and reheating in the oven at 350°F for 10 minutes always does the trick. If you’re freezing leftovers, wrap slices well in plastic wrap, then foil, and pop them in a zip-top bag. Thaw at room temperature or lightly microwave. Fresh glaze or a quick sprinkle of powdered sugar over thawed slices transforms leftovers into almost-new treats. Honestly, this bread gets better as it sits — the flavors meld beautifully, and the swirl becomes even more pronounced. Plus, you can freeze slices individually for an easy, speedy snack or breakfast in the mornings. I’ve found that this one’s a forgiving recipe, and with just a little planning, you can enjoy that warm, home-baked comfort anytime.
Frequently Asked Questions
Final Thoughts
Honestly, this zucchini banana swirl bread has become a staple in my kitchen. It’s one of those recipes I whip up on a whim when I need comfort or want to impress friends without breaking a sweat. The best part? It’s forgiving — I’ve made it with a little too much zucchini, swapped out ingredients, or baked it a tad too long, and it still turns out delicious. It’s a recipe that adapts to what you have on hand and still makes your home smell like a bakery. Nothing excites me more than seeing my kids (and husband) light up when I cut into it — that swirl pattern always seems to cast a little magic. I hope you give this a try and make it your own. Don’t forget to leave a comment or share your tweaks — I love hearing how others add their personality to it. Happy baking, friends!
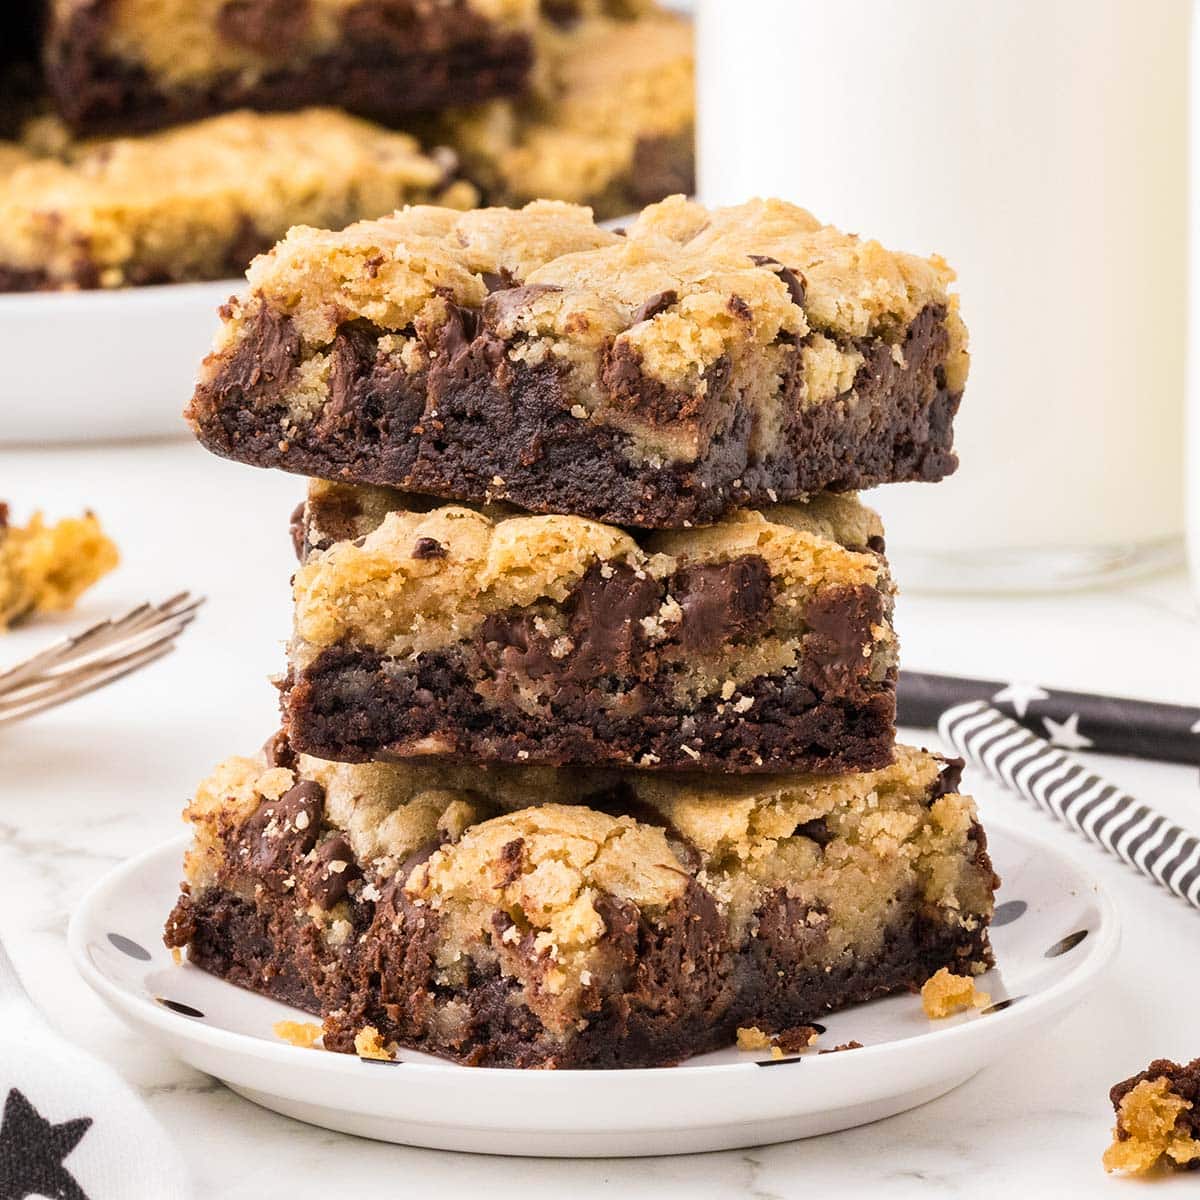
brownie cookie bars
Ingredients
Method
- Preheat the oven to 325°F. Line a 9x13 inch baking pan with parchment paper and lightly spray with non-stick spray.
- Prepare the brownie batter as per package instructions. Pour into the prepared pan and spread evenly.
- In a separate bowl, beat the butter, brown sugar, and granulated sugar until combined. Add the egg, egg yolk, and vanilla, mix until smooth.
- Stir in flour, cornstarch, baking soda, and salt until just combined. Fold in chocolate chips.
- Drop spoonfuls of cookie dough evenly over the brownie layer and bake for 20 minutes covered with foil. Remove foil and bake an additional 15-20 minutes until golden.
- Cool completely, then lift out using parchment overhang and slice into 24 bars.