Rich Peanut Butter Chocolate Cookies Recipe
There’s something about sinking your fork into a warm slice of cake topped with glossy fruit and coconut that instantly takes me back to lazy Sunday afternoons at my grandma’s house. I remember the smell of toasted coconut wafting through the air, mingling with the sweet aroma of ripe peaches, making my stomach rumble even before dessert was served. I always do this when I want something comforting and a little special — a cake that feels fancy enough for guests but is actually so easy, I can make it after a long day at work. This upside-down peach coconut cake is one of those recipes that’s become a family favorite, and honestly, it’s a lifesaver on busy nights or when friends pop by unexpectedly. The best part? It’s kind of a rustic beauty—completely forgiving with the fruit arrangement, and the flavor combo is just divine. Trust me, once you try this, you’ll be making it all the time — it disappeared in minutes at my house, and I bet it will at yours too.
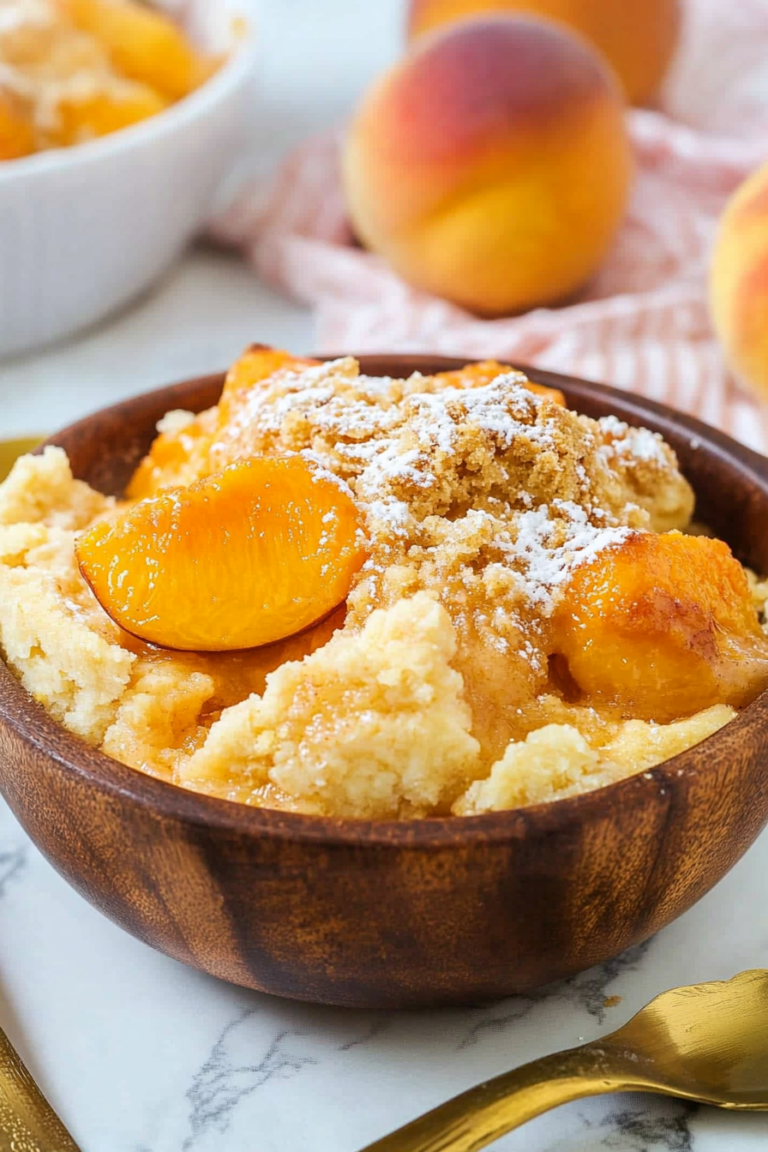
What is Upside Down Peach Coconut Cake?
Think of this as a tropical twist on a classic upside-down cake. It’s essentially a buttery, tender cake layered with caramelized peaches and shredded coconut, baked until golden perfection. When it’s done, you flip the whole thing out, revealing a beautiful, caramel-drizzled fruit topping that’s almost too pretty to cut into. The name says it all: “upside-down” because you flip it to serve, just like the pineapple upside-down cakes from the 1950s — only this version’s all about fresh peaches and coconut, giving it a summery, beachy vibe. It’s an easy one-bowl batter with simple ingredients, so no fancy equipment needed. Just imagine warm, sweet peaches nestled in coconut-flavored cake with hints of caramel, all topped with toasted coconut for a bit of crunch. Perfect for brunch, an afternoon treat, or even a cozy dessert that looks fancy but is dead simple to pull off.
Why you’ll love this recipe?
What I love most about this upside-down peach coconut cake is how it makes the house smell when it’s baking — that caramelized peach aroma is unbeatable. The flavor? Oh, it’s like a tropical vacation in dessert form — sweet, juicy peaches paired with the nutty richness of coconut, all wrapped in a soft, buttery cake. Plus, it’s downright easy. I’ve made this with pre-sliced peaches from the can (don’t judge!) when I was in a rush, and honestly, it still turns out just as dreamy. It’s budget-friendly too; the main ingredients are pantry staples—flour, sugar, coconut, and fruit. And versatility? You bet. You can swap peaches with nectarines or pineapple if you want a variation, or sprinkle in some chopped nuts or shredded coconut into the batter. I’ve also tested this with a hint of rum in the caramel, and wow — next level! Why I keep coming back to this is because it’s reliable, gorgeous, and everyone asks for seconds. Truly, this is one of those “instant happiness” desserts that feels special but is so, so simple.
How do I make upside down peach coconut cake?
Quick Overview
This cake comes together in just a few straightforward steps — first you make a caramel peach topping in the pan, sprinkle with shredded coconut, then pour over a simple batter. Bake it, flip it out (carefully!), and you’ve got a stunning dessert that tastes as good as it looks. The beauty of this recipe is how forgiving it is; even if your peaches aren’t perfectly sliced, just arrange them on top — they’ll look rustic and charming. I like to prep everything in advance because honestly, it’s the kind of dessert that’s just as impressive for a dinner party as it is for a lazy weekend treat. The glaze is totally optional but adds a lovely shine and extra caramel flavor if you’re feeling extra indulgent.
Ingredients
For the Main Batter:
- 1 1/2 cups all-purpose flour — I always use unbleached for a richer flavor
- 1/2 cup shredded coconut — sweetened or unsweetened, your call!
- 1 teaspoon baking powder
- 1/2 teaspoon salt
- 1/2 cup unsalted butter — softened, not melted, so it creamed nicely
- 1 cup granulated sugar
- 2 large eggs
- 1 teaspoon vanilla extract
- 1/2 cup coconut milk — I discovered almond milk works fine, but coconut milk makes it richer
For the Filling:
- 3-4 ripe peaches — peeled if you prefer, but I like the rustic look with peels on
- 1/4 cup brown sugar — for that caramel flavor
- 2 tablespoons unsalted butter
- A handful of shredded coconut — optional, for extra coconut flair
For the Glaze:
- 1/2 cup powdered sugar
- 2-3 teaspoons milk (or coconut milk)
- 1/4 teaspoon vanilla extract
- Extra shredded coconut for garnish
Step-by-Step Instructions
Step 1: Preheat & Prep Pan
Preheat your oven to 350°F (175°C). Grease a 9-inch round cake pan or a cast-iron skillet with butter — I actually love using cast iron because it gives the edges a lovely crispness. Line the bottom with parchment if you want to make flipping easier, but I don’t usually bother. Just keep your work area tidy because molten caramel can be a sticky mess to clean later.
Step 2: Make the Caramel Peach Topping
In the pan over medium heat, melt the butter and brown sugar together until it turns into a silky caramel. Add your sliced peaches, cut side down, and cook for about 3-4 minutes until they start to soften and the sugar mixture thickens slightly. Sprinkle in a handful of shredded coconut if you want that to toast along with the peaches. Remove from heat and set aside.
Step 3: Mix Dry Ingredients
In a bowl, whisk together the flour, shredded coconut, baking powder, and salt. This keeps your dry ingredients evenly distributed and prevents clumping when you add the wet stuff.
Step 4: Mix Wet Ingredients
In a separate large bowl, cream the butter and sugar until pale and fluffy. Beat in the eggs one at a time, then stir in vanilla. Gradually add coconut milk and mix until smooth—look for a batter that’s thick but pourable, not runny.
Step 5: Combine
Gently fold the dry ingredients into the wet, just until combined. Be careful not to overmix — a few lumps are fine. Overmixing can make the cake dense instead of tender. For the best rise, mix with a light touch.
Step 6: Prepare Filling
Peel and slice your peaches into thin wedges, then toss with brown sugar and a little butter. If you like, sprinkle on some extra coconut or even chopped nuts for crunch. Spread or layer the peaches over the caramel in the pan, arranging them prettily or just overlapping as you like.
Step 7: Layer & Swirl
Pour the batter gently over the peaches in the pan. If you want a marbled look, you can spoon some batter, then add a few peaches, then repeat, swirling gently with a skewer. This creates a lovely pattern when flipped — but honestly, I don’t stress about perfection. Rustic charm is better.
Step 8: Bake
Bake for 40-45 minutes, or until the top is golden and a toothpick inserted in the center comes out clean. If your cake is browning too quickly, tent it with foil — I’ve learned that from experience! Every oven is a little different, so start checking around the 40-minute mark.
Step 9: Cool & Glaze
Allow the cake to cool for about 10 minutes in the pan, then flip it onto a cooling rack or serving plate. Be gentle! If you lined with parchment, it peels right off. Mix your powdered sugar glaze — add just enough milk to make it pourable but thick enough to stay on top. Drizzle over the warm cake and sprinkle with extra shredded coconut for that extra pretty touch.
Step 10: Slice & Serve
Serve warm or at room temperature. A scoop of vanilla ice cream on the side? Yes, please! I also love a dollop of whipped cream or Greek yogurt. Trust me, this cake is best enjoyed within a day or two — it’s a little more decadent fresh out of the oven, and the peaches retain their juiciness perfectly in the first day or so.
What to Serve It With
This cake is versatile enough to shine at all kinds of gatherings. For breakfast, pair it with a robust cup of coffee or a glass of cold milk — it’s almost like a peachy coconut coffee cake. At brunch, serve slices alongside fresh fruit salad and a sparkling mimosa. Dinner parties? A tiny scoop of vanilla ice cream or a drizzle of caramel sauce on top makes it feel extra special. And if it’s just a casual afternoon treat, I love serving it with a hot cup of tea, because the coconut and peach flavors are so relaxing and tropical. At family gatherings, my kids ask for seconds, and I don’t blame them — it’s moist, flavorful, and a little indulgent without feeling overly sweet. It’s a warm hug in dessert form, and I always get compliments on how something so beautiful can be so simple. Truly, this cake has become part of my comfort-food arsenal.
Top Tips for Perfecting Your Upside-Down Peach Coconut Cake
After making this recipe countless times, I’ve picked up a few tricks to get it just right every single time. First, when slicing peaches, try to keep the slices uniform — not only does this look prettier, but they cook evenly. I used to layer the slices randomly, but now I arrange them in overlapping circles or fan shapes that look almost professional. A tip I learned the hard way: don’t overcrowd the pan with too many peach slices — they need room to caramelize and soften without steaming each other. For the batter, don’t overmix once you add the dry ingredients, or you risk a dense cake. Instead, fold gently until just combined. When swirling batter and peaches, use a skewer or toothpick to create a marbled effect — it makes each slice look like a work of art. As far as ingredient swaps go, I tested almond extract instead of vanilla on a whim, and it gave the cake a subtle nutty flavor that was lovely. And if you want to make it dairy-free, coconut oil works beautifully in place of butter, and almond or coconut milk works well for the liquid. Lastly, don’t skip toasting the shredded coconut! It adds incredible depth and crunch that really elevates the dessert.
One thing I’ve learned is to watch the cake closely near the end of baking. Ovens vary, and you don’t want it to overbake — that’s when the texture can get dry. Also, letting the cake cool just enough before flipping ensures that the caramelized fruit sets properly and doesn’t spill out. A little patience here really pays off. And trust me on this: the glaze is optional, but it beautifully enhances the presentation and flavor, especially if you add a splash of rum or vanilla to it. Remember, dessert is as much about the experience — the aroma, the anticipation — as it is about the final bite. Once you get the hang of these little tricks, I promise, you’ll be baking this in your sleep. It’s become that kind of recipe for me—my go-to when I need a guaranteed crowd-pleaser or just a moment to indulge myself.
Storing and Reheating Tips
Leftovers? Not a problem. This cake is actually quite forgiving when it comes to storage. If you finish the whole thing (which, let’s be honest, happens often in my house), wrap leftovers tightly in plastic wrap or store in an airtight container. It’ll stay moist and flavors will meld for about 2 days at room temperature, but I prefer refrigerating it if you want to keep it longer. Just pop it in an airtight container — it’s fine in the fridge for 3-4 days, and honestly, it’s still delicious cold or gently reheated. To reheat, microwave a slice for about 20-30 seconds or warm it in the oven at 350°F for 10-15 minutes until warm and fragrant again. If you’ve added the glaze, I recommend waiting to do that until right before serving, to keep that glossy shine fresh. For freezing, tightly wrap individual slices or the whole cake in plastic wrap and foil, then store in the freezer for up to a month. Thaw overnight in the fridge, then bring to room temp before serving. A quick reheat or serving at room temperature keeps it just as good as freshly baked, I promise.
Frequently Asked Questions
Final Thoughts
Honestly, this upside-down peach coconut cake has become my little shortcut to happiness. It looks like you fussed over it for hours, but in reality, it’s just a few good ingredients and some gentle care. The combination of caramelized peaches, toasted coconut, and soft cake is pure magic — I’ve made it for family dinners, summer potlucks, and even quick weeknight cravings. Every time I bake it, I feel like I’m channeling those cozy weekends from childhood, where dessert was the highlight of the day. If you try this recipe, I’d love to hear how it turns out — leave a comment or share your tweaks! Happy baking, and remember, the best part of cooking is sharing a slice with someone you love.

peanut butter cookies
Ingredients
Method
- Preheat your oven to 400°F. Line two baking sheets with parchment paper.
- Using a stand mixer with paddle attachment, combine cold butter, brown sugar, and granulated sugar. Beat on medium until creamy.
- Add egg and egg yolk; mix until well combined.
- Add vanilla extract and mix, scraping down sides as needed.
- Whisk together flour, cake flour, salt, baking powder, and baking soda in a medium bowl.
- Gradually add dry ingredients to wet mixture on low speed until just combined.
- Stir in chocolate chips and peanut butter chips until evenly distributed.
- Shape dough into 8 large balls (about 6 ounces each).
- Place 4 dough balls on prepared baking sheets, spacing evenly.
- Bake for 12 minutes or until edges are golden.
- Cool on sheets for 10 minutes, then transfer to wire racks.
- Serve warm or at room temperature.