Easy Mini Cheesecakes A Sweet Treat
There’s something about a warm slice of this zucchini breakfast loaf that always takes me straight back to lazy weekend mornings at my grandma’s house. I remember the smell of freshly grated zucchini melting into sweet, spiced batter, filling the entire kitchen, while my kids ask for seconds before the first piece even hits the plate. It’s honestly one of those recipes that’s so simple, yet feels like a hug in food form. I’ve made this countless times — tweaking here and there — and it’s still a little miracle when I pull that golden loaf out of the oven. Plus, it’s perfect for those mornings when you’re craving something sweet but want to keep it on the healthier side. Trust me on this one — it disappears in minutes at my house, and I think it’ll do the same for yours.
What is a Zucchini breakfast loaf?
This zucchini breakfast loaf is basically a moist, tender bread loaded with grated zucchini and warm spices like cinnamon and nutmeg. Think of it as a muffin’s heartier, loaf-y cousin—sweet, a little spicy, and just the right amount of dense without being heavy. It’s essentially a sneaky way to get kids (and grownups) to eat their veggies without even realizing it. The name is pretty straightforward because, well, it’s bread made with zucchini that’s perfect for breakfast or brunch. I love that you can slice it up in advance and dip into yogurt or spread some butter on a hot slice — it’s just one of those recipes that feels homemade but totally ideal for busy mornings.
Why you’ll love this recipe?
What I love most about this zucchini breakfast loaf is how forgiving it is — I’ve tested it with all sorts of tweaks, and it always turns out just right. The aroma that hits your nose when it’s baking? Unbeatable. It’s a perfect combo of sweetness and spice, with those fresh zucchini flecks adding a bit of surprise every time. This recipe is genuinely budget-friendly, using pantry staples like flour, sugar, and a bit of oil, and the grated zucchini is practically free if you’ve got a garden or a bunch left over from your weekly shop. Plus, it’s versatile — I’ve thrown in blueberries, swapped out lemon zest for orange, and even added a handful of chopped nuts for crunch. It’s a wonderful multi-tasker — perfect for breakfast, brunch, or even a cozy afternoon snack with a cup of tea. What I love most is how it makes the house smell warm and inviting — it’s like a little hug from the kitchen every time.
How do I make Zucchini Breakfast Loaf?
Quick Overview
This loaf comes together in one bowl—no fancy equipment needed—and bakes into a beautifully golden, slightly domed loaf that’s moist and fragrant. The key is gently folding in the grated zucchini into the batter, just enough to distribute evenly without deflating the airiness. I always do this when I want something satisfying but simple, like for a lazy Sunday morning or to prep ahead for the week. It’s a straightforward process, and the steps are pretty forgiving. The batter whisks together in minutes, the baking time is around 50 minutes, and once it’s out of the oven and cooled a bit, drizzling a lemon glaze over it just makes it next-level. It’s cozy, a little indulgent, yet wholesome — that’s the magic of this loaf.
Ingredients
For the Main Batter:
– 2 cups all-purpose flour (I always use unbleached because I like the flavor, but you can go gluten-free with a good blend if needed)
– 1 cup granulated sugar (feel free to reduce slightly if you prefer less sweetness)
– 1 teaspoon baking powder
– 1/2 teaspoon baking soda
– 1 teaspoon ground cinnamon
– 1/2 teaspoon nutmeg (freshly grated makes a difference)
– Pinch of salt
– 1/2 cup vegetable oil or melted coconut oil
– 3 large eggs
– 1 teaspoon vanilla extract
– 1 1/2 cups grated zucchini (from about 2 medium zucchinis, moisture squeezed out is optional but recommended for a lighter loaf)
– 1 tablespoon lemon zest (optional but so fresh and bright)
For the Filling:
– 1/2 cup chopped walnuts or pecans (optional but adds lovely crunch)
– 1/2 cup blueberries or raspberries if you’re feeling fruity
– Or leave it plain — it’s delicious either way
For the Glaze:
– 1 cup powdered sugar
– 2-3 tablespoons fresh lemon juice (adjust for desired consistency)
– Lemon zest for extra zing (optional)
Step-by-Step Instructions
Step 1: Preheat & Prep Pan
Set your oven to 350°F (175°C). Grease a standard 9×5-inch loaf pan generously with butter or non-stick spray, and dust it lightly with flour. I always line mine with parchment paper for easy cleanup. No matter how many times I make this, I find that a well-prepped pan saves me from any sticking dramas.
Step 2: Mix Dry Ingredients
In a large bowl, whisk together the flour, sugar, baking powder, baking soda, cinnamon, nutmeg, and salt. This step ensures all those lovely spices and leaveners are evenly distributed, so you get that consistent bite in every slice.
Step 3: Mix Wet Ingredients
In a separate bowl, beat the eggs lightly, then stir in the oil, vanilla, and lemon zest. I like to do this quickly with a fork or whisk — makes the batter come together faster. The smell of lemon and spices combined is already promising.
Step 4: Combine
Pour the wet mixture into the dry ingredients and gently fold together. Do not overmix — just until the flour disappears. Overmixing can cause that dense, muddy texture, and I speak from experience here. It’s okay if there are a few lumps, they’ll bake out fine.
Step 5: Prepare Filling
If using nuts or berries, toss them with a little bit of flour to prevent sinking. Fold those into the batter gently — I always save some to sprinkle on top for a pretty finish.
Step 6: Layer & Swirl
Pour half of the batter into your prepared loaf pan. Add the filling (nuts or berries) on top, then cover with the remaining batter. I love swirling in some extra lemon zest or a spoonful of jam at this stage to create beautiful ripples. Use a knife to gently swirl through the batter, making a marbled effect.
Step 7: Bake
Slide it into the oven and bake for about 50-55 minutes. It’s done when the top is golden and a toothpick inserted in the center comes out clean. Keep an eye around the 45-minute mark — every oven is a little different. If the top browns too fast, tent it loosely with foil.
Step 8: Cool & Glaze
Let it cool in the pan for about 10 minutes, then transfer to a wire rack. Once cooled slightly, drizzle with your lemon glaze. I like to do this while the loaf is still a tad warm so the glaze melts into every crack — divine.
Step 9: Slice & Serve
Slice with a serrated knife for clean cuts. Serve it warm or at room temperature, topped with a dollop of yogurt, extra lemon zest, or just as it is. My kids actually ask for this all the time — I’ve even packed it in their lunchboxes (shh, don’t tell). The slices keep well in an airtight container for a couple of days, and I swear it taste even better the next day after the flavors meld.
What to Serve It With
This loaf is so versatile that the options for serving are endless. For breakfast, I love pairing it with a strong cup of coffee or a glass of freshly squeezed orange juice. It’s a hit with my kids when I cut thick slices and serve with a smear of butter or cream cheese — quick, satisfying, and not overly sweet. When I want to elevate it for brunch, I’ll add some fresh berries on the side or serve it with a simple fruit salad dressed in honey and mint.
As a dinner or dessert, it’s lovely slightly warmed and topped with a dusting of powdered sugar or a drizzle of honey. It’s perfect with a scoop of vanilla ice cream or a spoonful of whipped cream for a cozy treat. If I’m feeling fancy, I’ll bake tiny muffins with the leftover batter for a grab-and-go snack that’s just as tasty. I’ve also experimented with adding cream cheese swirls or a little shredded coconut for extra texture — so many ways to make it your own. But honestly, my family just loves it plain, with its natural sweetness and bright lemon punch.
Top Tips for Perfecting Your Zucchini Breakfast Loaf
Alright, here’s where I’ve learned a few tricks after making this dozens of times. First, when grating zucchini, I always squeeze out excess moisture using a clean kitchen towel. It keeps the bread from turning out soggy, which has been a big lesson learned (trust me, you don’t want a watery loaf!).
Second, don’t overmix your batter. That’s the number one mistake I see people make — it results in dense, heavy slices rather than soft, fluffy bread. When you fold in the zucchini and nuts, do it gently and only until incorporated.
Regarding adding fruit or nuts, I recommend tossing them in a tablespoon of flour beforehand. It helps distribute them evenly and prevents sinking to the bottom.
If you want to tweak the sweetness, try reducing the sugar slightly or swapping half of it with honey or maple syrup. I tested this substitution, and it gives a nice depth without making it too oily or runny.
When baking, placement in the oven matters — middle rack is best, and rotating halfway ensures even browning. If your loaf browns too quickly, tent it lightly with foil to prevent overcooking the top while the inside finishes baking.
The glaze is forgiving — if it’s too thick, add a teaspoon of lemon juice or milk until it drizzles easily. Thin glaze gives a beautiful, glossy finish, but don’t make it too runny — we want it to stay nice and glossy on top.
And finally, my favorite bit — don’t rush slicing it. Let it cool completely so it slices cleanly, revealing those beautiful marbled ripples. I learned this the hard way — warm slices are a nightmare to cut without squishing! Now I wait patiently, and it’s always worth it.
Storing and Reheating Tips
This loaf stays fresh for a couple of days if stored properly. I wrap it tightly with plastic wrap or keep it in an airtight container at room temperature. If it’s hot outside or a warm kitchen, refrigeration is a good idea — just make sure to bring it to room temp before slicing for the best texture. It’s easy to reheat slices briefly in the microwave or pop a slice into a 350°F oven for 10 minutes to revive its just-baked moisture.
If you want to make it ahead, freeze individual slices wrapped tightly in plastic and aluminum foil. Thaw at room temp or warm up briefly — it’s just as delicious. The glaze can be applied after reheating if needed, but I honestly think it’s best enjoyed fresh with that zingy lemon burst on top. No matter how you store it, I promise it will bring warmth and comfort whenever you need a little sweet pick-me-up.
Frequently Asked Questions
Final Thoughts
This zucchini breakfast loaf truly holds a special place in my heart. It’s one of those recipes I turn to when I want something comforting yet indulgent, effortless yet impressive. The smell alone when it bakes is enough to brighten anyone’s day — that warm cinnamon, lemon zest, and baking zucchini aroma fill the house with happiness. It’s perfect on its own, but I love jazzing it up with fresh berries or nuts to keep things interesting. Honestly, I’ve served this at breakfast, brunch, and even as a cozy snack with tea — each time, it’s a hit. If you’re looking for a baking project that yields a loaf packed with flavor and heart, give this a try. And don’t forget to come back and tell me how it turned out — I’ll be waiting to hear all about it. Happy baking!
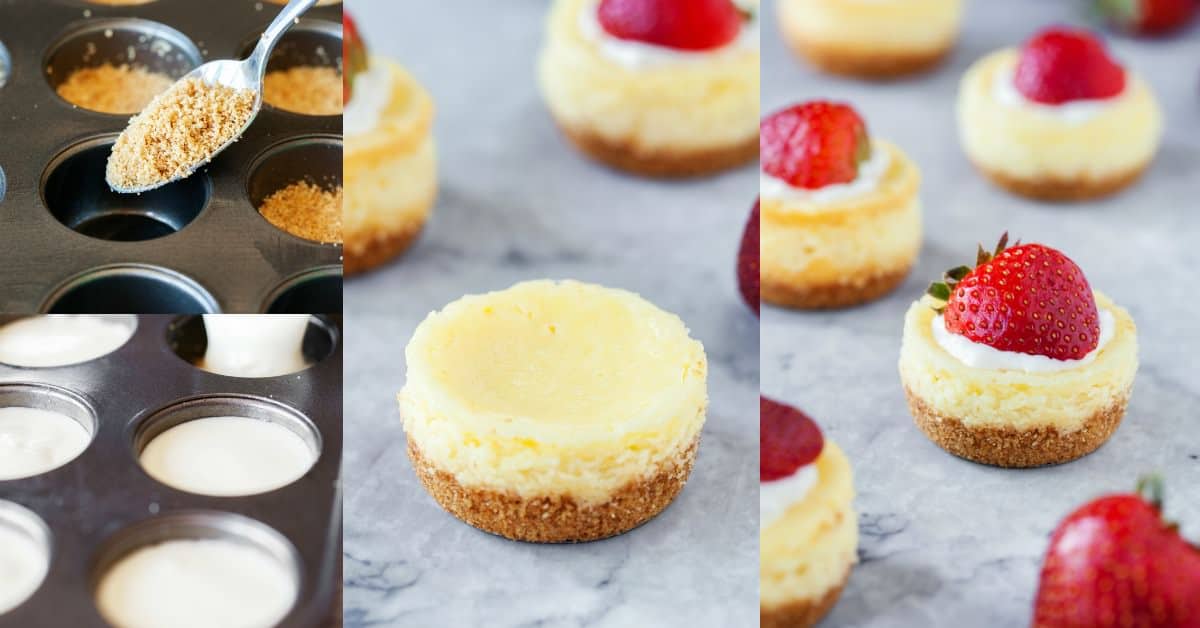
cheesecakes
Ingredients
Method
- Preheat oven to 350F.
- Add the cream cheese, eggs, vanilla, and sugar in a large mixing bowl. Blend and set aside.
- Crush the graham crackers and mix with the melted butter.
- Press the crumbs into the pan, dividing equally between each cavity.
- Pour the cheesecake mixture right on top of the crumbs, until it's 3/4 full.
- Bake for about 30-32 minutes.
- Let stand to cool for 15-20 minutes, then refrigerate about one hour.
- Add fruit, whipped cream (1 T per cake), and anything else you like before serving.