Creamy White Cheese Dip Recipe
If you’re like me, you probably have a secret stash of overripe bananas on your kitchen counter—those sweet, mushy ones that nobody wants to snack on anymore but are *perfect* for baking. I always do this when I need a quick, comforting treat: I whip up a batch of zucchini banana swirl bread. It’s like a hug in every slice, bursting with cozy flavors and that wonderful swirl of fruit and veggie goodness. Honestly, I’ve made this so many times, and if I’re being really honest, it’s become a family favorite—they ask for it on lazy Sunday mornings or when I have friends over. The smell alone, baking away, is enough to bring everyone to the kitchen. Trust me on this one, it’s a lifesaver on busy nights when everyone craves something sweet but you don’t want to mess with complicated recipes or turning on the oven for hours. Plus, it’s so forgiving—perfect for those ‘what do I do with all this extra zucchini?’ moments. It’s simple, delicious, and I promise once you try it, it’ll be a regular in your rotation too.
What is Zucchini Banana Swirl Bread?
Think of zucchini banana swirl bread as the lovechild of a moist banana bread and a savory zucchini loaf, all wrapped up in one irresistibly cozy package. The name might sound fancy or a bit weird, but here’s the thing—it’s essentially a loaf that’s all about creating harmony between sweet and veggie, with a beautiful marbled swirl running through it. This bread is a slice of my childhood memories—fluffy, slightly sweet, with unexpected bits of zucchini that keep the texture so tender and moist. The swirl is usually made with mashed bananas and a hint of cinnamon, giving it that comforting aroma that instantly takes you back to mornings at grandma’s house. It’s perfect for breakfast, brunch, or whenever you need a little pick-me-up—seriously, it’s just so good that my kids ask for it all the time, and I rarely have leftovers. Plus, it’s so adaptable—swap out ingredients, adjust the sweetness, or add a handful of nuts if you wish. It’s the kind of recipe that feels like a warm hug every single time.
Why you’ll love this recipe?
There’s just something so special about this zucchini banana swirl bread—once you make it, you’ll see what I mean. First, let’s talk flavor. The bananas lend it that sweet, caramel-rich taste, while the zucchini keeps it super moist and light. The cinnamon and vanilla add warm, cozy notes that make the house smell like a bakery, even if you’re just sneaking into the kitchen at 10 p.m. My favorite part? The swirl. It’s like a little surprise in each bite—marbled with mashed bananas and a hint of cinnamon that creates a beautiful visual and flavor contrast. What I love most about this is how *easy* it is to pull together. I’ve tested this with a handful of different ingredients—like swapping almond milk for regular milk or adding chopped walnuts—and it always turns out just perfect. It’s budget-friendly, too—simple pantry staples that you likely already have on hand. Plus, it’s versatile: serve it warm with a pat of butter, or toasted with a drizzle of honey. Honestly, once you try this, it’s bound to become a staple in your home—my kids actually ask for seconds, and that’s saying something!
How do you make Zucchini Banana Swirl Bread?
Quick Overview
This bread is super straightforward—no complicated techniques or fancy equipment needed. You mix your dry ingredients first, then mash up your bananas and zucchini, and fold everything together gently. The swirl comes from dolloping the banana mixture onto the batter before swirling it in with a knife—no stress, no fancy tricks. It’s just about layering and gently marbling the two batters for a stunning visual. Once it’s in the oven, you’ll smell that cinnamon-spiced aroma filling the house—it’s so welcoming. The best part? It’s practically foolproof, making this a perfect recipe for beginner bakers or anyone craving a cozy baking project that’s sure to wow.
Ingredients
For the Main Batter:
– 2 cups all-purpose flour (don’t skip the sifting—it keeps the bread super fluffy!)
– 1 teaspoon baking powder
– 1/2 teaspoon baking soda
– 1/2 teaspoon salt
– 1 teaspoon cinnamon
– 1/2 cup granulated sugar
– 1/3 cup brown sugar (adds a bit of caramel flavor)
– 2 large eggs
– 1/2 cup vegetable oil or melted butter
– 1 teaspoon vanilla extract
– 1/2 cup whole milk or almond milk (testing with almond milk actually made it creamier—try it!)
– 1 cup grated zucchini (squeeze out excess moisture—trust me, this keeps it from being too wet)
– 2 ripe bananas, mashed
For the Filling:
– 1 ripe banana, sliced thin for extra swirl effect
– Optional: 1 teaspoon cinnamon or a sprinkle of nutmeg for extra warmth
For the Glaze:
– 1/2 cup powdered sugar
– 1 tablespoon milk or lemon juice
– A few drops of vanilla or citrus zest for flavor (optional, but elevates the glaze!)
Step-by-Step Instructions
Step 1: Preheat & Prep Pan
I always start by preheating my oven to 350°F (175°C). Grease a standard loaf pan with butter or non-stick spray, then line it with parchment paper if you want easy removal. The key is to make sure nothing sticks—believe me, nothing’s worse than a crumbly loaf that breaks apart!
Step 2: Mix Dry Ingredients
In a large bowl, whisk together the flour, baking powder, baking soda, salt, and cinnamon. This ensures everything’s evenly distributed. I like to do this first because it saves time and keeps the batter smooth and light.
Step 3: Mix Wet Ingredients
In another bowl, mash those bananas until they’re nice and creamy—no big lumps. Add the eggs, oil, vanilla, and milk, whisking until smooth. I learned the hard way that using ingredients at room temperature helps everything incorporate better and results in a nicer crumb.
Step 4: Combine
Gently fold the wet mixture into the dry ingredients, being careful not to overmix. Stop as soon as there are no flour patches—overmixing can make the bread dense. If you see a few lumps, that’s perfectly fine.
Step 5: Prepare Filling
Stir a little cinnamon into the mashed banana if you’d like more depth. Or, skip it for a pure banana flavor. Keep some sliced banana set aside for the swirl—this makes the bread look stunning!
Step 6: Layer & Swirl
Pour half of the batter into your prepared pan. Dot with banana slices, then spoon the remaining batter on top. Use a butter knife to swirl the batter gently—zigzag patterns work beautifully, creating that lovely marbled effect. My secret? I try not to overmix at this stage—less is more for that gorgeous swirl.
Step 7: Bake
Pop it into the oven for about 50-60 minutes. Start checking around 50 minutes—insert a toothpick in the center, and if it comes out clean, it’s ready. Ovens vary, so keep an eye on it. The house will smell amazing—trust me, you’ll want to sneak a peek early.
Step 8: Cool & Glaze
Let the bread cool in the pan for about 15 minutes, then transfer to a wire rack. I usually wait until it’s just warm to the touch before glazing—it helps the glaze set beautifully. Mix your powdered sugar with milk and vanilla, then drizzle generously over the top. For an extra fancy touch, sprinkle some chopped nuts or a hint of citrus zest on top.
Step 9: Slice & Serve
Wait at least 20 minutes for the bread to cool completely before slicing—this prevents crumb messes! Use a serrated bread knife for clean, even slices. Serve warm, or room temperature—either way, it’s divine with a cup of coffee or tea. I love it with a smear of butter or a dollop of Greek yogurt for an extra indulgence.
What to Serve It With
This bread is so versatile; I love serving it at different occasions. For breakfast, pair it with a hot cup of coffee or tea—trust me, the smell alone will make everyone come running. My kids ask for it toasted with a bit of honey or jam—it’s practically a treat and a good way to sneak in some veggies for the picky eaters. For brunch, serve slices with a side of fresh berries and whipped cream—nothing fancy, just simple and delicious. When I bake it as dessert, I sometimes warm it slightly and add a drizzling of caramel sauce or a scoop of vanilla ice cream. It’s also fantastic for cozy snacks during chilly weekends, sliced thick and enjoyed with a mug of hot cocoa. This recipe really adapts to whatever mood you’re in—it’s comfort food with a little healthy twist, and it’s such a crowd-pleaser in my house.
Top Tips for Perfecting Your Zucchini Banana Swirl Bread
Over the years, I’ve picked up a few tricks to make this bread turn out even better every time. First, when grating the zucchini, I always squeeze out as much moisture as possible—you can use a clean dish towel or a fine-mesh sieve. Too much moisture will make the bread dense or gummy, and nobody wants that. I also recommend mixing the wet and dry just until combined—overmixing makes the crumb heavy, and nobody loves dense bread. For the swirl, try dolloping the banana batter in sections and swirling gently—fancy patterns aren’t necessary, but they do look pretty! If you want to jazz things up, toss in chopped walnuts, mini chocolate chips, or even blueberries—just adjust the flour slightly because wetter add-ins can change the batter’s consistency. When baking, positioning the pan in the center of the oven helps it cook evenly—fluctuations in heat can lead to uneven baking. I’ve learned to trust my toothpick test, but also, I judge doneness by how the smell fills the kitchen—if it’s golden and fragrant, it’s usually good to go. As for glazing, I keep it simple—just powdered sugar and a splash of milk—unless I want a citrus kick, then I add lemon zest. This recipe is a bundle of little tweaks that make a big difference—don’t be afraid to experiment and make it yours!
Storing and Reheating Tips
This bread keeps beautifully, which is a blessing—I often end up with a few slices leftover (rarely at my house, but still!). For short-term storage, just wrap it tightly in plastic wrap or place it in an airtight container at room temperature. It’s good for about 2-3 days before it starts to lose its freshness, so I recommend eating it sooner rather than later. If you want to keep it longer, pop it in the refrigerator—just take it out of the fridge about 15 minutes before serving to bring back some of that soft, fresh-baked feel. For freezing, slice the loaf first, wrap each piece individually in plastic wrap, then in foil or a freezer bag. It’ll keep for up to 3 months—perfect for grab-and-go snacks or quick breakfasts. To reheat, just pop a slice in the microwave for about 15-20 seconds, or warm it in a toaster oven for a few minutes. If you glazed it, wait until it’s fully reheated before adding the glaze again to prevent melting or cracking. I’ve found that gently rewarming enhances the aroma, making every bite taste like freshly baked again.
Frequently Asked Questions
Final Thoughts
This zucchini banana swirl bread isn’t just another loaf—it’s a little slice of happiness that I keep coming back to. It’s wholesome, flexible, and smells like a dream. Honestly, it’s a perfect way to use up those overripe bananas and zucchini hiding in your fridge, and I promise, once you bake it, you’ll see why it’s such a family favorite here. I love how the flavors meld so beautifully, and the swirl makes each bite a surprise. Whether you’re making it for breakfast, tea time, or a cozy snack, it hits every note—moist, flavorful, with that just-right sweetness. It’s one of those recipes that feels like a warm hug, and I really hope you love making it as much as I do. Do let me know if you try any fun variations or have your own secret tricks—I’d love to hear! Happy baking, and enjoy every slice.
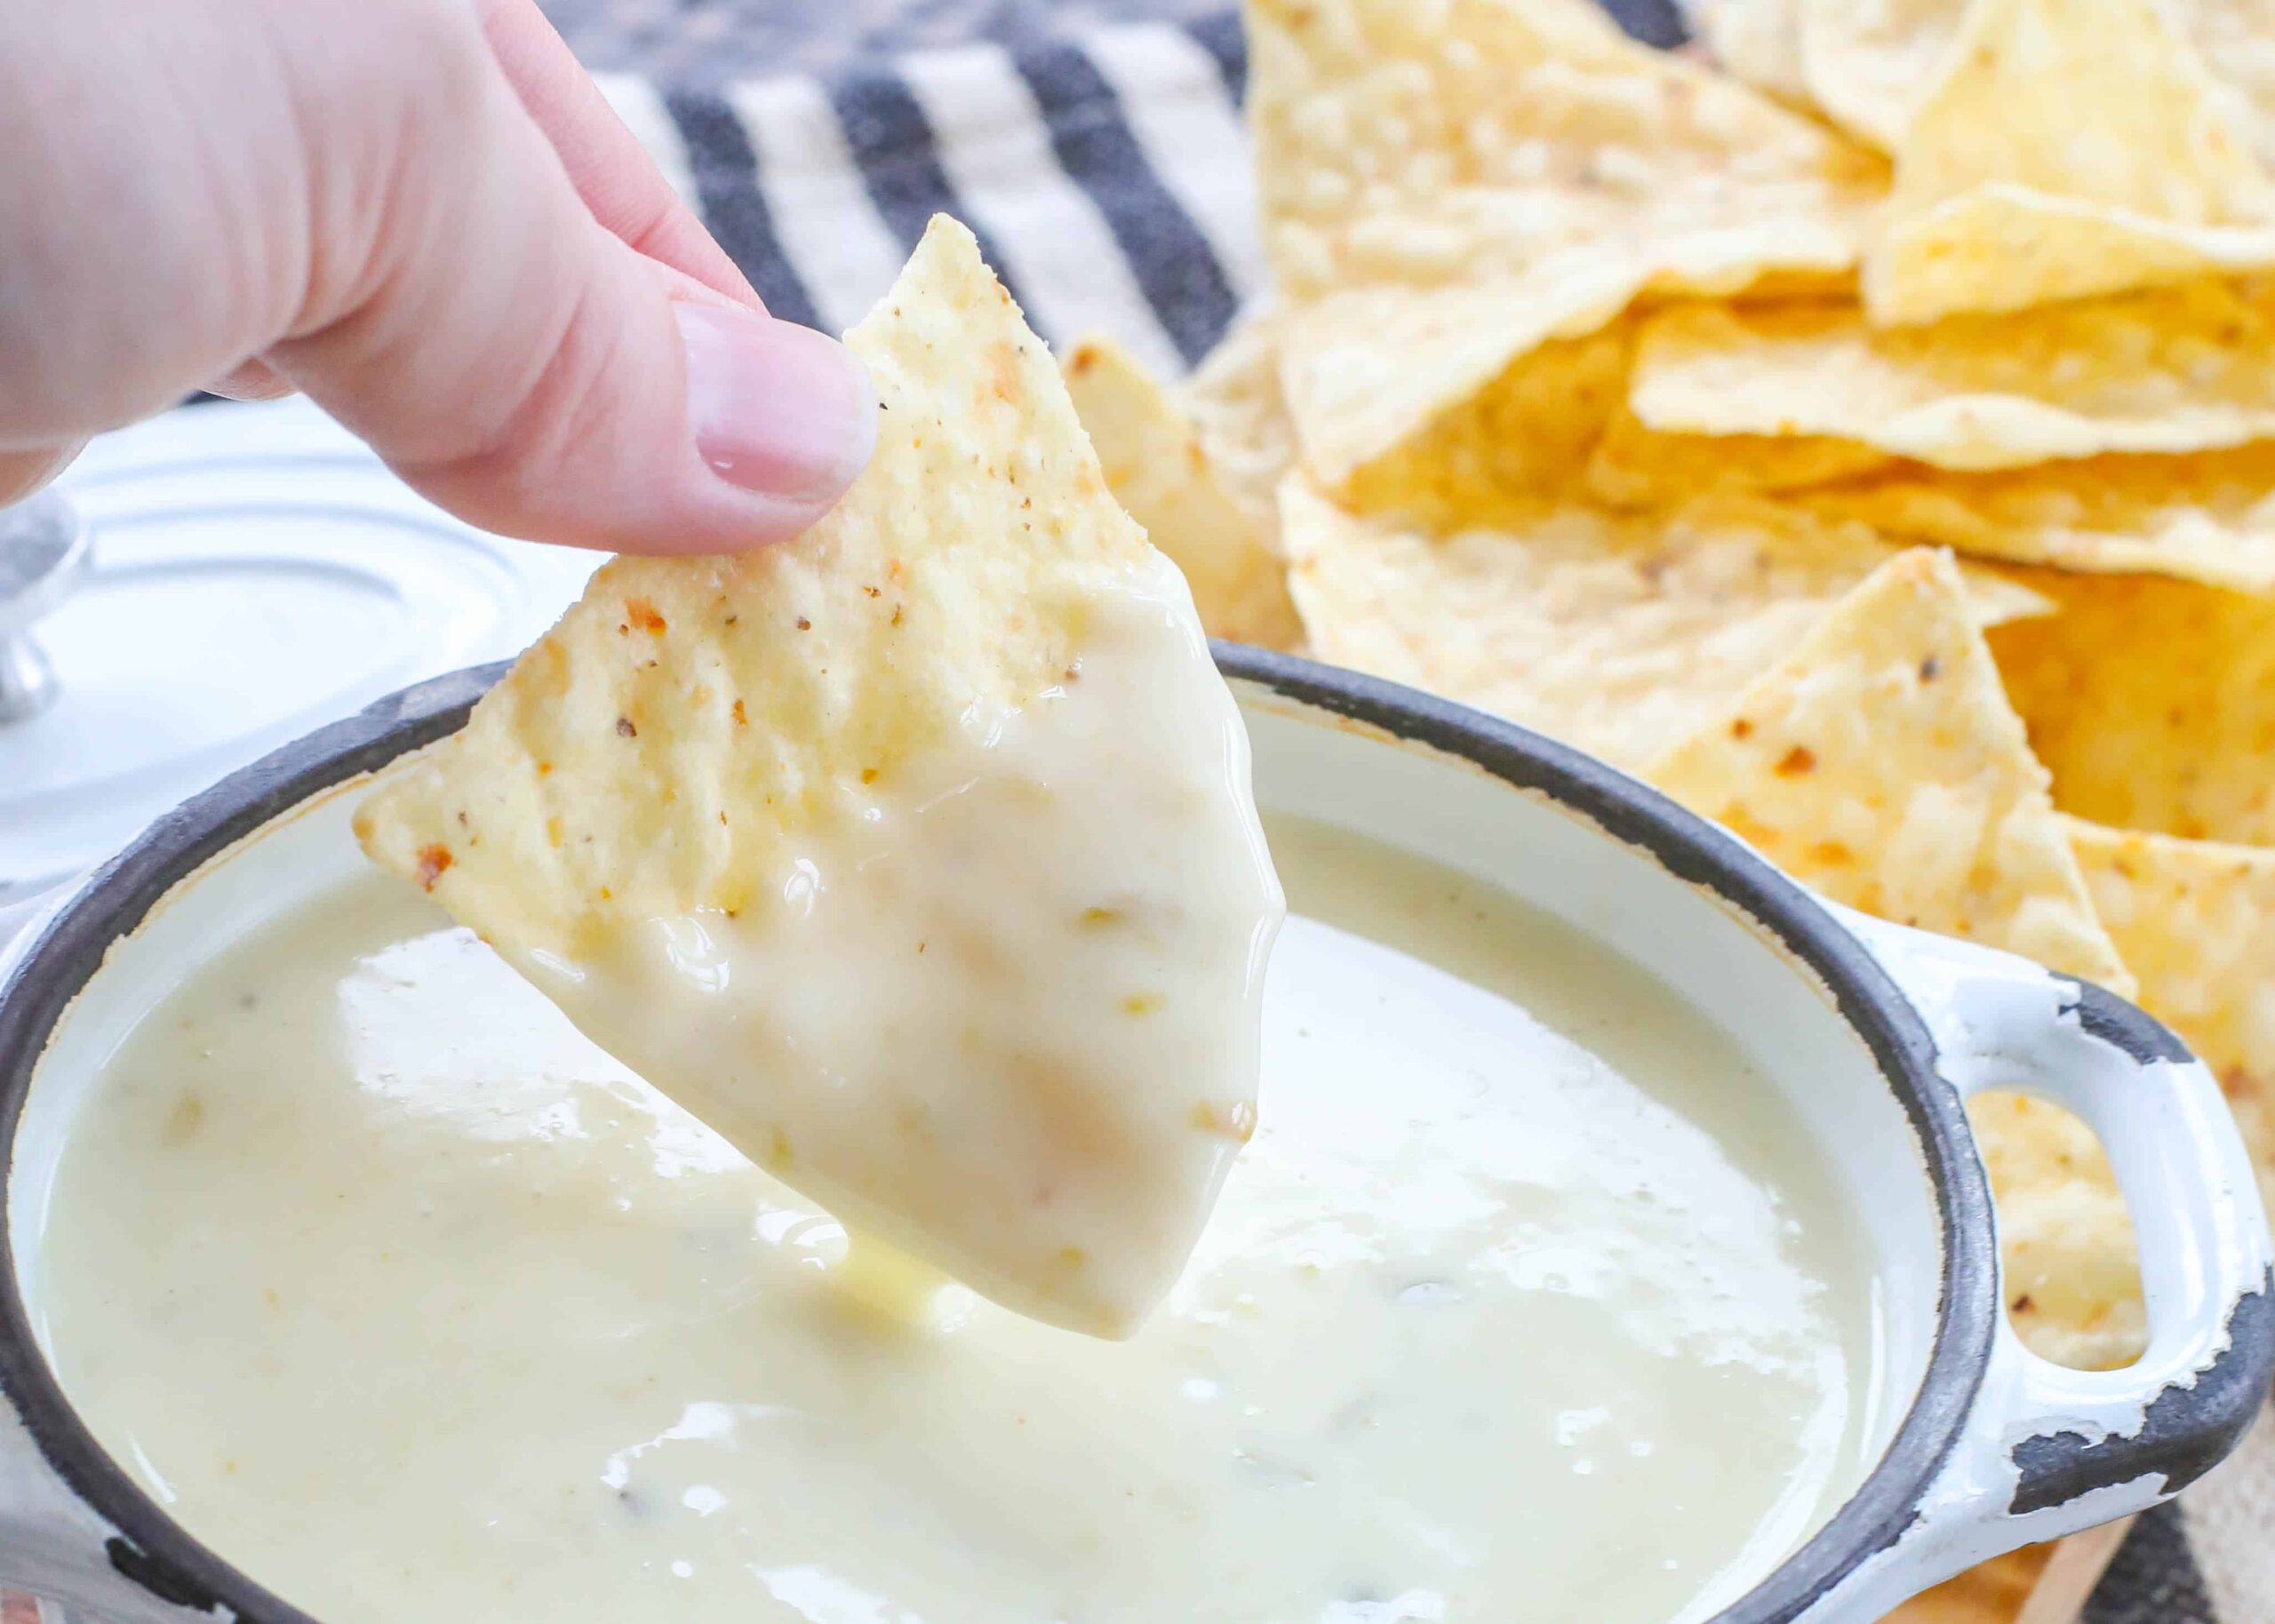
queso blanco
Ingredients
Method
- Combine all ingredients in a medium size glass bowl. Microwave for five minutes, pausing to stir after every minute. The dip will be very watery at first, but it will thicken as it finishes cooking.
- Serve hot, poured over just about anything that you want to make more delicious. Enjoy!