Easy Frito Pie Bake for a Crowd
I remember the first time I bit into a slice of warm, fragrant zucchini bread. It was at my grandma’s house, and honestly, I didn’t even realize zucchini could taste this good baked into something so sweet and tender. That smell, the moist crumb, and just how sneaky the zucchini was—hidden inside, yet adding this incredible richness and moisture—completely won me over. Now, whenever I bake this, it’s like a little hug from my childhood. Plus, it’s one of those recipes that seem fancy but is actually super simple to whip up. I’ve made this countless times, tweaking just small things here and there, and it’s always a crowd-pleaser. It’s perfect for brunch, a quick snack, or even gift-giving with a pretty ribbon. And trust me, this disappeared in minutes at my house – my kids actually ask for seconds! If you’re chasing that cozy, homemade vibe and want a dessert that’s health-friendly but indulgent, this chocolate zucchini bread is your new best friend.
What is chocolate Zucchini bread?
Think of it as the lovechild of a rich chocolate cake and a healthy vegetable dish. That might sound weird, but it’s honestly one of those magic recipes that balance indulgence with nutrition. This chocolate zucchini bread is essentially a moist, dense loaf packed with shredded zucchini, cocoa powder, and just enough sugar to satisfy that sweet tooth. The zucchini keeps it tender and adds a subtle earthiness that’s so comforting. It’s called “bread” because of the nice, rustic loaf shape, but really, it’s more like cake in disguise—perfect for breakfast, brunch, or a sneaky after-dinner treat. The best part? It’s endlessly customizable. Want more chocolate? Add some chocolate chips. Prefer it less sweet? Cut back the sugar slightly. It’s a cozy recipe I always keep in my back pocket because it’s like baking a little bit of love.
Why you’ll love this recipe?
What I love most about this chocolate zucchini bread is how forgiving and adaptable it is. It’s honestly a lifesaver on busy nights when I want something homemade to snack on but don’t want to spend hours in the kitchen. Plus, it’s budget-friendly—most of the ingredients are staples I always have lying around. The smell alone when it’s baking is enough to bring everyone running to the kitchen! The cocoa gives it that deep, rich flavor, while the zucchini keeps it incredibly moist—my secret weapon for a perfect loaf every single time. And don’t forget, it’s actually healthy-adjacent; sneaking in those veggies is a win, especially with kids who might turn their noses up at plain zucchini. My kids ask for this all the time, especially when school’s back in session and I want to make something that feels like a cozy treat but isn’t loaded with empty calories. I also love how versatile it is: serve it plain with a cup of coffee, toast it for breakfast, or cut thick slices to enjoy as a snack. Honestly, once you’ve made it a few times, it’s like your new baking best friend!
How do I make Zucchini bread?
Quick Overview
This recipe comes together faster than you’d think. First, you shred a zucchini and squeeze out excess moisture—trust me, I learned the hard way that too much water can make the loaf a bit gummy. Then, you whisk together your dry ingredients, mix the wet ingredients separately, and gently combine everything just until smooth. The batter is thick and fudge-like, which is what keeps the bread moist. Pour half into your loaf pan, sprinkle some chocolate chips or chunks if you fancy, add the rest, swirl it gently, and then bake. The aroma filling your kitchen is worth every step. It’s a one-bowl process, so cleanup’s a breeze. Plus, I tested this with almond milk, and honestly, it made it even creamier—so feel free to experiment!
Ingredients
For the Main Batter:
– 1 1/2 cups of all-purpose flour (or gluten-free blend if you prefer)
– 1/2 cup unsweetened cocoa powder (quality matters — I like Dutch-processed for that deep flavor)
– 1 teaspoon baking soda
– 1/2 teaspoon salt
– 1/2 teaspoon baking powder
– 1/2 cup granulated sugar (you can cut back to 1/3 cup for less sweetness)
– 1/2 cup packed brown sugar (adds a richer flavor)
– 1/2 cup olive oil or melted butter (I tested both, and they both work great)
– 3 large eggs (or flax eggs for vegan version)
– 1 teaspoon vanilla extract
– 1 cup shredded zucchini (squeezed dry — don’t skip this step!)
For the Filling:
– 3/4 cup semi-sweet chocolate chips or chopped dark chocolate (more if you’re feeling decadent)
– Optional: chopped nuts, like walnuts or pecans, if you want some crunch
For the Glaze:
– 1/2 cup powdered sugar
– 1-2 teaspoons milk or almond milk
– A few drops vanilla (optional but nice for extra flavor)
– A sprinkle of cocoa powder or chocolate shavings for garnish (make it pretty!)
Step-by-Step Instructions
Step 1: Preheat & Prep Pan
Set your oven to 350°F (175°C). Grease a standard loaf pan or line it with parchment paper — I swear by parchment for easy cleanup. If you want the crust extra crisp, a light spray of non-stick spray works too. Make sure your rack is in the middle; we want even baking without over-browning.
Step 2: Mix Dry Ingredients
In a big bowl, whisk together the flour, cocoa powder, baking soda, salt, and baking powder. Even mixing distributes the leaveners evenly—this keeps your bread from getting weird lumps. Honestly, I do this right in the measuring cup sometimes to save bowls and dishes!
Step 3: Mix Wet Ingredients
In another bowl, beat the eggs, sugars, and vanilla until smooth. Then, stir in the oil or melted butter. The mixture should look glossy and slightly thick. If you’re using almond milk, just add it here—I’ve tested it, and it makes the batter even creamier. Just watch your liquids, so the batter isn’t too thin.
Step 4: Combine
Pour the wet ingredients into the dry and gently fold until just combined — don’t overmix! Overworking the batter can make the bread dense. When it’s mostly incorporated, fold in the shredded zucchini and chocolate chips. I always leave some chocolate for topping—makes it extra special.
Step 5: Prepare Filling
If you want the swirl look, pour half the batter into the pan, sprinkle half the chocolate chips, then layer the remaining batter on top. Swirl gently with a toothpick or knife to create pretty patterns. It’s like a chocolate surprise lobby in every bite!
Step 6: Layer & Swirl
Gently swirl the batter with a knife to blend the layers—I like a figure-eight pattern. Not too much; just enough to get that marbled look. Trust me, that little swirl makes a big impact visually and flavor-wise.
Step 7: Bake
Pop it in the oven and bake for about 50-60 minutes. Check doneness with a toothpick inserted in the center; it should come out with moist crumbs, not batter. If it’s browning too fast, tent it with foil halfway through. Timings can vary depending on your oven—don’t be discouraged if you need to test a few times!
Step 8: Cool & Glaze
Let the bread cool in the pan for about 15 minutes, then transfer to a wire rack. Cool completely before glazing—that way, the glaze won’t melt and run off. Mix powdered sugar with a splash of milk, drizzle it on top, and decorate with chocolate shavings if you’re feeling fancy.
Step 9: Slice & Serve
Use a sharp serrated knife for clean slices. This loaf is best enjoyed slightly warm or at room temperature. I like to serve it with a dollop of whipped cream or a glass of cold milk—perfect for cozy mornings or afternoon treats. Honestly, it’s so rich and chocolatey that my kids ask for it as an after-dinner dessert too!
What to Serve It With
This decadent zucchini bread works on so many levels. For breakfast, it’s fantastic with a hot cup of coffee or a glass of cold milk. My favorite way to serve it is toasted lightly in the morning, topped with a smear of butter and a drizzle of honey. It’s also a showstopper at brunch—pair it with fresh berries, yogurt, or scrambled eggs, and everyone will ask for your secret.
As an afternoon snack, it’s pure comfort. I love cutting it into thick slices and adding a little extra chocolate or fresh fruit on top. When I serve it as dessert, I like to dust it with powdered sugar or drizzle some warm chocolate sauce for that extra oomph. Honestly, it’s a family favorite because it’s like a little piece of cozy heaven every time. Plus, the kids love helping me add the chocolate chips—little hands are pretty good at spreading that love around.
Top Tips for Perfecting Your Chocolate Zucchini Bread
Every time I make this, I learn something new—or at least I remind myself what works best. Here are some insider tips for a perfect loaf every time:
- Zucchini Prep: Squeeze out as much moisture as you can—don’t skip this! If the zucchini is too wet, your bread might turn out dense or gummy. I use a clean kitchen towel or paper towels to press out excess water after shredding.
- Mixing Advice: Be gentle when combining dry and wet ingredients. Overmixing can create a tough, rubbery texture—nobody wants that. Fold just until everything is incorporated.
- Swirl Customization: Want more chocolate? Toss in extra chips or chunks. For a different flavor twist, sprinkle in some peppermint or orange zest—really awakens the senses.
- Ingredient Swaps: I’ve tried coconut oil instead of butter, and it worked beautifully—gives it a faint tropical aroma that works surprisingly well. For a dairy-free version, coconut or almond milk is a lovely substitute.
- Baking Tips: Check the loaf at the 50-minute mark—ovens vary. Every oven is different, so don’t rely solely on time. The toothpick test is king! For an extra shiny crust, I brush the top with a little milk before baking for that bakery look.
- Glaze Variations: Instead of powdered sugar, you can melt some chocolate and drizzle it over the cooled loaf or top with a layer of cream cheese frosting if you’re feeling decadent. It all depends on the mood and occasion.
My biggest lesson? Patience is key. Let it cool completely before slicing—otherwise, it’s crumb city. But once you get the hang of it, this bread is like coming home every time.
Storing and Reheating Tips
This bread stays soft and flavorful for a few days if stored properly. Wrap it tightly in plastic wrap or keep it in an airtight container. It’s best enjoyed within 2-3 days at room temperature—that’s when the moist crumb is at its prime. If you need to keep it longer, pop it in the fridge; it’ll last about a week. Just remember to bring slices to room temperature before serving for that just-baked feel. Want to make it last even longer? Freeze slices individually in freezer-safe bags for up to three months. When you want a treat, just pop a slice in the microwave for about 15 seconds, and it’s like fresh from the oven. For the glaze—wait until serving to drizzle—it’s the perfect finishing touch that won’t get soggy if you store the bread properly. These small tricks keep your loaf tasty and beautiful for days after baking.
Frequently Asked Questions
Final Thoughts
Honestly, this chocolate zucchini bread has become my go-to comfort food—it’s like an edible hug. It’s moist, chocolatey, and has that homemade warmth that just makes everything feel right. Every time I make it, I remember my grandma’s kitchen and how a simple vegetable can turn into something utterly irresistible. I love that you can tweak it endlessly—add nuts, switch out the chocolate, use different flours—and it still comes out perfect. Plus, it’s almost foolproof; I’ve tested it with busy mornings, lazy Sundays, and even last-minute guests, and it never lets me down. If you’re looking for a cozy, crowd-pleasing loaf that sneaks a veggie in and still feels decadent, this is it. Can’t wait to hear how yours turns out! Drop a comment, share your variations, or just tell me you’re baking it now—I promise, it’s worth every minute spent in the kitchen. Happy baking!
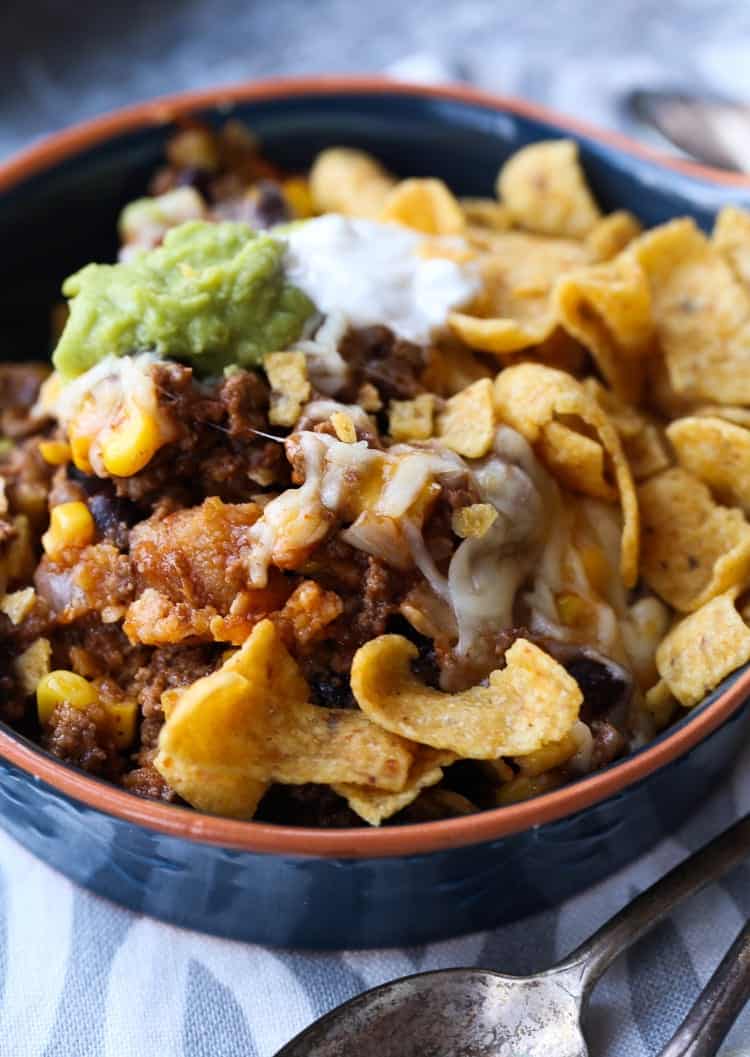
Frito Pie
Ingredients
Method
- Preheat oven to 400°F.
- In a large skillet brown the ground beef and onion together over medium-high heat until cooked through. Drain excess grease. Lower heat to medium-low and season with salt, pepper, cumin, coriander, chili powder, garlic powder, and paprika. Stir to coat. Add beans, corn, enchilada sauce, and tomato sauce. Cook until heated through.
- Spread 2/3 of the Fritos onto the bottom of a 9x13 baking dish. Layer the meat mixture over Fritos, then sprinkle with shredded cheese. Bake for 20 minutes or until cheese melts and bubbly.
- Garnish with remaining Fritos and serve warm.
- Top with sour cream and guacamole if desired.