Sweetheart Cake Bites How to Make Them
Some of my favorite childhood memories involve the scent of baked goods wafting through my grandma’s kitchen — warm cinnamon, sweet hints of vanilla, and that irresistible smell of something coming out just right. I always do this when I want a little piece of home: whip up a batch of zucchini crumb cake. It’s a cozy, forgiving recipe that’s perfect for those lazy weekend mornings or a quick afternoon pick-me-up. Honestly, it’s become my go-to when I need a dessert that feels both indulgent and wholesome. Trust me, this one’s a lifesaver on busy nights when I don’t want to fuss much but still crave something sweet and comforting. My kids ask for this all the time, and I love that I can sneak in a veggie without fuss—they never notice! I tested it with almond milk, and it actually made it even creamier, so don’t hesitate to experiment a bit. The best part? It’s like a hug in every bite, and everyone leaves the table with a smile. Shall we get you baking?
What is Zucchini Crumb Cake?
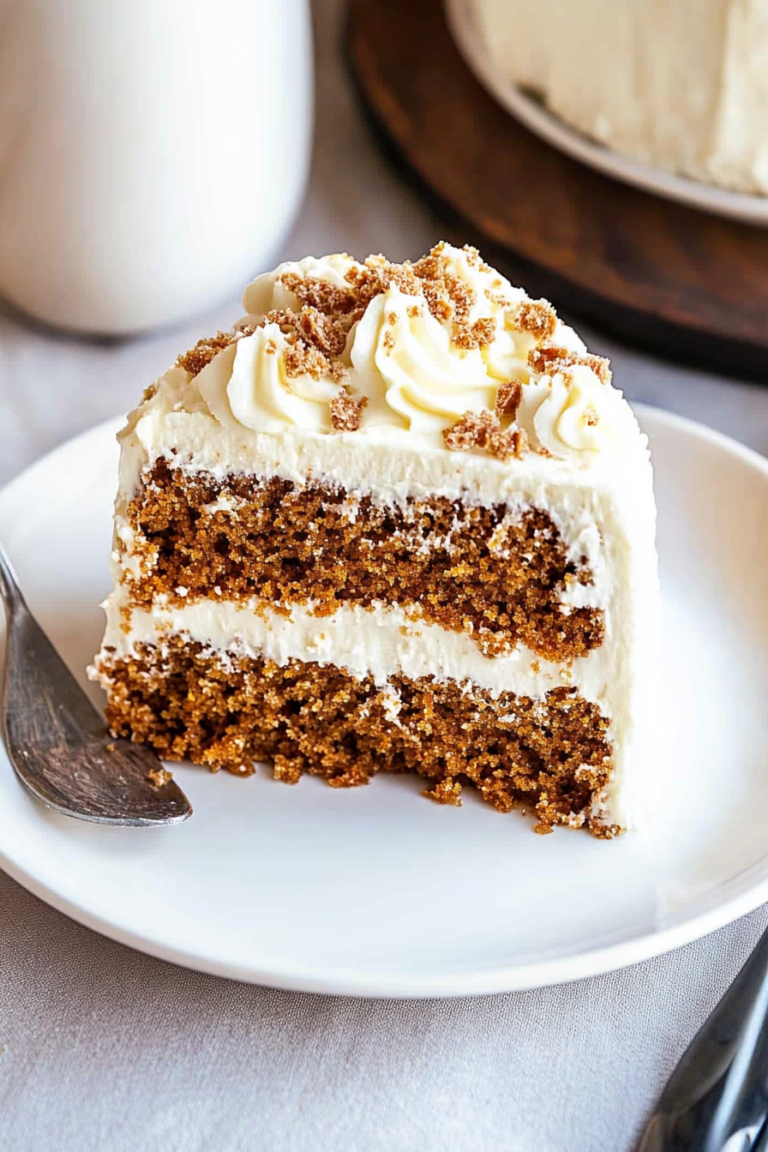
Think of zucchini crumb cake as the lovechild of a classic coffee cake and a healthy vegetable snack. It’s essentially a moist, tender cake packed with shredded zucchini — which, by the way, keeps it from feeling too rich or heavy — topped with a buttery, crispy crumb topping. The name ‘crumb cake’ might make you think of something dense and sweet, but this version balances a delicate sweetness with a hint of spice, thanks to cinnamon and vanilla. It’s like those old-fashioned baked goods you find in cozy bakeries, but with a little twist of healthiness because of the zucchini. It’s called a “crumb cake” because of that glorious topping that cracks just right when you slice into it. This recipe’s all about texture—the moist, fruity inside contrasted with the crunchy crumbs on top. It’s essentially an anytime cake, perfect for breakfast, brunch, or a sweet, guilt-free snack. I love how simple it is to throw together, yet it turns out soooo impressive.
Why you’ll love this recipe?
What I love most about this zucchini crumb cake is how it manages to be comfortingly nostalgic while sneaking in some sneaky veggies—that’s a win-win in my book! The first time I made it, the smell alone brought everyone running into the kitchen; that warm cinnamon aroma just signals cozy times. The flavor? It’s not overly sweet, which makes it a lovely breakfast or mid-morning treat, but it’s sweet enough to satisfy that dessert craving. The cake itself stays moist and tender, thanks to the zucchini, and I’ve tested it with different fillings and toppings, and honestly, it always adapts beautifully. Plus, it’s super simple. No complicated icing, no fancy equipment—just a bowl, a whisk, and a little patience. And best of all? It’s budget-friendly! You probably have most of the ingredients knocking around in your pantry. I’ve made this countless times, and it’s never failed me—it’s a real crowd-pleaser for family gatherings or even last-minute guest visits. What stands out most is how versatile it is: have it plain, add some chopped nuts, swirl in berries, or even a drizzle of honey. It’s a cake that feels special but is really just a quick bake that I can whip up anytime. Honestly, this one’s become a part of my little baking arsenal because it’s reliable, nostalgic, and just downright tasty.
How do I make Zucchini Crumb Cake?
Quick Overview
This zucchini crumb cake is about as straightforward as baking gets. You start with shredding the zucchini, mixing up a soft batter, and then layering it in your favorite baking dish. The magic comes from that crunchy topping—think butter, sugar, and a hint of cinnamon—that you sprinkle over the batter before baking. The whole process takes about 10 minutes to prep, then into the oven it goes for around 35-40 minutes until it’s golden, fragrant, and irresistibly tempting. What I love is how forgiving this recipe is — a few extra tips, and you’re in perfect baking territory. It’s a one-bowl wonder that you can assemble quickly, then forget about while it bakes. The smell alone makes your kitchen feel like a cozy café.
Ingredients
For the Main Batter:
– 2 cups grated zucchini (about 2 medium zucchinis, shredded and squeezed dry)
– 1 cup all-purpose flour (or a gluten-free blend if needed)
– 3/4 cup granulated sugar
– 1 teaspoon baking powder
– 1/2 teaspoon baking soda
– 1 teaspoon ground cinnamon
– 1/4 teaspoon salt
– 2 large eggs
– 1/2 cup vegetable oil or melted butter
– 1 teaspoon vanilla extract
For the Filling:
– Optional: 1/2 cup chopped nuts or chocolate chips for added texture and flavor, stirred right into the batter or sprinkled on top.
For the Crumb Topping:
– 1/2 cup all-purpose flour
– 1/3 cup packed brown sugar
– 1/4 teaspoon ground cinnamon
– 1/4 cup cold butter, cut into small cubes
Step-by-Step Instructions
Step 1: Preheat & Prep Pan
Set your oven to 350°F (175°C). Grease a 9-inch square baking dish or a similar size pan with butter or non-stick spray. You want every inch well-coated—trust me, this cake loves to stick if you skimp here. If you’re short on time, you can line it with parchment for easy removal and cleanup.
Step 2: Mix Dry Ingredients
In a large bowl, whisk together the flour, sugar, baking powder, baking soda, cinnamon, and salt. I always do this first so everything is evenly distributed—no clumps or uneven bites here.
Step 3: Mix Wet Ingredients
In a separate bowl, beat the eggs lightly, then add the oil and vanilla. Mix until smooth. I like to add the grated zucchini after—be sure to squeeze out the excess moisture so your batter isn’t too watery. A little moisture is fine, but you don’t want it swimming in zucchini juice. I tested with freshly grated zucchini, but I’ve also used frozen that’s been thawed and drained—either works fine.
Step 4: Combine
Pour the wet mixture into the dry ingredients and fold gently until just combined. Do not overmix! It’s okay if the batter is a little lumpy—that’s how you get that tender crumb. Overmixing can make it dense, and nobody wants a heavy cake.
Step 5: Prepare Filling
If you’re adding nuts or chocolate chips, fold them into the batter now. Or, sprinkle them on top before layering the crumb topping. You can even swirl berries, pumpkin puree, or a spoonful of jam if you’re feeling creative.
Step 6: Layer & Swirl
Pour the batter into your prepared pan, smoothing the top with a spatula. If you’re adding a swirl—say, some jam or a fruit compote—drop spoonfuls and swirl gently with a toothpick to create pretty patterns.
Step 7: Make the Crumb Topping
In a small bowl, combine flour, brown sugar, and cinnamon. Add the cold butter cubes and use your fingertips or a pastry cutter (or even two forks) to cut it into coarse crumbs. The mixture should resemble streusel—crumbly but slightly sticky. That buttery crunch makes this cake special.
Step 8: Bake
Scatter the crumb mixture evenly over the batter. Pop it into the oven and bake for 35-40 minutes. Check with a toothpick inserted into the center—if it comes out clean, you’re golden. The top should be crisp, and the house will fill with that warm spice aroma that’s just pure comfort.
Step 9: Cool & Glaze
Let it cool in the pan for about 10 minutes. It’s tempting to dig in immediately, but patience pays off. A gentle cooling allows it to set. If you like, drizzle with honey or a simple glaze made of powdered sugar and lemon juice for an extra touch of sweetness.
Step 10: Slice & Serve
Cut neat squares and serve warm or at room temperature. It’s fantastic with a dollop of whipped cream or a scoop of vanilla ice cream if you want to elevate it even more. I love the contrast of hot cake with cold ice cream—heaven!
What to Serve It With
Honestly, this cake is so versatile that it works in almost any setting. For breakfast, I love a cup of strong coffee or a glass of cold milk alongside. It’s equally lovely for brunch—maybe served with fresh berries or a dusting of powdered sugar, with a light mimosa or herbal tea. As a dessert, a little caramel sauce or a drizzle of honey makes it feel indulgent without overdoing it. And on casual days, just a mug of tea and the cake—simple, satisfying, and comforting. When my family comes over, I often cut it into big squares and serve it with a side of fresh fruit or a dollop of yogurt. It’s such a crowd-pleaser; I think I’ve made it for almost every holiday or weekend brunch since I first discovered it. Plus, even the pickiest eaters—kids included—can’t resist that crunchy topping and soft inside. Honestly, I’ve never seen someone turn down a piece of this!
Top Tips for Perfecting Your Zucchini Crumb Cake
After making this a handful of times, I’ve picked up a few tricks that make all the difference. First, when shredding zucchini, I always use a box grater on the coarse side. Then, I squeeze out as much moisture as I can—this step is crucial because too much water can make the cake sink or turn soggy. I’ve learned that a clean kitchen towel or cheesecloth works great for this. Don’t skip this step! When mixing, fold gently to keep the batter light and airy—I’ve overmixed before and ended up with a dense cake, which is no fun. For the crumb topping, I prefer to keep the butter very cold—this helps create those big, crisp crumbs. You can also experiment with adding chopped nuts or even coconut in the topping for extra crunch. My secret weapon? A splash of vanilla in the topping—just that little extra scent of warmth. Also, don’t be afraid to adjust the cinnamon—trust your nose. When baking, oven variations can cause timing differences; I always start checking around 33 minutes, and if it’s not quite done, I give it five more minutes. Once cooled, I like to dust with a little powdered sugar or even a spoonful of whipped cream for serving. Remember, the key is patience—let it cool so it slices perfectly, and you’ll be thrilled with the result. This is one of those recipes that gets better with time, and each bake feels like a little hug from the kitchen.
Storing and Reheating Tips
This cake is best enjoyed within a couple of days—after that, the crumb starts to soften, but honestly, it still tastes good. Store leftovers in an airtight container at room temperature for up to two days or in the fridge for about four. If you refrigerate, I recommend letting it sit out for a few minutes before slicing—cold cake can be a little dense. To freeze, wrap individual portions tightly in plastic wrap and then in foil—works like a charm. It’ll keep for up to three months, and when you want to enjoy a slice, just defrost at room temp for 15-20 minutes or warm it gently in the microwave. If you like your crumb topping crisp, reheat with the oven on low (around 300°F) for about 10 minutes. I don’t recommend freezing with the glaze, as it might get sticky or runny when thawed. If you want to add the glaze later, do so just before serving for that fresh crunch. Trust me, this cake reheats beautifully, and the flavors still shine through. It’s a sneaky little treat that stays delicious – I always keep a stash in the freezer for those unexpected moments when you need a sweet pick-me-up. Just make sure it’s fully cooled before wrapping or freezing, or you risk sogginess. The right storage keeps the cake moist, tender, and oh-so-satisfying.
Frequently Asked Questions
Final Thoughts
This zucchini crumb cake has become a little piece of my comfort zone. It’s the kind of dessert I make when I want to indulge but also feel good about what I’m eating. That soft, moist crumb inside paired with that irresistibly crunchy topping is just perfection in every bite. It’s proof that simple ingredients—like zucchini—can transform ordinary baking into something special. Whether it’s for a cozy weekend breakfast, a family get-together, or just because I need a little sweet thing in my life, this cake never disappoints. It’s friendly enough for beginners but developed enough from years of experimenting that I consider it a tried-and-true classic in my kitchen. I really hope you try it and see how comforting, adaptable, and downright delicious it is. And hey, I’d love to hear how yours turns out—please leave a comment or share your twist! Happy baking, and don’t forget to savor every crumb.

Ingredients
Method
- Preheat oven to 350°F. Lightly spray a cake pop pan with baking spray.
- Combine all the cake ingredients in a large mixing bowl and beat until combined. Place the batter into a piping bag or large ziplock bag with the tip cut off.
- Pipe the batter into the prepared cake pop pan and bake for about 20 minutes. Let it rest for 5 minutes before opening the pan.
- Place cake balls on a wire rack and let cool. Using scissors, cut the seam off the balls.
- Refrigerate the cake balls for about 45 minutes to firm up the shape.
- Melt chocolate melts in microwave according to package directions. Insert a bamboo stick into each cake ball and dip into the melted chocolate. Place onto a sheet of wax paper.
- Repeat with remaining balls. Place finished cake balls into mini cupcake liners, top with sprinkles, and drizzle with melted chocolate if desired.