Sweet Cherry Pie Cookie Cups How To
There’s something about baking with fresh zucchini that just screams late summer afternoons and the cozy hum of my kitchen. I remember my grandma’s garden overflowing with squash, and how she’d always say, “Bake this up before it disappears!” That’s exactly how I got started on this zucchini coffee cake—because honestly, what’s better than sneaking a vegetable into something sweet and satisfying? This recipe’s a little bit like those beloved crumb cakes you grab on a Sunday morning, but with a fresh, garden twist that makes it feel practically indulgent and entirely wholesome at the same time. I always do this when I want something that hits the spot, and my kids ask for seconds — yes, it’s that good. And the best part? It’s surprisingly easy. No complicated frosting or fancy ingredients, just simple, good old baking that fills your house with the smell of warm vanilla, cinnamon, and that sweet zucchini aroma. Trust me on this one—once you try it, it’s going to become a staple in your kitchen, too.
What is Zucchini Coffee Cake?
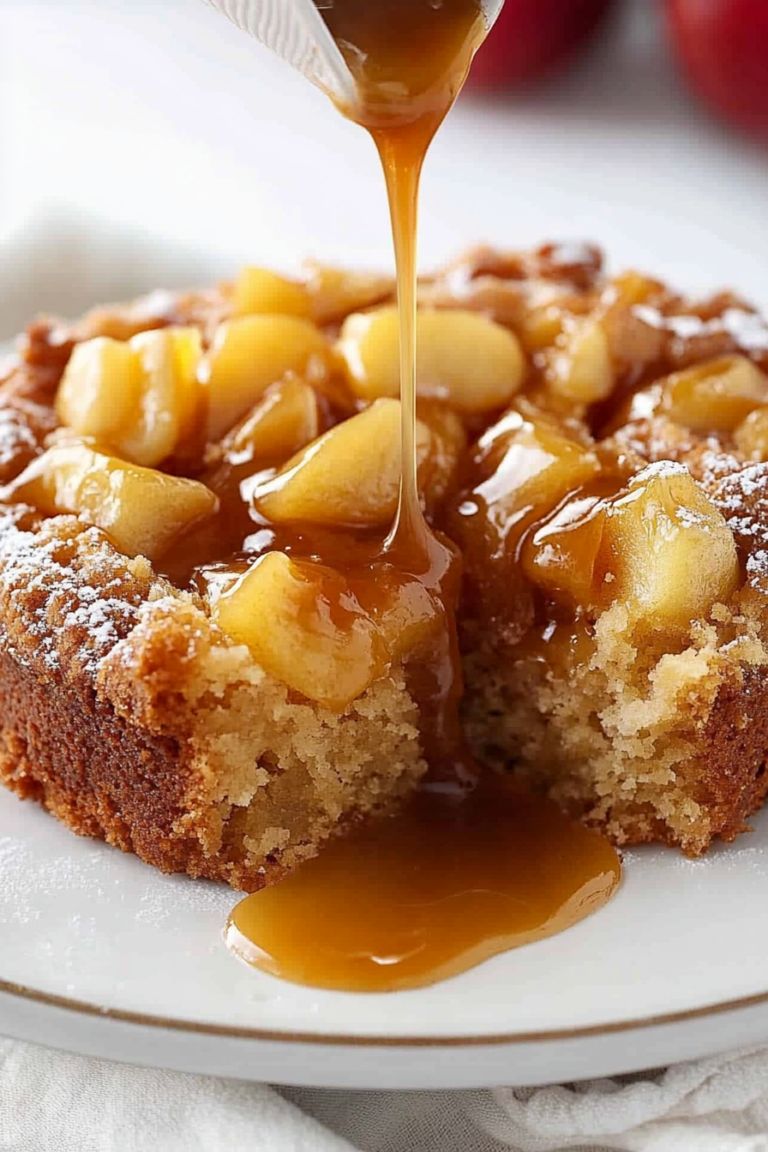
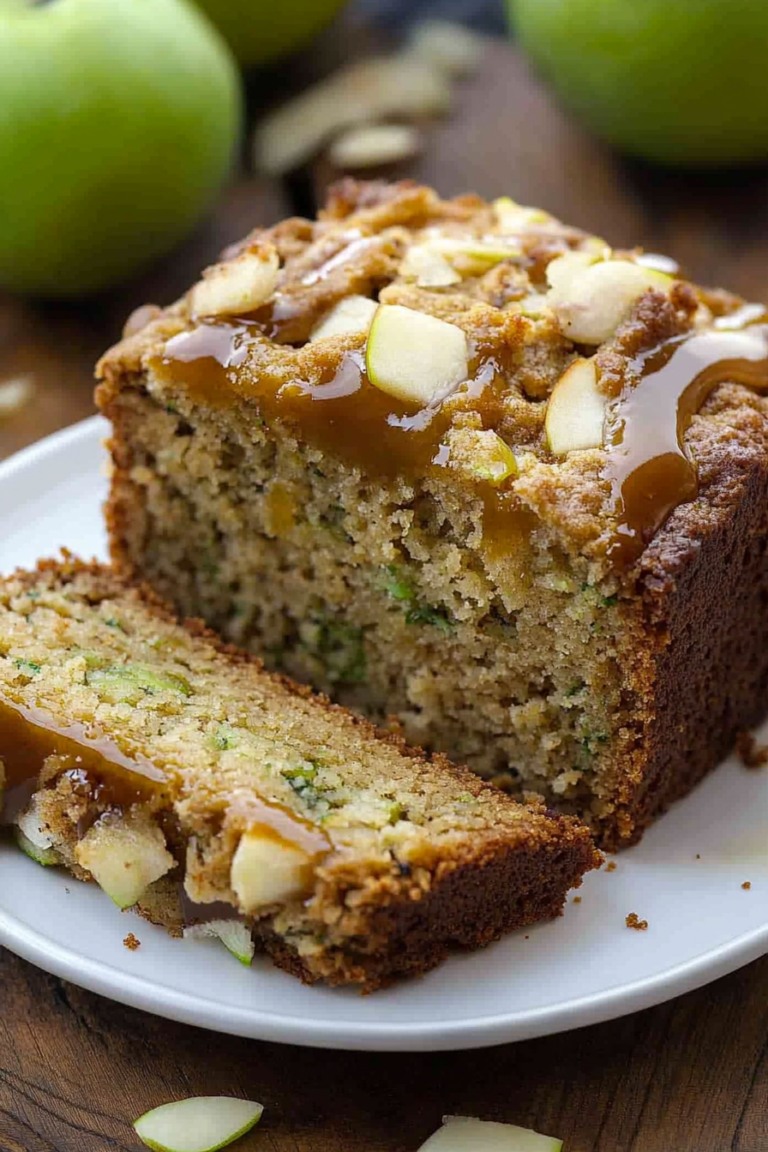
Think of zucchini coffee cake as a tender, moist cake with a crunchy cinnamon streusel topping, swirled with creamy cream cheese goodness. It’s essentially a cross between a quick bread and a coffee shop favorite, but with that sneaky veggie twist that makes it feel like a little secret just for you. The name “coffee cake” comes from its lovely breakfast or snacking vibe—something you’d enjoy with a morning cup or an afternoon tea. The “zucchini” part? Well, that’s all about sneaking in some extra veggies without anyone batting an eye. I like to think of this as comfort food with a little health boost, which makes you feel just a little less guilty about indulging. It’s a versatile recipe that’s at home on your brunch table, served as a quick snack, or even sliced up for a potluck. Think of it as the kind of cake you start craving as soon as the zucchini plants are ripe—that perfect way to enjoy the last days of summer while sneaking in something a little nutritious.
Why you’ll love this recipe?
What I love most about this zucchini coffee cake is how it combines the best of both worlds: that warm, cinnamon-scented flavor of classic coffee cake and the fresh, almost secret-ingredient touch of zucchini. First off, the flavor—moist, tender, with a hint of sweetness and that delightful swirl of tangy cream cheese that cuts through the richness beautifully. It’s like a cozy hug in every bite. Secondly, the simplicity of this recipe is a lifesaver on busy nights—I’ve made it countless times, and it never fails to impress. Plus, it’s budget-friendly, relying on pantry staples and garden produce, so you’re not breaking the bank. I’ve experimented a lot with this—testing with almond milk, adding a handful of chopped nuts, or swapping the sugar for honey—and it always turns out fantastic. My kids ask for this all the time, especially when they want a treat that’s a little special but still homey. And the best part? It tastes just as incredible warm out of the oven as it does the next day. It’s perfect for breakfast, brunch, or even a sneaky late-night snack—trust me, once you get the hang of this, it’ll become a household favorite.
How do I make Zucchini Coffee Cake?
Quick Overview
This zucchini coffee cake is truly a one-bowl wonder—mix up your dry ingredients while your zucchini is grated and drained, then fold in the wet, swirl in that luscious cream cheese mixture, sprinkle with cinnamon streusel, and bake. It’s super forgiving, so even if you’re a beginner, you’ll find the process straightforward. What makes this method special is how wonderfully moist and airy the cake turns out, thanks to the grated zucchini and buttermilk (or yogurt, if you prefer). The swirl of cream cheese adds a tangy richness that pairs so well with the spicy streusel topping. It’s one of those recipes where you realize, “Hey, I actually CAN bake this!”—and you’ll want to do it all the time once you taste that first slice. Perfect for lazy Sunday mornings or in a rush—because honestly, it takes just about an hour from start to finish.
Ingredients
For the Main Batter:
– 2 cups grated zucchini (about 2 small zucchinis, make sure they’re drained well)
– 2 cups all-purpose flour (or a mix of whole wheat and white for some healthy flair)
– 1 cup sugar (or honey, if you prefer natural sweetness)
– 1/2 cup unsalted butter, melted
– 2 large eggs
– 1/2 cup buttermilk or plain yogurt
– 1 teaspoon vanilla extract
– 1 teaspoon ground cinnamon
– 1 teaspoon baking powder
– 1/2 teaspoon baking soda
– Pinch of salt
For the Filling:
– 8 oz cream cheese, softened
– 1/4 cup sugar (or 2 tablespoons honey)
– 1 teaspoon vanilla extract
For the Glaze:
– 1 cup powdered sugar
– 2-3 teaspoons milk or lemon juice (for flavor variation)
– A dash of vanilla (optional)
– Additional cinnamon for sprinkling, if you like
Step-by-Step Instructions
Step 1: Preheat & Prep Pan
Heat your oven to 350°F (175°C). Grease a 9-inch springform pan or use parchment paper for easy removal. I often line the pan with parchment, especially since the zucchini can make things a little sticky. Now, grate your zucchini—I do this with a box grater or a food processor if I’m lazy—then toss it in a clean towel to squeeze out excess moisture. Trust me, removing that extra water keeps the cake beautifully moist without turning your batter into a soggy mess.
Step 2: Mix Dry Ingredients
In a large bowl, whisk together the flour, cinnamon, baking powder, baking soda, and salt. This part’s crucial because it ensures everything gets evenly distributed—no one wants pockets of baking soda or uneven cinnamon spice. Set this aside while you work on the wet ingredients.
Step 3: Mix Wet Ingredients
In another bowl, beat the eggs lightly, then stir in the melted butter, buttermilk, and vanilla. If I don’t have buttermilk, I just add a splash of lemon juice or vinegar to regular milk and let it sit for 5 minutes—it works like a charm. The mixture should look smooth and slightly frothy. Toss in the grated zucchini and mix until just combined.
Step 4: Combine
Pour the wet ingredients into the dry, then gently fold everything together just until there’s no streak of flour. Do not overmix! Overworking the batter can lead to a dense cake, and that’s not what we want here. Your batter should be fairly thick but still pourable. If it feels too stiff, a splash more buttermilk can help.
Step 5: Prepare Filling
For the cream cheese swirl, mix the softened cream cheese with sugar and vanilla until smooth. I like to use a fork or small whisk here—just enough to blend everything well. If you want a little extra flavor, adding a pinch of lemon zest works beautifully, but I keep it simple most of the time. Set aside.
Step 6: Layer & Swirl
Pour about half of the batter into your prepared pan, spreading it evenly. Dollop the cream cheese mixture on top in several places, then gently swirl it using a toothpick or a skewer—you want nice marbled patterns, not a uniform layer. Top with the remaining batter, smoothing it out carefully. If you love a crunchy top, sprinkle a little more cinnamon streusel here before baking.
Step 7: Bake
Pop it into the oven and bake for about 40-45 minutes. Check doneness with a toothpick inserted in the center—if it comes out clean, you’re golden. If it’s still have wet batter, pop it back in for 5-minute intervals until it’s just right. Every oven is a little different, so keep an eye on it as the time nears.
Step 8: Cool & Glaze
Let the cake cool in the pan for at least 15 minutes—this helps everything set up and makes slicing easier. If you’re glazing, whisk together powdered sugar and milk (or lemon juice) until smooth, then drizzle over the cooled cake. I love adding a sprinkle of cinnamon or extra zest here for that extra punch of flavor. The glaze can be a little runny or thick, depending on your preference—trust your instincts.
Step 9: Slice & Serve
Use a sharp serrated knife to get clean slices, and serve slightly warm or at room temperature. I think it’s perfect with a dollop of whipped cream or a small scoop of vanilla ice cream on the side. And if there’s any leftover—though let’s be honest, it rarely lasts that long—store it in an airtight container at room temperature for a day or refrigerate for up to 3 days. Just reheat gently if you want to enjoy that freshly baked sensation again.
What to Serve It With
This zucchini coffee cake is so versatile that it suits just about any occasion. For breakfast, I love drizzling a little extra honey or serving it alongside a robust black coffee or a cup of cinnamon-spiced chai. When it’s brunch, pair it with fresh fruit, a side of yogurt, and maybe some sparkling water with lemon slices for a light, refreshing touch. As an afternoon snack, it’s perfect with a mug of tea or a glass of cold milk—the kids especially love the milk route. And for dessert, I find it pairs beautifully with a sprinkle of chopped nuts on top or a dollop of whipped cream. Sometimes, I even serve slices topped with a fresh berry compote—totally indulgent but still deceptively healthy. My family loves to have this after Sunday dinner, especially when we can cozy up at the table and talk about the garden harvest. It’s one of those recipes that brings everyone together, the smell alone turning the house into a warm, inviting place.
Top Tips for Perfecting Your Zucchini Coffee Cake
Having made this a dozen times, I’ve picked up a few tricks that make all the difference. First, always drain your grated zucchini really well—moisture is the enemy of fluffy cake. I’ve used a clean kitchen towel to squeeze out the water and even give it a quick pat dry. This keeps the batter light. When mixing the dry ingredients, sift the flour and spices if you want an ultra-smooth, well-distributed crumb—plus, it helps prevent clumps. The swirl: don’t skimp on the cream cheese mixture. You want generous dollops that you can gently swirl into the batter—avoid overmixing, or the pattern can get lost. For ingredient swaps, I’ve tested coconut sugar and almond flour, but I find that traditional ratios work best unless you’re experimenting for fun. When baking, position the rack in the middle of the oven to promote even cooking, and always check for doneness a few minutes early—oven temps can vary. If you want a more decadent glaze, add a splash of vanilla extract or lemon juice for brightness. Personally, I learned to be patient: let the cake cool fully before glazing or slicing. It makes a huge difference in helping everything set perfectly and makes the slices look really pretty. The best part? It’s forgiving—if the swirl isn’t perfect or it bakes a little unevenly, just cut around it and enjoy. This cake is about comfort and joy, and I promise, you’ll keep coming back for more.
Storing and Reheating Tips
This cake keeps surprisingly well, which is great if you like to bake ahead or want leftovers for the next day. If you’re enjoying it within a few hours, just keep it covered at room temperature—cover loosely with foil or a clean towel to keep it fresh and prevent it from drying out. I usually find it stays perfect for about a day. For longer storage, wrap it tightly in plastic wrap or store in an airtight container in the refrigerator—it’ll be good for up to 3 days. Just keep in mind that refrigeration can sometimes dry out cakes, so I recommend gently reheating slices in the microwave for 15-20 seconds to bring back that softness. If you prefer it warm, a quick spin in the oven at 325°F for 10 minutes does wonders. As for the glaze, I usually wait to add it until I’m ready to serve, especially if I want it to look shiny and fresh rather than soggy or sticky. Freezing is also an option—you can wrap individual slices tightly and freeze for up to 2 months. Thaw at room temperature or gently rewarm, and you’ll almost feel like it’s fresh out of the oven again.
Frequently Asked Questions
Final Thoughts
This zucchini coffee cake has become a beloved part of my baking repertoire, not just because it tastes incredible but because it’s a reminder of how simple ingredients can turn into something truly special. The moistness, the gentle sweetness, and that gooey cream cheese swirl—each piece feels like a warm hug right from the oven. I love how adaptable it is, and I’ve learned a lot over the years, like how draining the zucchini thoroughly really makes a difference in texture. It’s amazing to me how something so humble—garden zucchini and pantry staples—can create a treat that’s welcomed at any brunch, enjoyed as an afternoon pick-me-up, or served as a cozy dessert. I hope you give this recipe a try and tag me in your photos—I’d love to see your versions! Happy baking, and don’t forget: a little patience and a lot of love are the secret ingredients to making everything taste just right.

Cherry Pie Cups
Ingredients
Method
- Preheat oven to 350°F. Spray mini muffin pans with nonstick baking spray or grease and flour the pans. Don’t skip this step or your cookies will stick.
- Place one cookie dough ball in each muffin pan cavity. Bake for 18-22 minutes or until the cookies are fully baked.
- Cool for 5-10 minutes, then use the back of a wooden spoon handle or the rounded part of a ½ teaspoon to press the cookie into a cup.
- Cool completely before trying to remove. Use a butter knife to carefully loosen and pop the cookie cup out of the muffin pan.
- Fill each cookie cup with some of the cherry pie filling.
- To make glaze: whisk powdered sugar and 1 tablespoon heavy whipping cream, adding more cream until you get desired consistency. Drizzle over cherry pies.
- Store pies in an airtight container in the refrigerator for up to 3 days. I don’t recommend freezing.