Sweet Cherry Bars A Simple Treat
There’s just something about the smell of freshly baked bread filling the kitchen—it instantly makes me feel cozy and nostalgic. This particular zucchini loaf is one I’ve been making for years, and honestly, it’s comfort food at its best. It’s fluffy, moist, and packed with that bright lemon zing that wakes up even the gloomiest mornings. I always do this when I have a spare zucchini hiding in the produce drawer, because I know my kids will ask for seconds, and I won’t feel guilty about sneaking in a veggie. Plus, it’s a lifesaver on busy nights when you want something homemade but don’t have time for elaborate baking. The best part? It’s super simple, feels like a little treat, and smells unbelievable while it bakes. Trust me, if you’re looking for a recipe that’s practically foolproof but still feels a bit fancy, this zucchini lemon loaf might just become your new favorite—mine sure is!
What is Moist Zucchini Lemon Loaf?
Think of this as a mash-up between your classic quick bread and a citrusy, summer-y treat. It’s essentially a lemony zucchini cake in loaf form, with easy ingredients that you probably already have in your pantry. The name might sound fancy, but don’t be fooled—this is a straightforward, home-cooked style bread that’s perfect for breakfast, snacks, or a light dessert. The zucchini keeps this loaf wonderfully moist and tender, almost like a soft sponge cake but with a rustic, hand-hewn vibe. The lemon—oh, the lemon!—brightens every bite with its fresh, tangy flavor that awakens your senses. I’ve tested this with different types of zucchinis, almond milk instead of regular milk, and even added a dash of vanilla, and let me tell you, each twist made it even more delicious. It’s like a hug in bread form—easy, flavorful, and just the right amount of indulgent.
Why you’ll love this recipe?
What I love most about this zucchini lemon loaf is how effortlessly it ticks all the boxes for a cozy, satisfying treat. First, the flavor profile is just incredible—light, citrusy, with just a hint of sweetness that pairs well with your morning coffee or afternoon tea. Seriously, the lemon zest and juice make the whole house smell like spring, even in the dead of winter. The best part? It’s super simple to whip up—no complicated techniques, no fancy equipment needed. Just a bowl, a whisk, and some grated zucchini. And if you’re watching your budget, hooray—most ingredients are pantry staples! I’ve made this for brunches, picnics, school snacks, and even as a last-minute hostess gift—everyone always asks for the recipe. It’s so versatile; sometimes I fold in blueberries or swap honey for sugar (trust me on this one). What I love most about this is how it’s one of those baked goods that gets better the next day, and it’s a perfect way to sneak in some veggies without anyone noticing.
And I should mention—this loaf disappeared in minutes at my house. My kids ask for it almost weekly, and I’ve caught myself slicing a piece just for a quick moment of calm when life gets hectic. Plus, it’s one of those recipes that makes you feel good inside because it’s homemade, wholesome, and honestly, feels like a little piece of sunshine. That’s the magic of this zucchini lemon loaf—comfort wrapped in bright, fresh flavors. Once you try it, I promise, it’ll become part of your rotation too.
How do I make a Moist Zucchini Loaf?
Quick Overview
This loaf comes together in about the same time as brewing your morning coffee—quick, simple, and surprisingly forgiving. You start by grating the zucchini, which adds moisture and a bit of bulk. In one bowl, you mix up the dry ingredients—flour, baking powder, a touch of salt—and in another, you whisk together the wet stuff: eggs, sugar, lemon zest, and a splash of oil or melted butter. Then you fold everything together, add the grated zucchini, and pour your batter into a loaf pan. The secret to perfect baking is not overmixing; just enough so everything’s just combined. Once baked, you let it cool a bit—don’t rush this step—and then brush on a simple glaze made of powdered sugar and lemon juice. It’s a straightforward process, but the result feels like a little bakery treat made right in your own kitchen.
Ingredients
For the Main Batter:
- 1 ½ cups all-purpose flour (I often use a mix of whole wheat and white for more texture)
- 1 teaspoon baking powder
- ½ teaspoon baking soda
- ¼ teaspoon salt
- Zest of 2 large lemons
- ½ cup granulated sugar (can swap for honey or maple syrup for softer sweetness)
- ⅓ cup vegetable oil or melted butter (trust me, butter makes it richer)
- 2 large eggs
- ½ cup milk (regular or almond milk work great)
- 1 teaspoon vanilla extract (optional but lovely)
For the Filling (Optional):
- ¼ cup lemon curd or blueberry jam (to swirl through for extra flavor)
For the Glaze:
- ½ cup powdered sugar
- 2-3 tablespoons fresh lemon juice
- Optional: a sprinkle of lemon zest or edible flowers for garnish
Step-by-Step Instructions
Step 1: Preheat & Prep Pan
I always preheat my oven to 350°F (175°C) and line a standard loaf pan with parchment paper or give it a good butter and flour coating. This helps prevent sticking and makes for a clean slice later. I like to set up everything beforehand because once you start mixing, it all comes together quickly!
Step 2: Mix Dry Ingredients
In a big bowl, whisk together the flour, baking powder, baking soda, salt, and lemon zest. These dry ingredients form the structure of the bread. Sifting them together is optional but helps create an even, fluffy crumb. I’ve learned that overmixing after adding wet ingredients is the quickest way to dense bread, so I just stir until everything looks evenly combined.
Step 3: Mix Wet Ingredients
In a separate bowl, whisk the sugar, eggs, oil, milk, and vanilla until smooth. The mixture should be slightly frothy, with the sugar mostly dissolved. I love using a bit of lemon juice here to brighten everything up. This step is where the magic begins—your kitchen will smell delightful in no time.
Step 4: Combine
Now, pour the wet ingredients into the dry, gently folding with a spatula. Just stir until there are no streaks of flour left—you don’t want to overmix here! Finally, fold in the grated zucchini, which adds moisture and a little color. The batter will be thick but moist.
Step 5: Prepare Filling
If you’re adding a swirl, gently spoon a few tablespoons of lemon curd or jam into the batter and swirl with a toothpick or skewer. This step is optional but makes the loaf look beautiful and adds a punch of fruity flavor.
Step 6: Layer & Swirl
Pour batter into your prepared pan, smoothing out the top. If you’re adding filling, gently spread it over the batter and swirl. Be careful not to press too hard—that’s how you keep a pretty marbled look without sinking everything to the bottom. I find that a few gentle zig-zags give it a nice pattern.
Step 7: Bake
Slide the pan into the oven and bake for about 55-60 minutes. Check for doneness by poking the center with a toothpick—if it comes out clean, you’re good! Ovens vary, so start testing around the 55-minute mark. The loaf should be golden on top and feel firm yet springy when lightly pressed.
Step 8: Cool & Glaze
Remove from oven and let it cool in the pan for about 10 minutes, then transfer to a wire rack. Once cooled slightly, whisk together your powdered sugar and lemon juice to make a glaze. Pour it over the loaf while it’s still warm so it seeps into all those nooks and crannies. Trust me, this glaze makes all the difference.
Step 9: Slice & Serve
Use a sharp serrated knife for clean slices—this loaf is moist and delicate, so patience is key. I like to serve it slightly warm or at room temperature, with a cup of tea or coffee. It also makes a lovely gift wrapped in parchment! My favorite way is to enjoy it with a little butter melting into each slice—heaven.
What to Serve It With
This zucchini lemon loaf is so versatile that it practically does itself. For a cozy breakfast, serve it with a dollop of Greek yogurt and fresh berries. It’s great as a brunch centerpiece alongside flaky croissants and freshly squeezed orange juice. My family loves it as a light dessert—just add a drizzle of honey or extra lemon glaze—and it pairs beautifully with a cold glass of milk or a bubbly sparkling water. I often stash a slice in the kids’ lunchboxes too; it’s just enough sweetness and feels special enough to make lunchtime feel fancy! On lazy weekends, I enjoy a slice with my afternoon coffee, and if I have a little extra, I keep it wrapped in the fridge for quick morning bites. Honestly, this loaf’s subtle fruity flavor and tender crumb make it a crowd-pleaser whenever you want something homemade but don’t want to fuss.
Top Tips for Perfecting Your Moist Zucchini Lemon Loaf
After making this countless times, I’ve picked up a few tricks that make all the difference. First, always squeeze out excess moisture from grated zucchini—you don’t want a soggy loaf! I usually sprinkle a pinch of salt on the shredded zucchini, let it sit for five minutes, then squeeze out the water using a clean kitchen towel. It’s the magic trick that keeps the bread fluffy. Next, avoid overmixing once you’ve combined wet and dry ingredients—that’s how you get a dense, rubbery texture. Fold gently just until combined.
Regarding ingredients, I experimented with olive oil once, thinking it might add an extra flavor dimension, but butter or neutral oils still reign supreme—the batter feels richer and more tender that way. For a more zesty punch, add a little extra lemon zest or even a splash of orange juice to the batter. I’ve also doubled the glaze for a more decadent look, but honestly, a light drizzle is all you need.
Finally, oven temperatures vary, so keep an eye on it after about 50 minutes. A toothpick inserted in the center should come out moist but not wet—guessing is the enemy of perfect bread! I’ve also found that letting the loaf cool completely before glazing gives the best drip-free finish, but I’m not above sneaking a slice warm when no one’s looking.
All these small tidbits add up to a loaf that’s reliably moist, bursting with flavor, and just a little indulgent. And every time I make it, I remember why I fell in love with baking in the first place—simple pleasures that bring everyone together.
Storing and Reheating Tips
Good news—this loaf stays fresh longer than you’d think. If you’re planning to enjoy it over a couple of days, wrap it tightly in plastic wrap or store it in an airtight container. At room temperature, it’ll stay good for 2-3 days—just don’t leave it in the sun or in a warm kitchen, or it might lose that tender crumb. For longer storage, pop it in the fridge for up to 5 days. Just be sure to wrap it well—moisture will keep the loaf moist, but it can also trap humidity that leads to a slight crust loss.
If you want to keep it for even longer, slice it and freeze it in airtight bags. Thaw at room temperature or warm slices in the microwave for about 15 seconds—perfect for a quick breakfast. For reheating the whole loaf, generously tent it with foil and warm at 300°F (150°C) for about 10-15 minutes. Once reheated, a quick fresh squeeze of lemon or drizzle of glaze really makes it taste just baked.
And if you’re worried about sogginess, just make sure to let it cool completely before storing and avoid wrapping it while still warm. The glaze, if added early, can become a little sticky, so I recommend glazing just before serving for the best presentation.
Frequently Asked Questions
Final Thoughts
If you’re looking for a baked good that’s as wholesome as it is delightful, this zucchini lemon loaf hits all those notes. It’s a little piece of sunshine that makes breakfast feel special and snacks feel like a treat. I love how simple ingredients come together to create something that’s moist, tender, and bursting with citrus flavor. Plus, it’s endlessly adaptable—swap out the lemon for lime, add some blueberries, or even sprinkle a handful of chopped nuts over the top. The best part? It’s a recipe that’s been tried and tasted by my family dozens of times, and each batch brings that same warm, welcoming smell and happy faces around the table. So go ahead, give it a try—I can’t wait to hear how yours turns out! And if you have a little twist of your own, share it in the comments—I love swapping ideas. Happy baking!
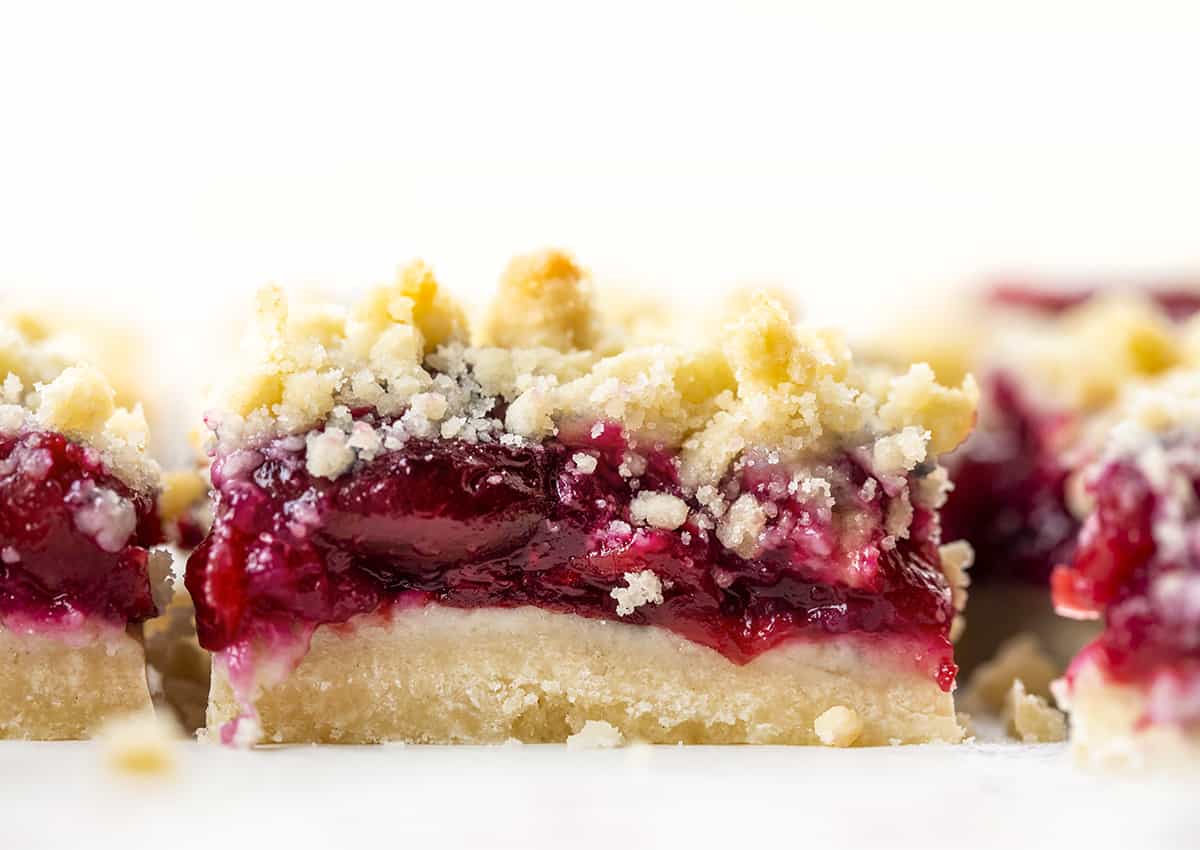
cherry bars
Ingredients
Method
- Preheat the oven to 375°F and line an 8x8-inch baking pan with parchment paper, including up the sides of the dish.
- In a large mixing bowl, add butter and sugar. Stir to combine.
- Add flour, baking soda, baking powder, and salt. Use a fork to stir the mixture together until combined. The mixture should look like crumbs.
- Remove ¾ cup of the mixture to use as the topping and set aside.
- Firmly press the remaining crumb mixture into the lined pan.
- Top with cherry pie filling.
- Using your hands, evenly distribute the reserved crumb mixture over the cherry pie filling.
- Bake 23-25 minutes, or until golden brown.
- Let the bars cool before cutting and serving.