Easy Hawaiian Mac Salad Recipe
You know those days when you’re craving something sweet but don’t really want to spend hours baking? Or when you’ve got a bunch of summer zucchinis growing like crazy in the garden, and you’re scratching your head wondering what to do with them? I get you. That’s exactly how this chocolate zucchini swirl cake became my go-to. It’s one of those recipes that’s secretly sneaky—healthy-ish, moist, incredibly chocolatey, and so addictive that my kids ask for it pretty much every week. The best part? It’s simple enough for a weeknight treat, but fancy enough to serve guests. Imagine a dense, fudgy cake with beautiful marbled swirls of zucchini and chocolate that’s so tender it practically melts in your mouth. Honestly, it’s like eating a rich brownie but with a sneaky veggie boost. Trust me on this one—once you try it, it’ll become part of your regular rotation, I promise.
What is a Zucchini Swirl Cake?
This cake is basically a delightful marriage between a classic chocolate loaf and a vibrant zucchini bread—only, it’s super moist, layered with swirls of grated zucchini, and finished off with a molten chocolate glaze. It’s called a “swirl” because, instead of mixing the zucchini into the batter completely, I like to layer the batter and then use a knife to create those beautiful, marbled patterns. Think of it as a sneaky way to get some greens in without anyone noticing. The name might sound fancy, but it’s just a cozy, family-friendly loaf that’s perfect for breakfast, a snack, or dessert. It originated from my desire to use up a glut of zucchinis after a backyard harvest, but honestly, it’s become one of our favorites all year round. It’s essentially a brownie-meets-banana bread but with zucchini—so good, so moist, and hard to resist.
Why you’ll love this recipe?
What I love most about this chocolate zucchini swirl cake is how it’s secretly healthy—kind of like a veggie-loaded treat that doesn’t make you feel guilty. The grated zucchini keeps every bite insanely moist without added oils or butter; yes, even in the gluten-free version, it’s still velvety and tender. Plus, the flavor? Oh, it’s just *chef’s kiss*—deep, rich, and chocolaty, with a subtle freshness from the zucchini that keeps it light. And since I often make it on busy nights, I can tell you it’s incredibly forgiving. No fancy gadgets needed—just a grater, a whisk, and a loaf pan. It’s budget-friendly too, with pantry staples like cocoa powder, flour, and a bit of sugar. My kids go nuts for the swirls—they say it’s “like magic,” and I love knowing I’m sneaking extra veggies into their diet. This one’s a lifesaver on hectic days when you want something comforting and satisfying, but you’re also trying to eat semi-clean. Oh, and the leftovers—if there are any—stay fresh for days, which makes it even better.
How do I make Zucchini Swirl Cake?
Quick Overview
This cake is a breeze to make. You start by preheating your oven and greasing a loaf pan. Then, you grate some zucchinis—squeeze out excess moisture because nobody wants a soggy cake! While the zucchinis hang out, you mix your dry ingredients like cocoa, flour, baking powder, and salt. Separately, you whisk together wet ingredients—perfectly ripe bananas or applesauce work great if you’re looking to cut sugar. Combine everything, fold in the grated zucchini, then pour half of the batter into your pan. Swirl in the rest of the batter with a spoon, creating those gorgeous marbled patterns. Bake until a toothpick comes out clean or with just a few moist crumbs—my oven usually takes about 45 minutes. Once it’s out, I let it cool just enough and then drizzle with a shiny, dark chocolate glaze. The smell alone will draw everyone into the kitchen—trust me!
Ingredients
For the Main Batter:
– 1 ½ cups all-purpose flour (or gluten-free blend if you like)
– ½ cup unsweetened cocoa powder (preferably good quality)
– 1 teaspoon baking powder
– ½ teaspoon baking soda
– ½ teaspoon salt
– ½ cup brown sugar (or coconut sugar for a healthier touch)
– ½ cup honey or maple syrup (if you want more sweetness)
– 2 large eggs
– ½ cup vegetable oil or melted coconut oil
– 1 teaspoon vanilla extract
– 1 cup grated zucchini (squeeze out excess moisture)
For the Filling (optional, but fun for swirl effect):
– Extra batter or chocolate chips if you want more richness.
For the Glaze:
– ½ cup dark chocolate chips
– 2 tablespoons heavy cream or coconut milk
– A pinch of sea salt (to balance the sweetness)
– Optional: a splash of vanilla or espresso for extra depth
Step-by-Step Instructions
Step 1: Preheat & Prep Pan
Preheat your oven to 350°F (175°C). Grease a standard loaf pan—you can use butter, butter spray, or parchment paper. I always do this first so I’m ready to go once the batter is mixed. Don’t forget to line the pan if you’re scared of sticking—especially if you’re using gluten-free flour because it can be a little temperamental.
Step 2: Mix Dry Ingredients
In a large bowl, whisk together the flour, cocoa powder, baking powder, baking soda, salt, and sugar. This part is crucial because it ensures everything is evenly distributed and prevents clumps of baking soda or cocoa in your final loaf. I’ve made the mistake of skipping this step once or twice—trust me, lumps are not your friend!
Step 3: Mix Wet Ingredients
In another bowl, beat the eggs lightly. Add the oil, vanilla, and your sweetener of choice—honey or maple syrup. If you want an even richer flavor, I sometimes mix in a teaspoon of espresso powder or a splash of vanilla. Stir until smooth. Warm the oil just a tad if you’re using coconut oil—this makes combining easier—then add the grated zucchini. Remember to squeeze out as much moisture as you can—if the zucchini’s too watery, your cake might turn out mushy, and nobody likes that.
Step 4: Combine
Now, pour the wet mixture into the dry ingredients. Fold gently—don’t overmix! Overmixing can make the cake dense. Just stir until everything is combined and the batter is a little thick. It should be chocolatey but still pourable. If it seems stiff, a splash of milk can loosen it up a bit.
Step 5: Prepare Filling
Pour about half of the batter into your prepared loaf pan. Then, spread or swirl in the remaining batter. For a pretty marbled effect, use a butter knife or skewer to gently swirl through the batter—don’t overdo it, or you’ll lose those lovely patterns.
Step 6: Layer & Swirl
Once layered, take a toothpick or skewer and gently create swirling patterns—zigzags or circles, whatever feels artistic! This step makes each slice a little piece of art, and kids always love watching the marbled look develop as it bakes.
Step 7: Bake
Bake for about 40-50 minutes, or until a toothpick inserted in the center comes out with just a few moist crumbs. Every oven’s a little different, so start checking around 40 minutes. If the top is getting too dark but the center isn’t baked, tent it with foil and keep going. I usually rotate the pan halfway through for even baking.
Step 8: Cool & Glaze
Let the cake cool in the pan for about 15 minutes. Then, transfer it to a wire rack. The best part? Drizzling the glaze while it’s still slightly warm. It softens the chocolate and creates that glossy finish that everyone will want a piece of. Use a spoon or a piping bag if you’re feeling fancy. Sometimes I sprinkle a little sea salt or chopped nuts on top before glazing—adds even more flavor.
Step 9: Slice & Serve
Once cooled completely, slice with a serrated knife. This cake is best served slightly warm or at room temperature. It pairs beautifully with a glass of cold milk, a strong coffee, or a dollop of whipped cream. And leftovers? Wrap tightly in plastic wrap or store in an airtight container—if it lasts that long!
What to Serve It With
This cake works wonders in so many settings. For a cozy weekend breakfast, slice it up and serve with fresh berries and a steaming cup of coffee. It’s equally delightful as an afternoon snack paired with a glass of cold milk or herbal tea. When I want to dress it up for a weekend brunch, I add a dollop of whipped cream and a few fresh mint leaves on top. And as a dessert, I like serving it with a little extra drizzle of honey or caramel sauce—trust me, it’s decadent enough without feeling heavy. Honestly, this cake is like a little piece of comfort—moist, chocolatey, with just enough zucchini to remind you of sunny garden days. My family loves it warm out of the oven, and my kids ask for it almost every weekend. It’s become our easy “special occasion” treat—because somehow, it feels fancy but is so incredibly easy to make.
Top Tips for Perfecting Your Chocolate Zucchini Swirl Cake
After making this countless times, I’ve picked up a few tricks that make all the difference. First, when grating the zucchini, use a fine grater and squeeze out as much moisture as possible—otherwise, the batter gets too thin, and the cake might turn out a little flat. I’ve tried different types of zucchinis, and honestly, the smaller, younger ones give the best flavor and moisture. If you prefer a completely gluten-free version, just use a good quality gluten-free flour blend—just note that it might need a splash more liquid because it can be a little drier.
Mixing is key—work gently and just until combined. Overmixing can lead to a dense loaf, which is the opposite of what we want here. For the swirl pattern, I like to pour half the batter, add dollops of the remaining batter on top, and then swirl it with a skewer or a knife. It creates those beautiful, marbled patterns that make every slice photogenic! Or, if you’re feeling adventurous, blend in some chopped nuts or chocolate chips to bump up the decadence.
When baking, every oven is different, so keep an eye on the cake after 40 minutes. Use the toothpick test—if it comes out with just a few moist crumbs, you’re done. If it’s wet, give it a few more minutes, but don’t overbake or it’ll dry out. The glaze is optional but adds a shiny, rich finish. I’ve experimented with various options—sometimes I add a splash of espresso or a pinch of chili powder for a spicy kick. Personally, I love the simplicity of just melted dark chocolate combined with a little cream. It’s luscious without being too sweet.
My biggest lesson? Let it cool at least 20 minutes before slicing—I’ve learned the hard way that this helps the cake set and makes slicing much neater. And the smell! Oh, that deep cocoa aroma with hints of zucchini—your whole house will smell like a bakery. Promise.
Storing and Reheating Tips
This cake keeps surprisingly well, which is a blessing since it often disappears in minutes at my house. At room temperature, it stays fresh for about two days if wrapped tightly. I find that loosely covering it with a clean towel or foil works great—no need for an airtight container if it’s not super humid outside. If I want to keep it longer, I pop it into the refrigerator after the first day. Just take it out about 15 minutes before serving so it’s not too cold—and if you warmed it slightly in the microwave for about 20 seconds, it’s just like fresh-baked. For freezing, wrap tightly in plastic wrap and then foil—this prevents freezer burn. It’ll last for up to three months. To reheat, thaw overnight in the fridge, then warm gently in the microwave or oven. I don’t recommend glazing before freezing—better to add that fresh when serving.
Frequently Asked Questions
Final Thoughts
If you’re on the hunt for a breakfast, snack, or dessert that feels indulgent but is secretly wholesome, this chocolate zucchini swirl cake is it. It’s become a staple in my kitchen thanks to its flexibility, affordability, and downright deliciousness. Every time I make it, I get a flurry of “Mmmms” and “Can I have seconds?” from my family, and honestly, that’s all the encouragement I need. Once you’ve made it a few times, you’ll see how forgiving and adaptable it is—try adding nuts, different extracts, or even a splash of booze for grown-up flair. It’s a recipe I’ll keep in my back pocket forever, and I hope it becomes yours too. Happy baking, and don’t forget to share pictures of your gorgeous marbled slices!
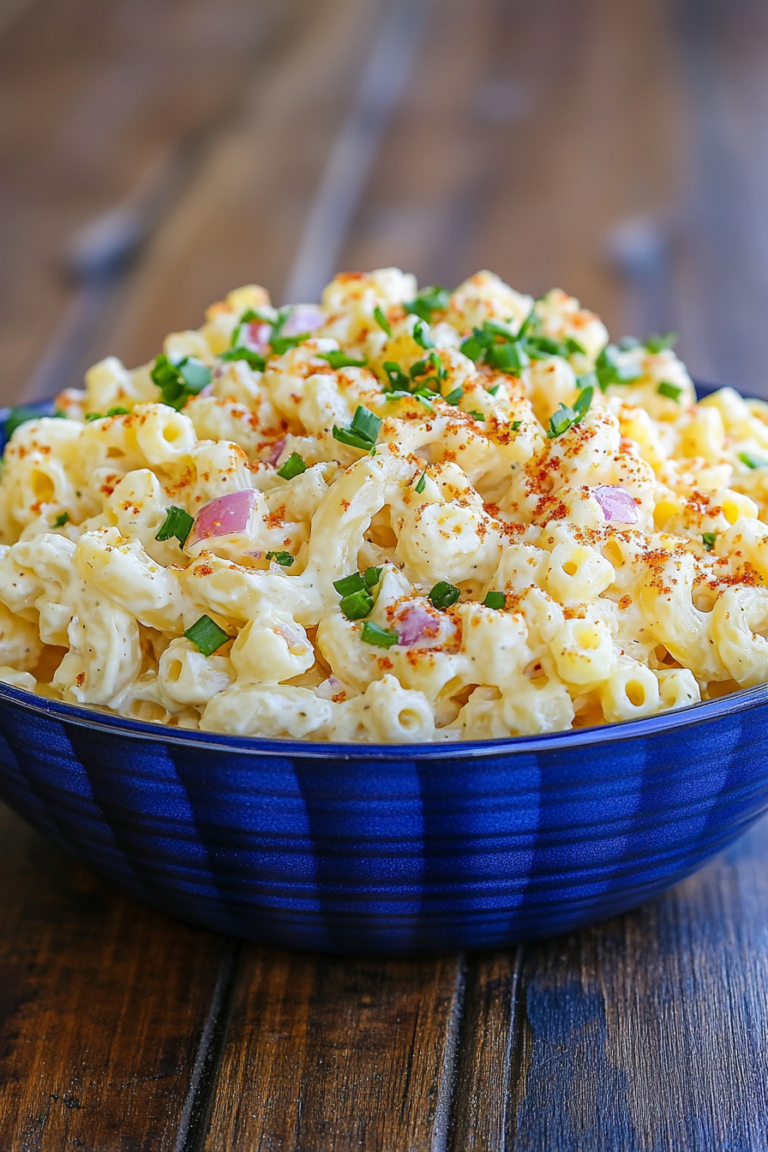
Hawaiian Mac Salad
Ingredients
Method
- Bring a large pot of salted water to a boil. Cook the pasta according to the package directions, but add 2 to 3 minutes to the cook time. You want the pasta to be just slightly overdone.
- When the pasta has finished cooking, drain the water and place the pasta in a large bowl and pour the apple cider vinegar over the noodles. Toss gently.
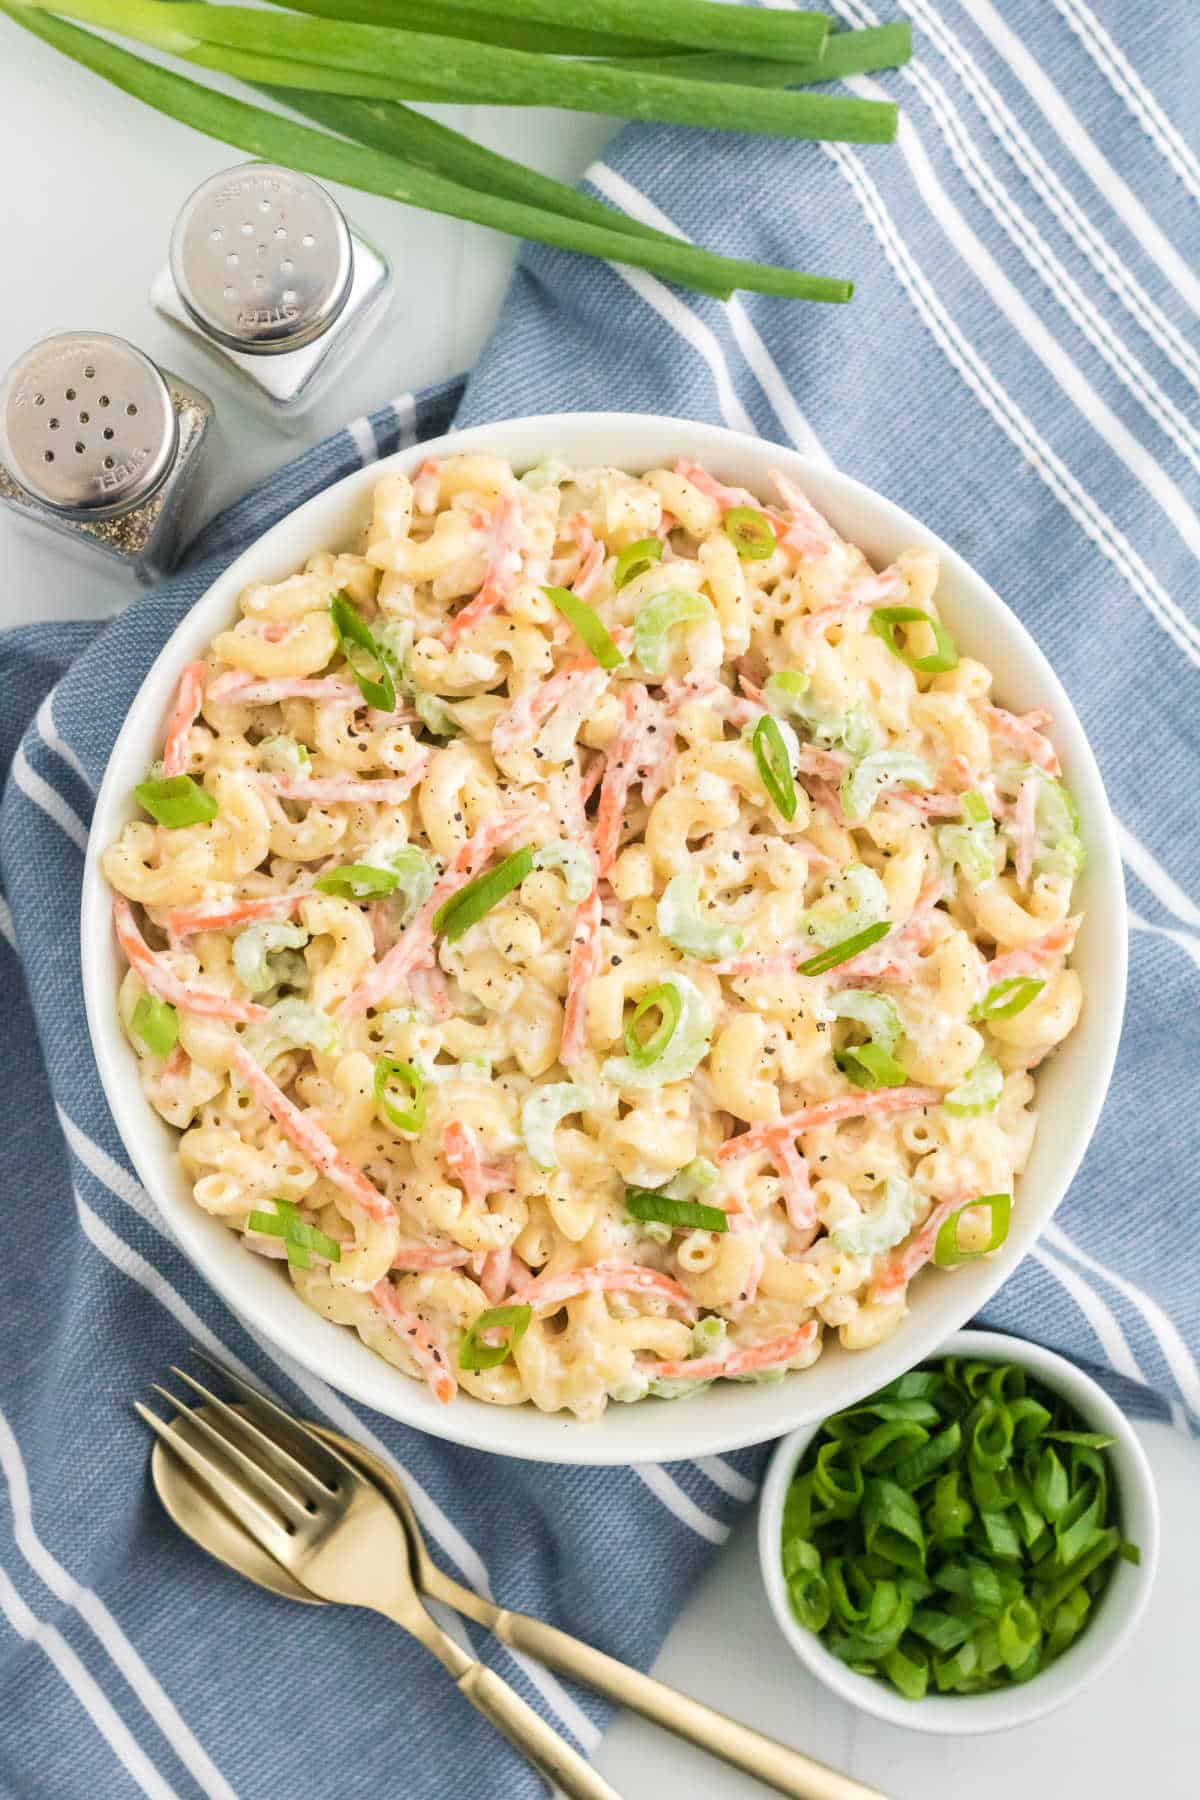
- Add the carrots, onion, and celery and toss gently.
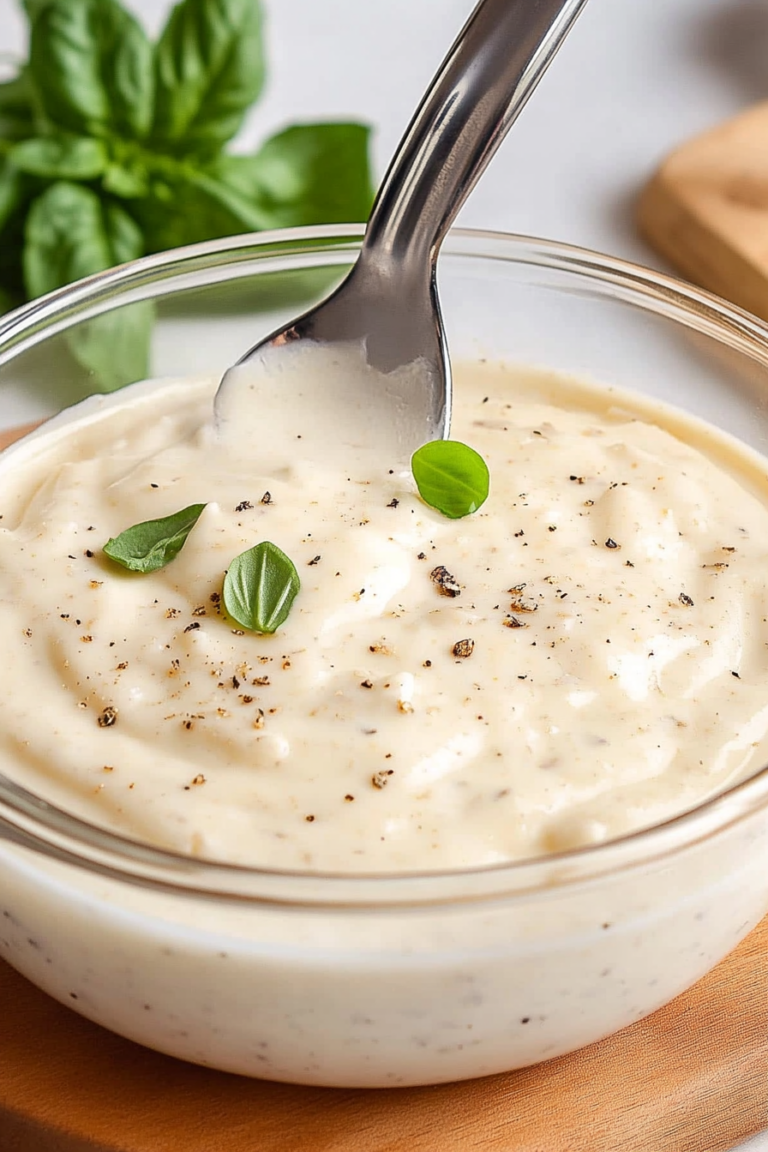
- In a medium sized bowl, add the mayonnaise, milk, and sugar. Mix well with a rubber spatula.
- Pour the mayonnaise dressing over the pasta veggie mix and toss gently to coat.
- Sprinkle the salt and pepper over the pasta salad.
- Chill the salad in the fridge for 30 minutes to 1 hour. Serve chilled.