Easy Fried Chicken Sandwich Recipe
If there’s one dessert I could eat forever, it’s this zucchini swirl cake. Sounds kinda strange, right? But trust me on this one — it’s all about the flavor, the moistness, and that little swirl of sweet goodness running through each bite. I remember my grandma making something similar, and honestly, I always thought zucchini was reserved for savory dishes. But after I tried turning it into a cake, I was hooked. This one’s a lifesaver on busy nights when I want something homemade but don’t want to spend hours in the kitchen. My kids ask for this all the time, especially because it’s so fun to cut into and watch that marbled pattern emerge. Plus, it’s a sneaky way to get some veggies into little kids who might turn their noses up at a bowl of steamed zucchini! So, get ready — this cake will become your new go-to for everything from casual weekends to special occasions. The smell alone will bring everyone to the kitchen in minutes. I promise, once you make this, you’ll be hooked too.
What is Zucchini Swirl Cake?
Think of it as a cross between a rich, fluffy cake and a hidden vegetable masterpiece. It’s essentially a moist vanilla or cinnamon-spiced cake layered or marbled with a sweet zucchini filling. The name might sound a little fancy, but it’s really just a fun twist on classic loaf or marble cakes. The idea originated from a simple need — how to sneak in some extra veggies without fuss — but over time, it’s turned into a crowd favorite. The zucchini adds moisture like no other, making each slice melt-in-your-mouth tender. And that swirl of cinnamon sugar or cream cheese filling? It’s pure magic. I love how versatile this cake is: you can swap in different spices or add nuts if you like. The best part? The batter comes together so quickly, it’s perfect for last-minute snacking or when guests unexpectedly pop by. It’s such a warm hug in cake form — comforting, homey, and just a little unexpected.
Why you’ll love this recipe?
There are a few reasons why I keep coming back to this zucchini swirl cake — it’s honestly become a family staple. First, the flavor is just next-level sweet and slightly spicy. That hint of cinnamon or nutmeg compliments the zucchini beautifully, creating a cake that’s both comforting and a little fancy. What I love most about this is how ridiculously easy it is to pull together, even after a long day. No fancy equipment needed, just a bowl, a whisk, and some patience while it bakes. Plus, it’s budget-friendly — most of what you need, you probably already have in your pantry. And here’s the best part: it’s incredibly versatile. You can serve it as a dessert, a brunch treat, or even as an afternoon snack with tea. I’ve played around with different fillings and frostings, and each variation turns out equally delicious. The texture is what really makes this special — moist, tender, and packed with little bursts of sweetness every time you swirl the filling through. And if you think zucchini in a cake sounds weird, I promise it just adds an extra layer of richness that’s impossible to resist. This cake has saved many a busy weeknight and always makes my kitchen smell like home.
How do I make Zucchini Swirl Cake?
Quick Overview
This cake is a simple one-bowl wonder. You start by preheating your oven, then mix the dry ingredients while you grate your zucchini — I always do this last to keep it fresh and lively. The batter comes together quickly, and the secret is not overmixing to keep it light and fluffy. The zucchini filling is just a lightly sweetened mixture, ready to swirl through the batter before baking. Once it’s in the oven, you’ll be dazzled by how it rises and turns golden. After cooling, I love to add a quick glaze or dusting of powdered sugar for that perfect finish. It’s honestly one of those recipes that makes everyone ask, “Wow, how is this so good?” — and little do they know, it’s mostly sneaky zucchini!
Ingredients
For the Main Batter:
– 2 cups all-purpose flour (I like to use a good quality brand for the best texture)
– 1 ½ cups granulated sugar (can reduce slightly if you prefer less sweetness)
– 1 teaspoon baking powder
– ½ teaspoon baking soda
– 1 teaspoon ground cinnamon (or nutmeg if you’re feeling extra cozy)
– ¼ teaspoon salt
– ¾ cup vegetable oil (or applesauce for a lighter version)
– 3 large eggs (trust me, buy farm-fresh if you can, it makes a difference)
– 1 teaspoon vanilla extract
– 1 cup finely grated zucchini (squeeze out excess moisture to avoid sogginess)
For the Filling:
– 1 cup grated zucchini (again, squeeze out moisture)
– ¼ cup brown sugar
– 1 teaspoon ground cinnamon
– 1 tablespoon flour or cornstarch (helps thicken and hold the swirl)
For the Glaze:
– ½ cup powdered sugar
– 1-2 tablespoons milk (or lemon juice for zing)
– A splash of vanilla or almond extract (optional, for flavor)
Step-by-Step Instructions
Step 1: Preheat & Prep Pan
Set your oven to 350°F (180°C). Grease a standard loaf pan or line it with parchment paper — I like using parchment because it’s less fiddly, and I get clean slices every time. Once the oven’s warm, get your ingredients ready. Grate the zucchini first — I use the fine side of a box grater. Keep a paper towel nearby to squeeze out excess moisture, because trust me on this — too much water can make the cake dense and heavy.
Step 2: Mix Dry Ingredients
In a big bowl, whisk together the flour, sugar, baking powder, baking soda, cinnamon, and salt. This step ensures that everything distributes evenly, so your cake bakes beautifully and rises nicely. When I do this step, I like to run my fingers through the flour to break up any clumps, especially if your sugar’s a little grainy.
Step 3: Mix Wet Ingredients
In a separate bowl, beat the eggs lightly, then add the oil and vanilla. Mix until smooth — this usually takes about a minute. Then, stir in the grated zucchini, making sure it’s evenly coated. If your zucchini is super watery, I recommend squeezing out as much liquid as you can because it helps keep the batter nice and tender.
Step 4: Combine
Pour the wet mixture into the dry ingredients. Using a spatula or spoon, gently fold until just combined. Don’t overmix — that’s the secret to keeping the cake light. A few lumps are totally fine. Overmixing can lead to a dense cake, and nobody wants that!
Step 5: Prepare Filling
In a small bowl, toss the grated zucchini with brown sugar, cinnamon, and flour. It should look like a coarse crumble. If you want a more decadent swirl, feel free to add a dollop of cream cheese or nut butter — I’ve experimented with both, and they’re game changers.
Step 6: Layer & Swirl
Pour half of the batter into your prepared pan. Spread the zucchini filling evenly over the top, then cover with the remaining batter. Using a knife or skewer, gently swirl through the batter to create a marbled effect. It’s such a satisfying step — just do a few gentle zigzags, and watch the swirl come to life!
Step 7: Bake
Pop it in your preheated oven and bake for 45-55 minutes. The top should be golden, and a toothpick inserted into the center should come out clean. Every oven is a little different — I’ve found my oven needs about 50 minutes, but I start checking at 45 just in case. If the top browns too quickly, cover loosely with foil.
Step 8: Cool & Glaze
Let the cake cool in the pan for about 15 minutes before transferring it to a wire rack. Once cooled—you don’t want the glaze melting—mix powdered sugar with milk and vanilla until it’s smooth but pourable. Drizzle over the cake, and wait a few minutes for the glaze to set. The aroma alone is enough to make everyone sit at the kitchen table!
Step 9: Slice & Serve
Use a serrated knife for clean cuts. I like slicing this cake slightly warm because the inside stays moist and the swirl looks extra pretty. Serve with tea or a glass of cold milk, and watch your family devour it fast. Trust me, leftovers are rare — but if you do have some, just cover with plastic wrap or store in an airtight container.
What to Serve It With
This zucchini swirl cake is incredibly versatile. In the mornings, I like to slice a piece and toast it lightly, then slather with butter or cream cheese. It’s a fantastic accompaniment to a strong cup of black coffee or a milky chai. On weekends, I’ll serve it as part of a brunch spread alongside crispy bacon, fresh fruit, and topped with whipped cream. It makes a simple yet impressive dessert after dinner, especially when paired with a scoop of vanilla ice cream or a drizzle of honey. Sometimes, I even crumble it into yogurt for a cozy, veggie-inspired breakfast bowl. The kids love that their sneaky veggies become a sweet indulgence, and I love how easy it is to whip up on a lazy afternoon. This cake has become a little tradition of ours — perfect for sneaking in some nutrients without sacrificing flavor. It’s also a great way to use up extra zucchini during summer. Honestly, I never get tired of seeing how pretty those marbled layers look — it’s like edible art in every slice.
Top Tips for Perfecting Your Zucchini Swirl Cake
If you want to elevate your cake game, here are some of my favorite tricks learned over years of baking. First, when grating zucchini, don’t skip squeezing out the excess water. It’s tempting to skip, but trust me, moistness is key to a tender crumb. I use a clean dish towel or paper towel — just press out as much moisture as possible. Second, don’t overmix the batter once you’ve added the wet ingredients; this is the golden rule for fluffy cakes. I always fold gently and stop as soon as the batter is just combined. For the swirl, try alternating spoonfuls of batter and filling — it creates a more defined pattern, which looks beautiful when sliced. You can also experiment with flavor substitutions, like adding lemon zest for brightness or chopped nuts for crunch. If you’re looking for a dairy-free version, replace the eggs with applesauce and use plant-based milk. Just note the texture might shift slightly, but it’ll still be delicious. I’ve tested adding coconut flakes, and they add a nice tropical twist, just be careful not to overload the batter. Honestly, the key is patience and a gentle touch — the more you practice, the better your swirls will look and taste. Plus, don’t forget to keep your zucchini fresh if you’re not baking right away — it makes all the difference in moisture and flavor. This recipe is forgiving, adaptable, and, most importantly, shows how a humble vegetable can turn into something truly special.
Storing and Reheating Tips
This cake is best enjoyed within a couple of days, but if you need to store it, I have a few tricks. At room temperature, it stays fresh for about two days if wrapped tightly in plastic or stored in an airtight container. After that, I recommend refrigerating it — just be sure to cover it well, or it’ll dry out. I prefer storing it in a loaf or cake container with a tight lid. To reheat slices, just pop them in the microwave for about 10-15 seconds — it’s like the first warm bite all over again. If you want to keep it longer, freezing is your friend. Wrap individual slices tightly in plastic wrap, then foil, and store for up to a month. When you’re ready to eat, just thaw at room temperature or warm it gently in the microwave. Keep in mind, the glaze might need a quick reapplication or touch-up if it gets a little dull after refrigerating. Trust me, the flavor actually gets better over time — the spices meld and deepen, and the moistness stays just right. If you do make the glaze fresh each time, I think it tastes even brighter after refrigerating. Overall, this cake’s flexibility makes it perfect for weekend baking marathons or last-minute cravings.
Frequently Asked Questions
Final Thoughts
This zucchini swirl cake is one of those recipes that makes me feel connected to my roots — kind of like a warm hug from the kitchen. It’s simple enough to throw together on a busy weeknight, but elegant enough for a company’s dessert table. The sneaky veggie component makes everyone feel a little healthier, even as they indulge in the moist, flavorful slices. I love how adaptable it is — you can jazz it up with different spices, nuts, or even swirl in some cocoa powder for a chocolate twist. More than anything, it’s a testament to how humble ingredients, when handled with a little love, can turn into truly memorable food. I can’t wait to hear how yours turns out — don’t forget to share your tweaks and favorites! Happy baking, and remember: it’s the love in the kitchen that makes everything taste just right.
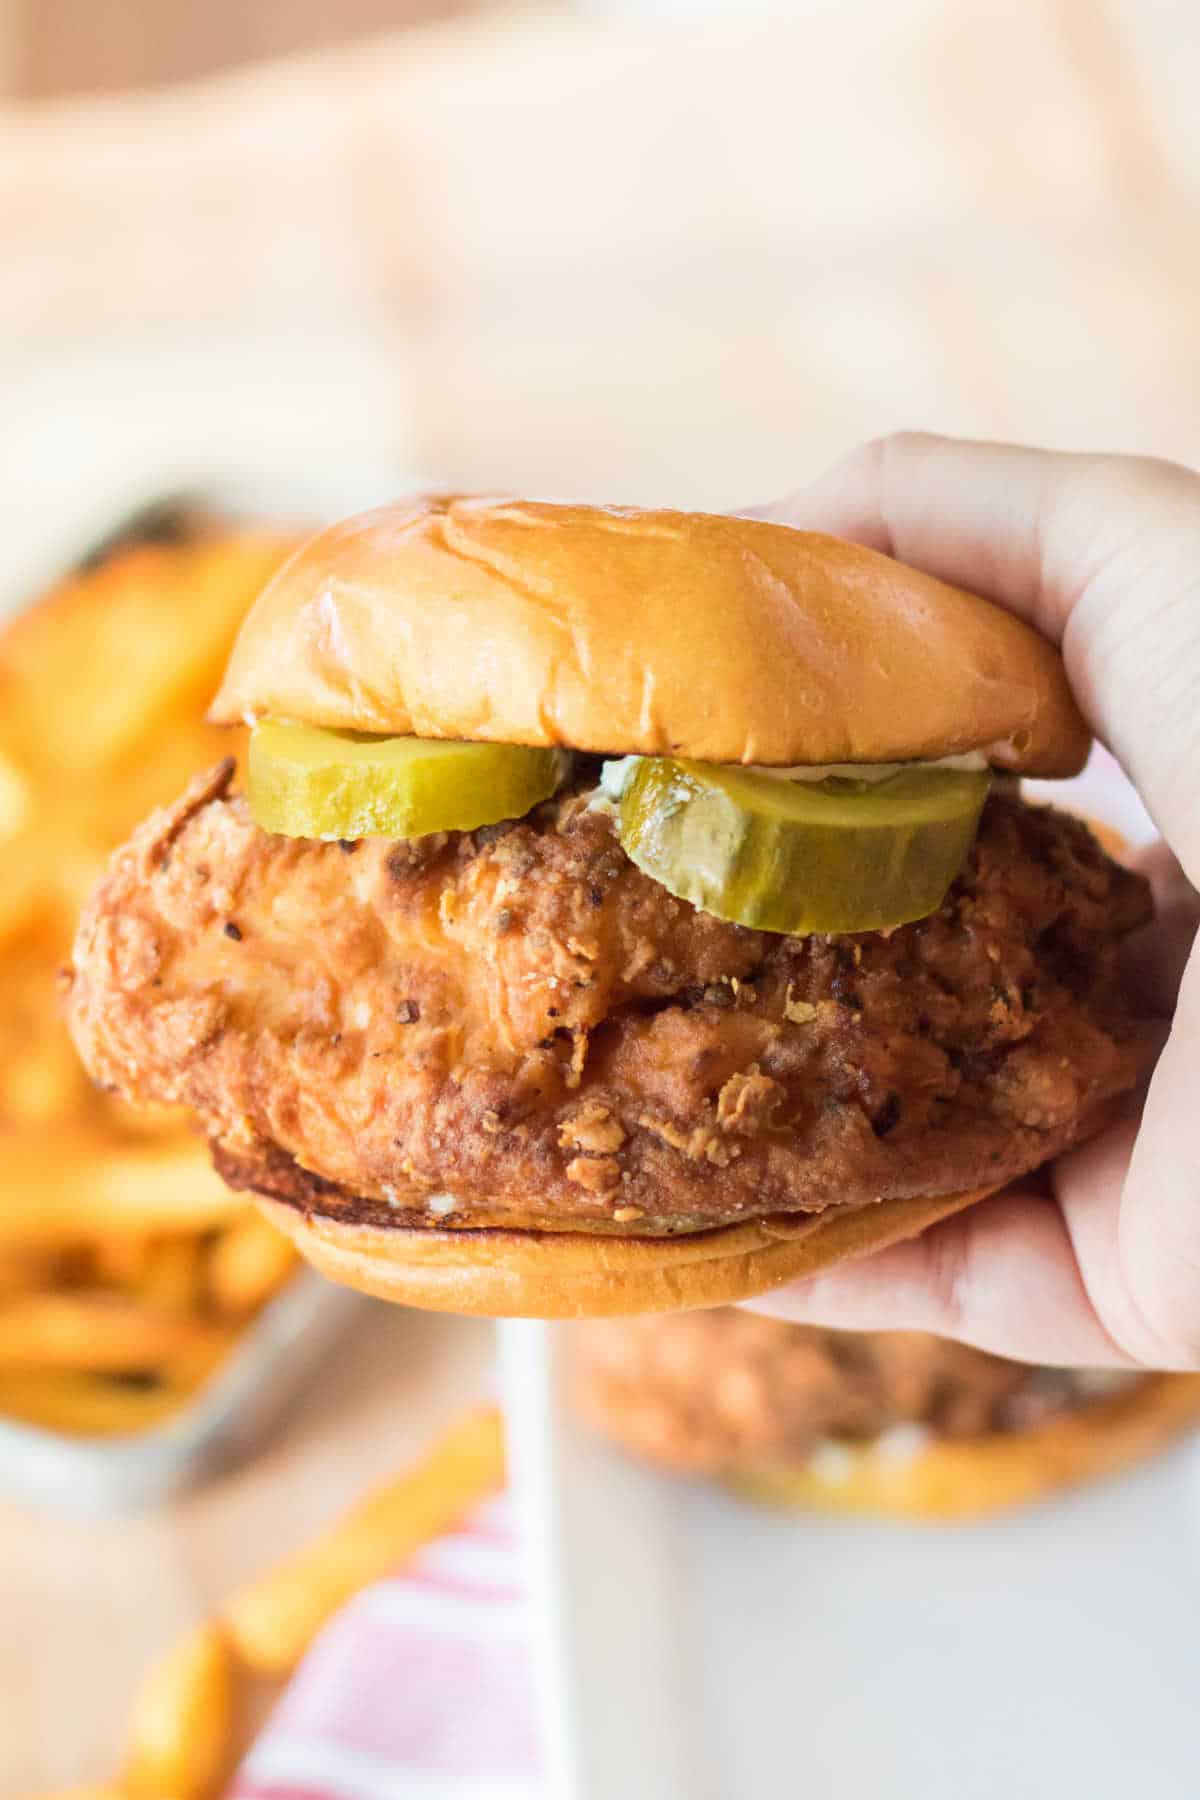
chicken sandwich
Ingredients
Method
- Pound the chicken breasts lightly and trim any extra fat off.
- In a small bowl, stir together the Cajun seasoning, pepper, garlic powder, onion powder, and sugar.
- Add 1 tablespoon of the seasoning mix to the buttermilk and stir to combine. Pour over the chicken and marinate for at least 1 hour.
- Combine the remaining seasoning mix with the flour and whisk to combine.
- Dip the marinated chicken into the flour mixture, pressing chunks of flour onto the chicken.
- In a large heavy pan, heat vegetable oil to 350°F. Fry chicken pieces for 5-6 minutes until golden and cooked through.
- Remove fried chicken and place on cooling rack. Repeat with remaining chicken.
- Assemble the sandwiches by placing the fried chicken on toasted brioche buns, spreading mayonnaise, and adding pickle slices if desired.