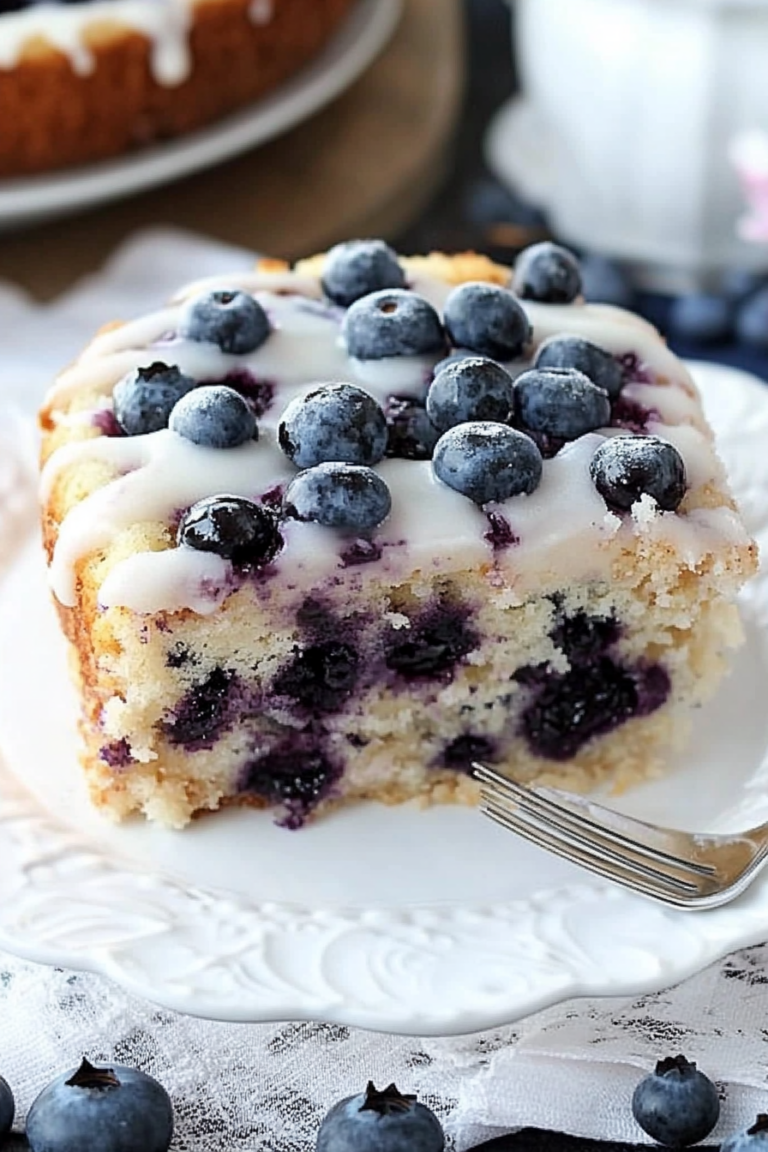
Easy Blueberry Muffins: A Simple Morning Treat
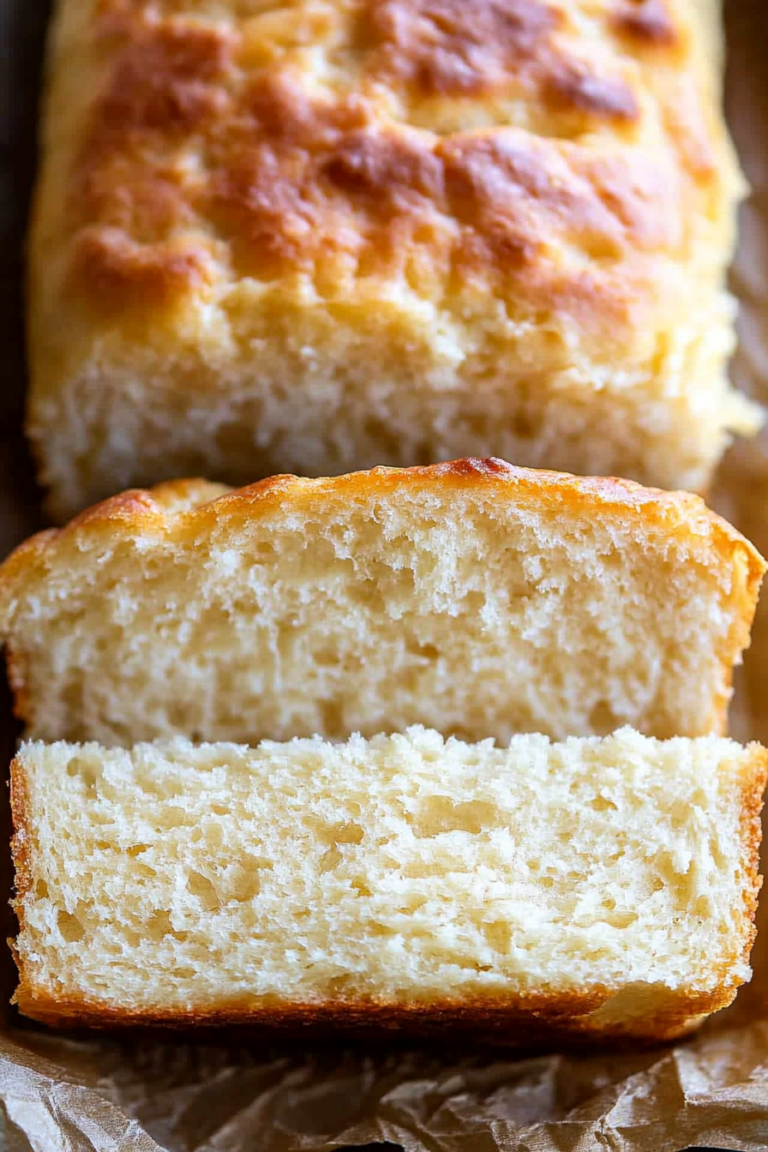
There’s something so cozy about biting into a slice of homemade loaf, especially when it’s packed with fresh zucchini and warm spices. I still remember my grandmother baking something similar on lazy Sunday afternoons — the warm smell filling every corner of her kitchen, making the whole house feel like a hug. Over the years, I’ve tweaked and played with this recipe until it became my go-to “pick-me-up” in the afternoon or a sweet surprise for friends. It’s honestly a lifesaver on busy nights when I want something sweet but don’t want to fuss with complicated baking. Plus, my kids ask for this all the time — it’s become part of our family routine. The best part? It’s almost impossible to mess up, and a slice pairs perfectly with a cup of coffee or tea. Trust me, once you try this zucchini spice loaf, it’ll be in your regular rotation too. And yes, it’s just as good the next day—if it lasts that long! Okay, let’s dive in and make some magic happen in the kitchen.
What is Zucchini Spice Loaf with Cream Cheese Swirl?
This zesty, spiced zucchini loaf is essentially a cozy, homemade cake you can enjoy for breakfast, tea, or dessert. Think of it as a mash-up between best-loved banana bread and a cinnamon-swirl coffee cake, but with a veggie twist! The zucchini keeps the loaf incredibly moist—so much so that you don’t even notice it’s there at first. The warm blend of cinnamon, nutmeg, and cloves gives it that inviting aroma every time I bake it, and the cream cheese swirl adds a tangy richness that balances out the sweetness beautifully. The name might seem fancy, but really, it’s just a simple quick bread with a fancy little swirl on top that makes it perfect for sharing or snagging a slice on a lazy weekend morning. This recipe is approachable, forgiving, and totally adaptable—whether you want to swap out some spices, add nuts, or even switch up the glaze, it’s all about making it your own.
Why you’ll love this recipe?
What I love most about this zucchini spice loaf is how effortlessly it combines comfort with elegance. The flavor? Out of this world. You get that warm hit of cinnamon and nutmeg with the subtle earthiness of zucchini — it’s like a hug for your taste buds. Plus, it’s crazy easy to make. Seriously, I’ve tested this with my kids running around, and as long as you have your ingredients handy, you’re good to go. The batter comes together in minutes, and the swirl step? It’s so fun to do. I also love how budget-friendly this is—all those simple pantry staples like flour, sugar, and spices. And the best part? It’s super versatile. Serve it sliced warm with butter, or dust it with powdered sugar for that bakery-style finish. My friends always ask for the recipe because it’s such a crowd-pleaser, and I always do this when I want a quick dessert without turning on the oven for hours. It’s honestly my secret weapon when I need a warm, sweet treat, no fuss involved. Plus, I’ve made this with almond milk instead of regular milk, and it actually made it even creamier—so don’t be shy to experiment!
How do you make Zucchini Spice Loaf with Cream Cheese Swirl?
Quick Overview
This loaf is a quick-batter kinda deal — just mix your dry ingredients in one bowl, wet in another, then combine gently to keep it light and airy. The batter gets poured into a loaf pan, layered with a luscious cream cheese mixture, then swirled into that gorgeous marbled pattern. The whole thing bakes in under an hour, filling your kitchen with cinnamon and vanilla. Once baked, I like to let it cool just enough so the cream cheese doesn’t run everywhere, then drizzle it with a simple glaze or dust with powdered sugar. It’s honestly so straightforward, and since the ingredients are so basic, you probably have most of it already in your pantry. The best part? No complicated steps or fancy tools—just good old-fashioned baking love.
Ingredients
For the Main Batter:
– 2 cups all-purpose flour (I like to use unbleached—it has a lovely depth)
– 1 cup granulated sugar (or coconut sugar for a slight caramel note)
– 1 teaspoon baking powder
– ½ teaspoon baking soda
– 1 teaspoon ground cinnamon
– ½ teaspoon freshly grated nutmeg
– ¼ teaspoon ground cloves (trust me, a little goes a long way)
– ½ teaspoon salt
– ¾ cup vegetable oil or melted unsalted butter
– 3 large eggs
– 1 cup grated zucchini (squeeze out excess moisture, or the loaf can be a little too damp)
For the Filling:
– 4 oz cream cheese, softened
– ¼ cup granulated sugar
– 1 teaspoon vanilla extract
– A pinch of salt (to balance the richness)
For the Glaze:
– ½ cup powdered sugar
– 1-2 teaspoons milk or lemon juice
– Optional: a splash of vanilla or citrus zest for flavor
Step-by-Step Instructions
Step 1: Preheat & Prep Pan
Set your oven to 350°F (175°C). Grease a standard 9×5-inch loaf pan with butter or spray, then line with parchment for easy removal. This helps with that perfect, crack-free top. You can also use a silicone loaf pan if you have one—works beautifully and makes cleanup a breeze.
Step 2: Mix Dry Ingredients
In a large bowl, whisk together the flour, sugar, baking powder, baking soda, spices, and salt. Mixing these first ensures everything is evenly distributed — essential for a balanced rise and flavor. The smell of cinnamon and nutmeg just filled my kitchen as I did this last time; it’s such a cozy moment.
Step 3: Mix Wet Ingredients
In another bowl, beat the eggs, then add the oil, vanilla, and grated zucchini. I always do this next—it’s like a little ritual that gets my batter nice and smooth. For a richer flavor, I sometimes swap half the oil for applesauce or Greek yogurt—both work well in this recipe and make it a little lighter.
Step 4: Combine
Pour the wet ingredients into the dry, then gently fold until just combined. Don’t overmix — I’ve learned the hard way that overbeaten batter can turn dense. It should look a little lumpy but combined; that’s perfect.
Step 5: Prepare Filling
Mix the softened cream cheese, sugar, vanilla, and salt until smooth. It should be creamy but firm enough to spread easily. If I want a little variation, I sometimes add lemon zest or a handful of chopped nuts here.
Step 6: Layer & Swirl
Pour half the batter into the pan, spread the cream cheese mixture on top, then pour the rest of the batter over. Use a knife or toothpick to swirl the layers into a marbled pattern — don’t overdo it, just a few gentle swirls to keep it pretty. This part is so fun, like making art with batter!
Step 7: Bake
Pop it into the oven and bake for about 50-60 minutes. Start checking around 50 minutes — insert a toothpick in the center, and if it comes out clean, you’re good. If you see moist crumbs, give it a few more minutes. The smell alone will make your whole house smell like cinnamon spice heaven.
Step 8: Cool & Glaze
Remove from oven and let the loaf cool in the pan for about 15 minutes, then transfer to a wire rack. Once cooled slightly, drizzle with your glaze or dust with powdered sugar. I usually wait until it’s just warm — the glaze melts into the cracks and looks so bakery-professional.
Step 9: Slice & Serve
Use a serrated knife to cut neat slices — I find waiting until it’s almost at room temp makes for cleaner cuts. Serve with a dollop of butter or a splash of honey. It’s amazing warm or at room temperature, and leftovers keep well in an airtight container.
What to Serve It With
This loaf is pretty versatile. For breakfast, I love pairing it with a strong cup of coffee or a mild herbal tea—something that balances all those warm spices. My kids enjoy it toasted with a smear of cream cheese or a little honey drizzled on top. On brunch, I’ll arrange slices on a pretty platter with fresh berries and a side of Greek yogurt—looks as pretty as it tastes. As a dessert, it’s fantastic on its own, or I’ll serve it with a scoop of vanilla ice cream or whipped cream for that extra special touch. When I need an afternoon snack, I cut thick slices, add a pat of butter, and maybe sprinkle a little cinnamon sugar. To me, it’s comfort food at its best—warm, sweet, and a little spicy, reminding me of lazy Sundays and cozy mornings. You can also make little muffins from this batter if you’re in a hurry; just fill muffin tins, reduce baking time to about 20-25 minutes, and you’re all set. My family loves these for quick breakfasts, and they freeze beautifully, so I always bake extras for busy mornings. The best part? It’s so adaptable—add chopped nuts, raisins, or even cranberries if you want to give it your own twist.
Top Tips for Perfecting Your Zucchini Spice Loaf with Cream Cheese Swirl
This recipe is super forgiving, but a few tricks do help it turn out even better. First, grated zucchini is key — make sure you squeeze out as much moisture as possible, or your loaf might come out a little soggy. I usually do this by wrapping the zucchini in a clean kitchen towel and giving it a good squeeze. It’s the secret to keeping the crumb light and tender. When mixing the batter, I recommend folding gently—overmixing can make it dense, which nobody wants in a comfy loaf like this. For the swirl, I’ve experimented with different patterns—spirals, marbled swirls, or just random strokes—and honestly, all look pretty in the end. If you want a more intense flavor, add a tablespoon of maple syrup or honey to the batter. As for ingredient swaps, I’ve successfully used gluten-free flour blends and coconut sugar, and the texture holds up well—just keep an eye on baking times as they might vary. If you’re baking late in the day, I recommend lowering the oven temperature slightly to prevent over-browning. For the glaze, I found that adding a splash of lemon juice brightens the sweetness and balances the spices. You can also swap the glaze for a dusting of cinnamon sugar or a drizzle of honey. One thing I’ve learned from making this dozens of times? Patience pays off — let the loaf cool well before slicing to keep the perfect, clean cuts. And don’t be afraid to get creative with filling and decorating; this recipe is basically a blank canvas!
Storing and Reheating Tips
This loaf keeps surprisingly well—especially if you wrap it tightly in plastic wrap or store it in an airtight container. Leftover slices are perfect for breakfast or snack later in the day. At room temperature, I find it stays fresh for about two days; after that, I pop it into the fridge, where it’s good for up to five days. To keep it moist, I recommend wrapping it well to prevent drying out. If you want to make it ahead, you can freeze slices—just wrap each piece tightly with plastic, then place them in a zip-top bag. Thaw at room temp or gently warm in the microwave—trust me, a warm slice tastes even better! If you added glaze, it’s best to add it just before serving to prevent any sogginess. I’ve also experimented with reheating slices in a low-temperature oven to retain that fresh-baked texture. Honestly, this loaf tastes just as delicious a few days later, especially if you toast it lightly first. And if you’re short on time, just pop a slice in the microwave for about 10-15 seconds for that fresh-baked warm goodness.
Frequently Asked Questions
Final Thoughts
Honestly, this zucchini spice loaf with cream cheese swirl has become one of my favorite baking discoveries. It’s simple enough to whip up any day, but special enough to serve for family gatherings or when friends pop by unexpectedly. There’s just something about those warm spices and the tender crumb paired with a tangy cream cheese ribbon—every bite feels nostalgic and indulgent all at once. I love how adaptable it is, too; I’ve experimented with different spices, added chopped nuts, or even swapped out the glaze for fresh fruit compote. Every time I bake it, I get a little excited because I know it’s going to bring smiles, cozy feelings, and maybe even a few happy tears of comfort. Do give it a try — I can’t wait to hear how yours turns out! And don’t forget to share your own tweaks or photos—I’d love to see your beautiful creations. Happy baking, and enjoy every slice!

blueberry muffins
Ingredients
Method
- Preheat oven to 425 degrees. Line jumbo muffin cups with paper liners. Set aside.
- In large mixing bowl, cream butter with 1 cup of sugar for about 2 minutes. Add eggs, one at a time, beating well after each addition.
- Beat in vanilla extract.
- Add 2 cups of flour, salt, baking powder gradually while mixing by hand, alternating with milk in about 3 additions.
- Remove about 1 cup of batter and set aside. In a small bowl, toss blueberries with remaining 1 tablespoon of flour to lightly coat.
- Gently fold coated blueberries into the batter, being careful not to overmix.
- Divide batter among muffin cups using a large scoop, filling about 2/3 full. Drop reserved batter over the top and press a few blueberries into the surface if desired.
- Sprinkle the muffin tops with extra sugar.
- Bake in the oven at 425 degrees for 35 minutes, then immediately reduce oven temperature to 350 degrees and bake for an additional 10 minutes.