Easy Asian Noodle Salad Recipe
There’s something about biting into a rich, fudgy brownie that takes me right back to my childhood, sitting at my grandma’s kitchen table. But this recipe? It’s a little different—because it sneaks in zucchini, and honestly, it’s a total game-changer. I always do this when I want something sweet but don’t want to wait for a full cake to bake—these zucchini brownies are my go-to for those quick, cozy moments. My kids ask for them all the time, and even my pickiest eater doesn’t suspect that sneaky veggie is hiding inside. Plus, the texture is insanely good—moist, dense, and just the right chewy bite. I’ve tested this a million times, tweaking the extras, and I swear, this version is perfection. Honestly, the smell alone when they’re baking will have everyone in the house drooling. Ready to get baking and bring some love and deliciousness into your kitchen?
What is Zucchini Brownies?
Think of zucchini brownies as the cozy, slightly healthier cousin of your classic chocolate treats. They’re essentially fudgy brownies but with a hidden, nutritious twist—zucchini! Yes, you heard that right. The zucchini melts into the batter, adding moisture and a subtle veggie boost that makes these brownies feel a little lighter and a lot more sneaky. The name “zucchini brownie” might sound unconventional, but once you taste them, you’ll wonder why more folks aren’t baking with zucchini all the time! It’s kind of like that classic carrot cake, but with a modern, veggie-loving spin. The best part? You can keep it simple with just cocoa and chocolate chips, or jazz it up with nuts, coconut, or even a dash of chili powder if you’re feeling adventurous. The idea is to make a show-stopping chocolate fix that’s as cozy and comforting as sitting in your favorite chair with a warm blanket.
Why you’ll love this recipe?
Honestly, what I love most about these zucchini brownies is how versatile and forgiving they are. They’re a lifesaver on busy nights when I don’t want to fuss over complicated desserts but still crave that decadent, chocolatey treat. The flavor is *almost* too good for how simple they are—deep, rich cocoa with just a hint of sweetness that hits you right in the soul. And because of the zucchini, they’re naturally a little more moist and tender, which is perfect if you like brownies that melt in your mouth. Cost-wise, it’s a winner—most of us already have the ingredients in the pantry. Plus, I love that you can customize them with whatever you have on hand—chocolate chips, walnuts, shredded coconut… I’ve even tested adding a splash of vanilla or a pinch of cinnamon for extra warmth. What I love most, though, is how these brownies disappear in minutes at my house. My kids actually ask for seconds, and sometimes I indulge and have another one myself—not feeling guilty because, well, zucchini.
This isn’t just another brownie recipe; it’s like a little bit of magic hiding inside a wholesome, family-favorite dessert. It’s perfect for when you want to impress but don’t want to spend hours baking. Plus, you get the bonus of sneaking in some veggies without anyone knowing! Trust me on this one—once you try these zucchini brownies, you’ll be making them constantly. They’re a total comfort food, wrapped in a healthyish little package, and I can’t wait for you to try them.
How do I make Zucchini Brownies?
Quick Overview
This recipe is refreshingly simple. First, you grate the zucchini and squeeze out some excess moisture—this prevents sogginess. Then, you mix your wet ingredients like eggs, oil, and vanilla. Separately, you whisk together cocoa powder, sugar, baking powder, and flour. Once everything’s ready, you combine the wet and dry, fold in your zucchini and chocolate chips, and pour into a baking dish. A quick bake later, you get irresistibly fudgy brownies that are careful not to overbake—because, trust me, you want that perfect, chewy middle. This method keeps it straightforward and stress-free, which is exactly what I need when I’m craving something sweet but don’t want to get lost in complicated steps.
Ingredients
For the Main Batter:
– 1 ½ cups grated zucchini (about 2 medium zucchinis, fresh and firm)
– ½ cup vegetable oil or melted butter
– 3 large eggs
– 1 teaspoon vanilla extract
– ¾ cup sugar (white or coconut sugar for a healthier touch)
– ½ cup unsweetened cocoa powder
– 1 teaspoon baking powder
– ½ teaspoon salt
– 1 cup all-purpose flour (or almond flour if you prefer gluten-free)
For the Filling:
– ½ cup chocolate chips (dark or semi-sweet)
– Optional: chopped nuts, shredded coconut, or cinnamon for extra flavor
For the Glaze:
– ½ cup powder sugar mixed with a teaspoon of milk or cream, or simply dust with cocoa powder for a more rustic look. Or, do a quick melted chocolate drizzle for extra decadence.
Step-by-Step Instructions
Step 1: Preheat & Prep Pan
Set your oven to 350°F (175°C) and line a 8×8-inch square baking dish with parchment paper or lightly grease it. This step is your best friend—it prevents sticking and makes cleanup so much easier. Throw in a quick spritz of cooking spray, especially on the corners—the more evenly greased, the less hassle when you cut the brownies later. While you wait, grate your zucchinis on a box grater, then squeeze out the excess moisture with a clean kitchen towel or paper towels. I’ve made this mistake before—don’t skip that step, or your brownies might turn out a little watery. Trust me, it’s all about that moisture balance!
Step 2: Mix Dry Ingredients
In a small bowl, whisk together the cocoa powder, baking powder, and salt. Set this aside. I do this first because it helps evenly distribute the dry ingredients so that the cocoa isn’t lumpy or uneven in your batter. Also, I’ve learned the hard way that cocoa clumps can make your brownies uneven in flavor—so whisk it good!
Step 3: Mix Wet Ingredients
In a larger bowl, whisk together the eggs, oil, and vanilla until smooth. Add the sugar and stir until well combined. The mixture should look glossy and start to loosen up—I usually do this step right after grating the zucchini because it helps to build that cozy base. I’ve tried using different oils, and honestly, melted coconut oil gives a subtle tropical flavor that I love. If I’m feeling a bit adventurous, I’ll add a splash of almond extract here.
Step 4: Combine
Gradually fold the dry ingredients into the wet, mixing just until they’re combined. Don’t overmix—this is key to keeping your brownies tender. You’ll notice the batter darkens and thickens, which is exactly what you want. If your batter feels too thick, a splash of almond milk can loosen it up. But I usually don’t need to—we want that dense, fudgy consistency.
Step 5: Prepare Filling
Fold in the chocolate chips and optional extras like nuts or shredded coconut. I love adding walnuts for a little crunch. If you’re a cinnamon fan, a pinch here adds cozy warmth. This is where you can get creative—just remember to keep the mix even so every bite gets a hit of chocolate.
Step 6: Layer & Swirl
Pour half of the batter into your prepared pan, then sprinkle or dollop the filling on top. Gently swirl with a toothpick or a skewer to create a marbled effect. I love doing this a little randomly—sometimes making beautiful patterns, other times just haphazardly swirling for that homey, rustic look. It’s like art in the oven, but you don’t need to be a pro.
Step 7: Bake
Pop it in the oven for about 25-30 minutes. Keep an eye on it—don’t overbake or they’ll lose that fudgy texture I love. Test with a toothpick: it should come out with moist crumbs, not wet batter. Sometimes, my oven runs hot and I take them out a tad earlier—better to underbake slightly than dry them out!
Step 8: Cool & Glaze
Let the brownies cool in the pan for at least 15 minutes. Patience is key here—rushing this step can cause cracks or uneven cuts. Once cooled, drizzle with melted chocolate or dust with powdered sugar. I often do a quick chocolate drizzle—melt some chocolate chips and spoon it over, then let it set. It’s that little extra that makes them look fancy but is so simple.
Step 9: Slice & Serve
Use a sharp knife to cut into squares or rectangles. Because these are fudgy, I recommend wiping the knife clean between cuts—it keeps your edges neat. Serve at room temperature, maybe with a dollop of whipped cream or a glass of cold milk. Warm, fresh-out-of-the-oven brownies are irresistible, but honestly, they’re just as good the next day—if you can resist the temptation!
What to Serve It With
My favorite way to enjoy these zucchini brownies depends on the mood. For breakfast, I like slicing a warm one and topping it with a little Greek yogurt or a drizzle of honey—kind of like a chocolatey breakfast treat. It sounds indulgent, but it’s honestly a quick way to start the day with a little happiness. During brunch, serve them alongside fresh berries and a light coffee or tea—makes for a relaxed, cozy vibe. As a dessert after dinner, I suggest dolloping whipped cream or a scoop of vanilla ice cream on the side—yum! For casual snacks, a simple dusting of powdered sugar or just a glass of cold milk is perfect. I grew up with brownies as a family staple—this version gets the kids excited, and I love that it sneaks in some veggies. Plus, they’re so adaptable—you can add coconut, swap the chocolate chips for white chocolate, or even spice them up a bit with cayenne or cinnamon. It’s a baked good that genuinely feels like a warm hug, anytime of day.
Top Tips for Perfecting Your Zucchini Brownies
Over the years, I’ve picked up a few tricks that help me nail these brownies every single time. First, when grating the zucchini, always use a box grater; it gives you the perfect size for moistness without overwhelming the batter. Squeezing out excess water is essential—I’ve learned this lesson the hard way, or you end up with a soggy mess. Trust me, a clean dish towel or cheesecloth makes this step so much easier. When mixing, don’t overstir once the dry ingredients are added—less is more to keep the brownies tender. I’ve made the mistake of overmixing folk, and the texture becomes dense or rubbery. For the swirl pattern, I lightly drag a skewer through the batter—visuals are nice, but it’s really about that rustic, home-baked look. Substitutions? I tested using almond flour, and it worked beautifully—just reduce the oil slightly because nuts absorb more moisture. Also, if you want to cut back on sugar, a combo of honey and coconut sugar works well, but keep in mind it may slightly alter the texture. When baking, my oven runs hot, so I tend to check around the 23-minute mark—every oven varies! For the glaze, I like a quick mixture of powdered sugar and a splash of cream—smooth enough to drizzle but thick enough to hold its shape. Sometimes, I sprinkle sea salt on top before serving, which adds a lovely little counterbalance to the sweetness. Honestly, I’ve learned that the little imperfections—like cracked tops or uneven swirls—just make them more charming. These brownies are all about cozy imperfections and loving them just as they are.
Storing and Reheating Tips
So, you’ve baked up a batch of these gorgeous zucchini brownies—what’s next? The good news is, they keep surprisingly well. At room temperature, keep them in an airtight container or cover with foil for up to 2 days. If you’re planning to stash them longer, refrigeration is your friend. Just pop them into a sealed container in the fridge, where they’ll stay fresh for about 5 days. I like to gently warm a slice in the microwave for about 10 seconds if I want that just-baked feel—I swear, it revives the fudginess! Freezing is also easy: wrap individual pieces in plastic wrap, then tuck into a freezer bag. They’ll happily live there for up to 3 months. When ready to enjoy, defrost at room temperature for a quick snack, or warm them up slightly. A quick reheat in the microwave turns these into a gooey, warm treasure—perfect for those late-night cravings when you want something sweet but don’t feel like baking again. I recommend adding your glaze or toppings fresh after reheating, so they stay that shiny, appealing finish. The key is not to overheat or leave them uncovered—moisture is what keeps these brownies luscious, after all.
Frequently Asked Questions
Final Thoughts
There’s something truly special about these zucchini brownies—they’re like a warm hug wrapped in a chocolatey blanket. I love how forgiving they are, how easy they come together, and how they transform a simple vegetable into a decadent treat. Every time I bake them, I get this nostalgic feeling—the smell wafts through the house, and I remember the afternoons I spent helping my grandma bake, or sneaking a piece early before dinner. They remind me that baking doesn’t have to be complicated to be meaningful. Whether you’re making these for a quick dessert, a snack to pack in your kids’ lunch, or just because you need a bite of comfort, I promise they’ll become a staple in your kitchen too. So go ahead, give these zucchini brownies a try, and watch how everyone turns into a happy, chocolate-loving zucchini convert. I’d love to hear how they turn out—leave a comment or share your variations! Happy baking and sweet moments to you!
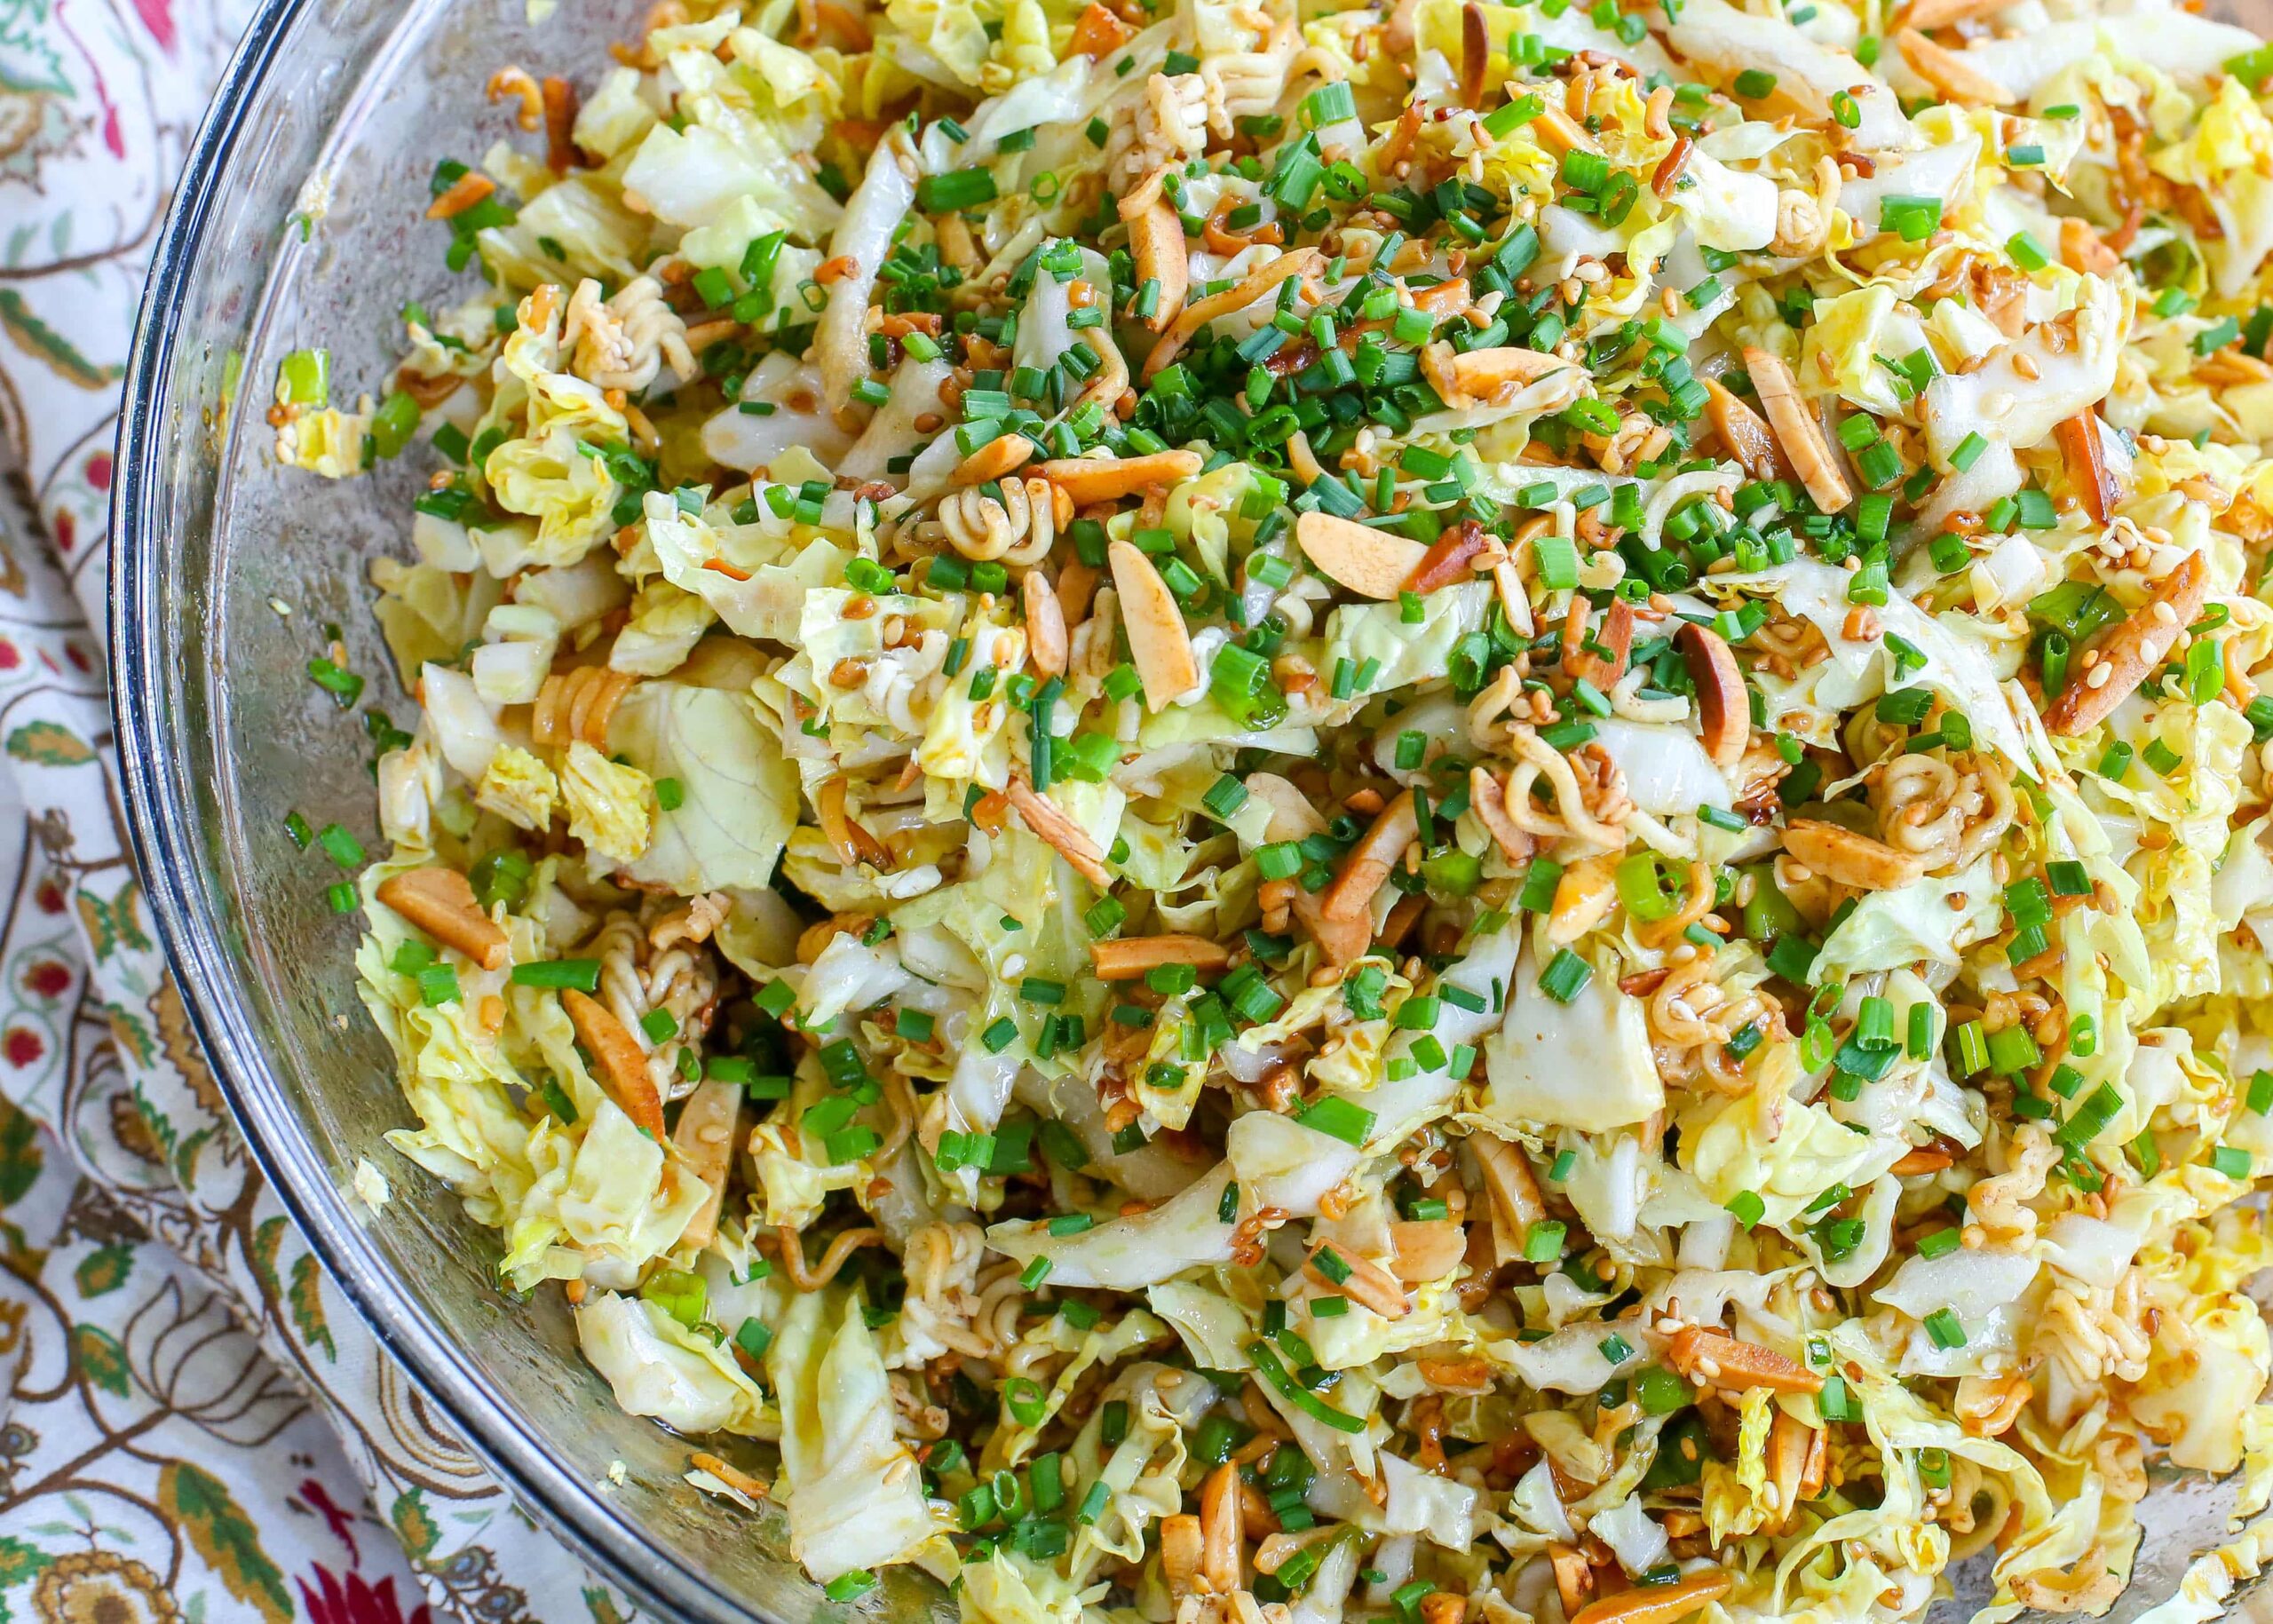
ramen noodle salad
Ingredients
Method
- Preheat oven to 350°F and spread ramen noodles on a baking sheet in a single layer. Bake for 5 minutes or until crunchy and golden. Remove and let cool.
- In a large bowl, combine sliced cabbage, red bell pepper, shredded carrots, and chopped green onions.
- In a separate small bowl, whisk together soy sauce, rice vinegar, vegetable oil, honey, grated ginger, and minced garlic until well blended.
- Pour the dressing over the vegetable mixture and toss to coat evenly.
- Just before serving, add the cooled crunchy ramen noodles and toasted almonds to the salad and gently mix.