Autumn Spice Snack Mix How to Make It
There’s something about pulling a warm loaf out of the oven that feels like a cozy hug, isn’t there? I remember the first time I whipped up this zucchini chocolate chip loaf during a hectic week, and honestly, it became an instant favorite around here. My kids ask for this all the time, and I love how it’s practically foolproof—perfect when you want something sweet but also want to sneak in some veggies. Plus, I swear, the smell alone brings everyone running to the kitchen like a magnet. This isn’t your typical banana bread or bundt cake — it’s truly special, with a moist crumb, pockets of melty chocolate, and a flavor that’s just the right balance of sweet and cozy. Whether it’s for breakfast, a snack, or dessert after dinner, I always find myself reaching for this loaf—trust me, this one’s a lifesaver on busy nights or when I need a little treat that’s still a little wholesome. Let’s get baking, shall we? You’re going to love it!
What is Zucchini Chocolate Chip Loaf?
Think of this zucchini chocolate chip loaf as the sneaky, irresistibly delicious sibling of zucchini bread. It’s basically a tender, moist cake that’s packed with shredded zucchini—yes, zucchini!—but no one will ever guess because it’s packed with rich chocolate chips and just a whisper of vanilla. The recipe hails from my grandma’s kitchen, but I’ve tweaked it over the years to make it even easier and more irresistibly chocolatey. It’s essentially a bread, but honestly, I serve it as a dessert or snack because it’s that indulgent. The shredded zucchini melts into the batter, keeping everything super moist and giving it an unexpected nutritional boost that my kids love. It’s perfect for using up those summer zucchinis, and my favorite part? It stays deliciously soft for days—if it lasts that long! And yes, it’s a little sneaky in the best way possible.
Why you’ll love this recipe?
What I love most about this zucchini chocolate chip loaf is how it manages to be both wholesome and decadent at the same time. The moist crumb is just perfect—moist enough to make you feel like you’re biting into a cake, but still breadish enough to feel comforting and homey. The chocolate chips, oh wow, they melt slightly during baking, creating pockets of gooey sweetness that make every bite a little celebration. It’s incredibly simple to make—you won’t believe how quick it comes together. You just toss everything into a bowl, stir gently, and pour into a loaf pan—easy peasy! Another big plus is how budget-friendly it is: just a handful of pantry staples and a zucchini from your garden or farmers’ market is all you need. I also love how versatile it is—you can serve it with coffee in the morning, cut thick for a snack, or present it as a fancy dessert with a dusting of powdered sugar. Honestly, what I love most about this is how it’s become a quick, reliable crowd-pleaser that I can make on a whim. And it’s practically impossible to mess up—believe me, I’ve tested it with almond milk, coconut oil, even a little bit of leftover jam on top, and it always works out beautifully.
How do you make Zucchini Chocolate Chip Loaf?
Quick Overview
This zucchini chocolate chip loaf is a no-fuss recipe that comes together in about 10-15 minutes once you have your ingredients prepped. The batter is mixed just until everything is incorporated—no overmixing, or it gets tough. Then, it’s baked until golden and a toothpick inserted in the center comes out clean. The trick is to grate the zucchini finely, squeeze out excess moisture (more on that later), and mix everything gently. The result is a moist, chocolate-baven loaf that tastes like a treat but sneaks in some veggies, making me feel a little less guilty about that second slice. Trust me, this makes your house smell fantastic while baking — that warm, chocolaty aroma fills every corner of the kitchen and pretty much guarantees a happy crowd. It’s a simple comfort that I always keep in my back pocket for unexpected guests or a quick snack on busy days.
Ingredients
For the Main Batter:
– 2 cups all-purpose flour (or a gluten-free blend if you prefer)
– 1 tsp baking soda
– 1/2 tsp baking powder
– 1/2 tsp salt
– 1/2 cup granulated sugar (or honey/maple syrup for a natural touch)
– 1/3 cup vegetable oil (or melted coconut oil for extra flavor)
– 2 large eggs
– 1 tsp vanilla extract
– 1 cup finely shredded zucchini (about 1 small zucchini)
– 1/2 cup mini chocolate chips (or more if you’re feeling extra indulgent)
For the Filling:
– I like to keep it simple with just the zucchini and chocolate chips. Optional: chopped nuts or a sprinkle of cinnamon for extra warmth.
For the Glaze (Optional):
– 1/2 cup powdered sugar
– 1-2 tsp milk or cream
– A splash of vanilla or cocoa powder for flavor variation
Adjust for desired thickness—since I love drizzling it over the cooled loaf for that extra touch of sweetness.
Step-by-Step Instructions
Step 1: Preheat & Prep Pan
Set your oven to 350°F (175°C). Grease a standard loaf pan with butter or non-stick spray, and lightly dust with flour, or line it with parchment paper for easy removal. I always do this early so I don’t forget—nothing worse than fighting a stubborn loaf out of the pan!
Step 2: Mix Dry Ingredients
In a large bowl, whisk together the flour, baking soda, baking powder, salt, and sugar. This ensures everything’s evenly distributed and gets those leaveners working evenly in the batter. I learned the hard way that skipping this step sometimes leads to uneven rising or pockets of flour in the mix—so don’t rush it!
Step 3: Mix Wet Ingredients
In a separate bowl, whisk the eggs, oil, and vanilla until well combined. I like to do this right in my measuring cup for easy pouring later. Once smooth, pour into the dry ingredients. Make sure your zucchini is grated finely—coarse shreds tend to make the batter uneven. A little squeeze of the grated zucchini to remove excess moisture is key—otherwise, your loaf might turn out a little too dense or soggy. I do this by wrapping the zucchini in a clean dish towel and giving it a good squeeze, which helps keep things balanced.
Step 4: Combine
Gently fold the wet ingredients into the dry, just until combined. Don’t overmix! A few lumps are fine, and this keeps the loaf super tender. That’s when I add the chocolate chips—folding them in gently to distribute without breaking them apart. Sometimes I also sprinkle a few extra on top before baking so it looks pretty when it comes out—I can’t resist a gooey top!
Step 5: Prepare Filling
Since this batter already has the zucchini and chocolate chips, I just ensure they’re evenly dispersed. If you want to mix in nuts or dried fruit, now’s the time. I’ve tried chopped walnuts—yum! Just keep in mind that moisture from some add-ins can affect the overall batter consistency.
Step 6: Layer & Swirl
If you want a marbled effect, you can pour half the batter into the pan, then sprinkle some extra chocolate chips or nuts, add the rest, and swirl gently with a knife or toothpick. I like to keep it simple—just a spoonful here and there makes a pretty marbled pattern during baking, but nothing too intricate. The goal is a lovely, random swirl that looks homey and inviting.
Step 7: Bake
Pop it into your preheated oven and bake for about 50-60 minutes. Test with a toothpick—stick it in the center, and if it comes out clean, you’re good. If it’s still wet, give it another 5-10 minutes. I’ve found that ovens vary—my old back-of-the-house oven always takes a little longer. Keep an eye on that golden crust developing. Resist opening the oven door too early or your loaf might sink or turn dense.
Step 8: Cool & Glaze
When the loaf is golden and a toothpick comes out clean, let it cool in the pan for about 10 minutes, then transfer to a wire rack. If you’re glazing, wait until it’s just warm or cooled to avoid melting the glaze completely—the pretty drizzle looks much better that way! I’ve tested this with simple powdered sugar glaze, but a touch of cocoa powder makes it extra chocolatey—delicious.
Step 9: Slice & Serve
Once fully cooled, slice with a serrated knife for clean cuts. I like thick slices—perfect with a cup of coffee or tea. I find that this loaf is even better the next day, once those flavors have settled. It’s lovely sprinkled with a little powdered sugar or served plain. Honestly, I usually can’t wait to sneak a piece warm from the oven—hot, melty chocolate is the best end to any day!
What to Serve It With
This loaf is versatile enough to suit several occasions. For breakfast, it’s divine with a smear of butter and some fresh fruit—or a tall glass of milk if you want to feel like a kid again. I often serve it for brunch alongside scrambled eggs and crisp bacon, or on a lazy Sunday afternoon with a pot of coffee and some fresh berries. When it’s time for dessert, I like to dress it up with a dusting of powdered sugar, a drizzle of caramel sauce, or a scoop of vanilla ice cream. My family loves crispy roasted almonds on top or even a smear of cream cheese for extra indulgence. And the best part? It’s a total crowd-pleaser—everyone’s happy, and it’s a lovely way to use up those zucchinis from the garden. Honestly, it disappears in minutes whenever I make it—my secret weapon for quick, cozy gatherings!
Top Tips for Perfecting Your Zucchini Chocolate Chip Loaf
Over the years, I’ve tried a bunch of tricks to get this loaf just right. Here’s what I’ve learned:
Zucchini Prep: The key is to grate it finely and squeeze out as much moisture as possible. Last summer, I left the zucchini a bit too chunky, and the batter turned out wetter than I liked. Now I always give it a good squeeze—works like magic! Also, use fresh zucchini for the best flavor; frozen works too but drain thoroughly and pat dry.
Mixing Advice: Don’t overmix once you add the wet ingredients—that’s when gluten develops and your loaf can turn dense. I just fold gently until there are no streaks of flour. A light hand keeps it tender and fluffy.
Swirl Customization: For fun, I sometimes add a swirl of peanut butter or caramel in the middle—just dollop it in and swirl with a skewer. Pretty and extra tasty! It’s all about visual interest and flavor layering.
Ingredient Swaps: I tested coconut oil instead of vegetable oil—delicious! Or honey instead of sugar—works beautifully. For a healthier twist, try reducing the sugar or using maple syrup. Just adjust the liquid balance accordingly.
Baking Tips: Every oven is different. If your loaf seems browner on top before it’s baked through, loosely tent it with foil to prevent burning. Also, I always place a baking sheet on the rack below in case of drips—because, trust me, batter leaks! Test doneness with a toothpick—if it comes out sticky, give it five more minutes.
Glaze Variations: If you’re feeling fancy, add a teaspoon of espresso powder to the glaze for a mocha touch or stir in a splash of liqueur—recommendations include Baileys or Kahlua. Or skip the glaze altogether and dust with powdered sugar for a more understated look. The texture should be smooth but not runny—adjust with a splash more milk if needed.
These little tips help me troubleshoot common issues and make the loaf even better every time. Like any good recipe, I’ve learned from mistakes—overmixing, underbaking, or rushing to decorate—so take your time, enjoy the process, and I promise, you’ll end up with a loaf that’s cozy, chocolatey, and just the right amount of indulgent.
Storing and Reheating Tips
This loaf stays wonderfully moist for about 2-3 days at room temperature, wrapped tightly in foil or stored in an airtight container. I recommend slicing it beforehand if you’re planning to reheat—makes serving super easy. If you want it warmer or softer, microwave a slice for about 15-20 seconds—perfect when you’re craving that melt-in-your-mouth feel. For longer storage, I keep leftovers in the fridge for up to a week, but I find that it’s best eaten within three days for optimal freshness. When it comes to freezing, wrap individual slices tightly in plastic wrap and stash in a freezer bag—just defrost at room temperature or quick warm-up in the microwave. If you add the glaze later, wait until you’re ready to serve so it stays glossy and fresh. This way, you can enjoy a slice on a busy morning or late-night craving without worrying about it drying out or losing flavor. Nothing beats waking up to the smell of a fresh warm loaf—trust me on this!
Frequently Asked Questions
Final Thoughts
If there’s one recipe I keep coming back to, it’s this zucchini chocolate chip loaf. It’s like a little piece of home—moist, chocolatey, and infused with a heartfelt touch of nostalgia. I love how simple it is to whip up, making it perfect for lazy weekends or busy weekdays when I need a quick treat that hits all the right notes. Plus, the sneaky zucchini keeps it moist and healthier than it looks, which my kids appreciate—though, between you and me, I think they’d love it even if it was just loaded with chocolate and sugar! This never fails to bring smiles and compliments at my house, and I bet it’ll do the same in yours. So, go ahead, give it a try—you might just discover your new favorite comfort food. And hey, I’d love to hear how it turns out or if you’ve added your own special twists. Happy baking!

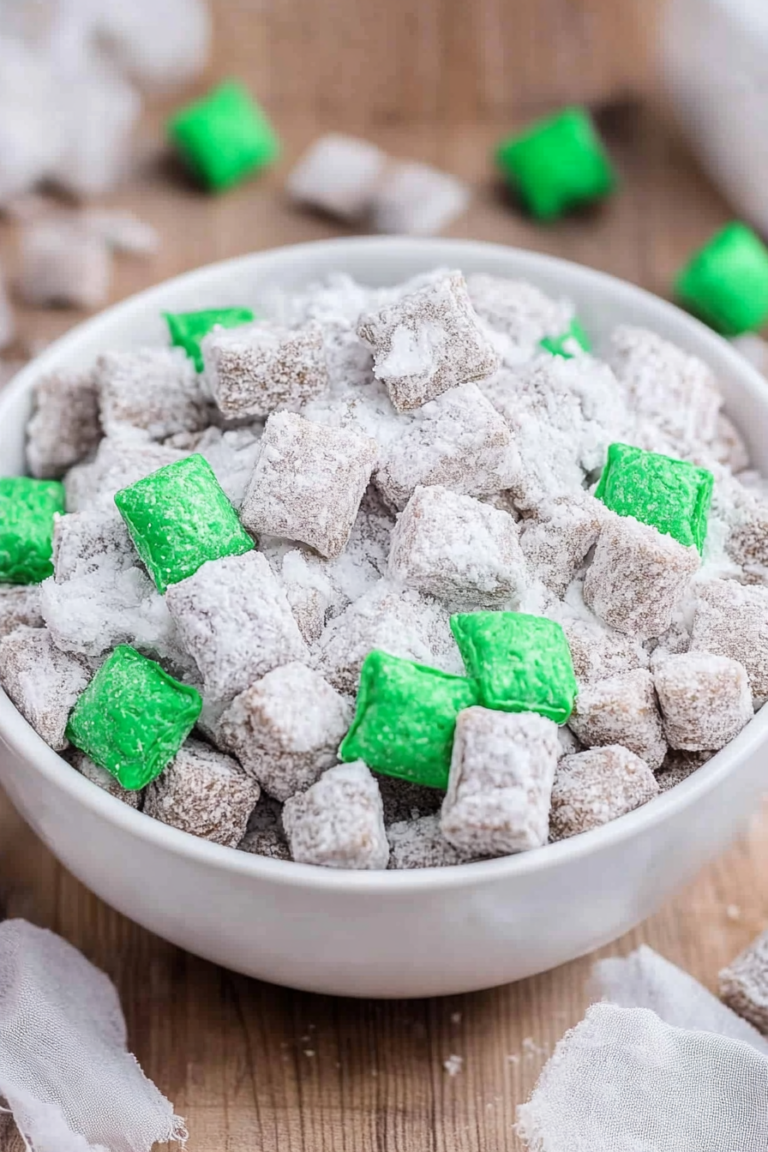
pumpkin spice
Ingredients
Method
- In a large mixing bowl, combine the cereal, pretzels, and Bugles.
- In a small bowl, stir together melted butter, brown sugar, pumpkin pie spice, and vanilla extract. Pour over the dry mixture and stir to coat.
- Spread the mixture evenly onto a baking sheet lined with parchment paper or a silicone baking mat.
- Bake at 275°F for 45 minutes, stirring every 15 minutes to ensure even coating and prevent burning.
- Allow the snack mix to cool completely. Toss with candy pieces (candy corn, pumpkins, Reese’s).
- Store in an airtight container and enjoy by the handful.