Stacked Cabbage Rolls How to Make Them
You know that feeling when you’re rummaging through your kitchen late at night, craving something sweet but don’t really want to bake an entire cake? That’s pretty much how this zucchini and cream cheese swirl cake came into my life. It’s one of those recipes I’ve made dozens of times, and every single time, it disappears in minutes at my house. The aroma alone makes everyone drop what they’re doing—sweet vanilla, a hint of fresh zucchini, and that fluffy, tender crumb. Plus, it’s WAY easier than it sounds. I always do this when I want a slice of comfort that’s both cozy and a little fancy, perfect for those weekends or even a quick weekday treat. And trust me, my kids ask for this all the time. It’s almost like a cinnamon roll without the fuss, but with that extra surprise swirl of creamy cheese. If you’re looking for a new dessert that feels almost gourmet but is still totally homey—you’ve just found it. Grab a cup of coffee and let’s chat about my all-time favorite zucchini treat!
What is Zucchini & Cream Cheese Swirl Cake?
This cake is basically a tender, moist vanilla sponge infused with shredded zucchini (yes, zucchini!) and layered with a luscious cream cheese swirl. Think of it as a cross between a quick bread and a fancy coffee cake—bright, moist, and loaded with subtle veggie goodness that honestly makes it feel like a sneaky way to get your kids eating more greens. The swirl of cream cheese gives it that rich, tangy punch that balances beautifully with the sweetness of the batter. The name is pretty straightforward: zucchini, which keeps the cake remarkably moist, paired with a swirl of cream cheese that adds a cozy, indulgent touch. It’s the kind of dessert that sounds a little fancy but is damn easy to put together, almost like a sweet hug in every bite. I love that it’s versatile enough to serve for breakfast, brunch, or after dinner—and it’s basically resilient enough to forgive a few measuring mishaps along the way.
Why you’ll love this recipe?
I can’t stop raving about this cake, and here’s why I think you’ll fall for it too: Honestly, I
- Flavor:What is the flavor profile of a Vienna coffeehouse?
- Simplicity: No fancy techniques required here. I’ve tested this recipe with just about every type of flour, and it always comes out perfectly soft and moist. Just mix, layer, and bake. That’s it.
- Cost-efficient ingredients: All the ingredients are pantry staples—flour, sugar, eggs, zucchini, cream cheese—and I bet you already have most of them. That makes it a real budget-friendly treat.
- Versatility: Love experimenting? You can swap in honey instead of sugar, almond flour for a gluten-free version, or add a teaspoon of cinnamon for extra warmth. The batter is forgiving, and the swirl can be jazzed up with lemon zest or vanilla bean paste.
- 2 cups all-purpose flour (I prefer unbleached for a richer flavor)
- 1 cup sugar (white or organic, whatever you have on hand)
- 2 teaspoons baking powder
- 1/2 teaspoon salt
- 1/2 cup vegetable oil (or melted butter, if you want richer)
- 3 large eggs (fresh, room temperature if possible)
- 1 teaspoon vanilla extract (preferably pure)
- 1 cup shredded zucchini (squeeze out excess moisture for a fluffier cake)
- 8 oz cream cheese (softened, full-fat for that luscious texture)
- 1/2 cup powdered sugar (optional, but it helps balance the tang)
- 1 teaspoon vanilla extract (for extra flavor)
- 1/2 cup powdered sugar
- 1-2 teaspoons milk or lemon juice
- Extra zest or flavorings if you like
- Zucchini Prep: Always squeeze out as much moisture as possible—this keeps your cake fluffy. That’s a step I learned after a few soggy failures. Use a clean dish towel or cheesecloth to drain it thoroughly.
- Mixing Advice: Be gentle once you add the zucchini to avoid deflating the batter. Fold just until incorporated. Overmixing leads to a dense crumb, and nobody wants that.
- Swirl Customization: Play with flavor! Add a little lemon zest or some chopped nuts into your cream cheese mixture. A sprinkle of cinnamon on top before baking also adds a lovely warmth.
- Ingredient Swaps: Tried almond flour? Works beautifully, but you’ll want to add a little more moisture, maybe a splash of milk. Using Greek yogurt instead of oil makes it even moister—trust me on this one.
- Baking Tips: Keep an eye on the edges; they tend to brown early. Use the toothpick test to make sure it’s baked just right—no dry or gummy bits.
- Glaze Variations: Instead of lemon, try a splash of orange juice or a dusting of cocoa powder for a different twist. Apply it when the cake’s cooled slightly for a shiny finish.
What I love most about this is how it feels like a special occasion cake but is honestly a weeknight hero. My kids, friends, and neighbors all ask for leftovers—if there *are* any, of course. Plus, it’s surprisingly forgiving. Overmix? No problem. Slightly burned edges? Still delicious. It’s one of those recipes that has become a staple in my family not just because it’s tasty but because it’s a real comfort in my busy life.
How to Make Zucchini & Cream Cheese Swirl Cake
Quick Overview
This cake is all about simplicity and flavor. You mix a basic vanilla batter, fold in shredded zucchini, prepare a creamy swirl, layer it all in the pan, then bake until golden and bubbly. The secret? Don’t overmix once you add the zucchini, and swirl that cream cheese just enough to create a beautiful marbled pattern. It’s like making a mini work of art while your oven does the heavy lifting. And the best part? You get a moist, fluffy cake that’s bursting with flavor—perfect to serve warm or at room temp. Honestly, I’ve made this so many times, and I still get excited every time I pull it from the oven—you can smell that cozy blend of vanilla and cheese, just enough to make your mouth water.
Ingredients
For the Main Batter:
For the Filling:
For the Glaze (optional):
Step-by-Step Instructions
Step 1: Preheat & Prep Pan
Set your oven to 350°F (175°C). Grease a 9-inch round cake pan or line it with parchment paper—trust me, this cake is sticky but forgiving. I always give it a quick spray of nonstick spray and a dusting of flour. This will make it a breeze to get out once baked. If you’re feeling extra fancy, you can use a springform pan—I do that when I want perfect slices without crumbs everywhere. Let the pan sit nearby because everything comes together pretty fast once you start mixing.
Step 2: Mix Dry Ingredients
In a large bowl, whisk together the flour, baking powder, and salt. Sifting isn’t necessary but helps lighten the batter. I always do this step first—it’s the foundation for a good rise and even texture. Plus, no one wants lumps of baking powder hiding in their slice.
Step 3: Mix Wet Ingredients
In a separate bowl, whisk the eggs until frothy—this helps incorporate air and makes the cake super fluffy. Add the sugar, oil, and vanilla, then beat until smooth. I like doing this by hand with a whisk; it makes me feel like I’m in a baking show, but a mixer works too. Once everything looks shiny and just combined, add the shredded zucchini. Make sure you squeeze out most of the moisture because too much water will make the batter runny—that’s a lesson I learned the hard way after a few “soggy” cakes!
Step 4: Combine
Pour the wet mixture into the dry ingredients, then gently fold until just combined. Be careful not to overmix—we want a tender crumb, not a dense one. It’s okay if there are a few lumps. Overmixing creates gluten and makes the cake tough, so take your time. Every time I overmix, I regret it once I take the first bite.
Step 5: Prepare Filling
In a small bowl, blend the softened cream cheese, powdered sugar, and vanilla. Use a spatula or fork—no fancy tools needed. You want this to be smooth but thick enough to hold its swirl shape. Adjust the sweetness here based on your taste—my kids prefer a little more sugar, but I love the tangy punch of plain cream cheese.
Step 6: Layer & Swirl
Pour half of the batter into your prepared pan. Dollop spoonfuls of the cream cheese mixture across the batter’s surface. Then cover with the rest of the batter. Using a knife or skewer, gently swirl the cream cheese into the batter—don’t overdo it; you want a marbled effect, not a blobsplosion. This swirling is what makes each slice look like a little piece of art and adds a lovely surprise in every bite.
Step 7: Bake
Pop it in the oven, and bake for about 45-50 minutes. The top should be golden, and a toothpick inserted into the center should come out clean or with just a few moist crumbs. Every oven is different—my old one runs hot, so I check at 45 minutes and go from there. If the edges are browning too quickly, a quick foil tent prevents burning. Trust me, you’ll smell this baking—warm vanilla and cheese, making your whole house smell like one giant dessert hug.
Step 8: Cool & Glaze
Let the cake cool in the pan for at least 15 minutes before transferring it to a wire rack. Patience is key here—rushing results in crumbly slices. Once cooled, drizzle with your glaze if you’re feeling fancy. I usually mix powdered sugar with a splash of lemon juice or milk until it’s pourable but not runny. The glaze adds a glossy finish and a fruity tang, but honestly, this cake is pretty perfect even without it.
Step 9: Slice & Serve
Use a sharp serrated knife for clean slices. I like serving it slightly warm or at room temperature. It’s fantastic with a dollop of whipped cream or a scoop of vanilla ice cream if you’re feeling decadent. My family loves to eat this for breakfast (yes, breakfast!), brunch, or just a sweet treat after dinner. It’s versatile and forgiving—trust me, even if your swirl isn’t perfect, it still tastes incredible. Plus, the leftover slices heat up well in the microwave, making each bite just as delightful the next day.
What to Serve It With
This cake is like a blank canvas—serve it with coffee in the morning, a nice herbal tea for brunch, or a scoop of ice cream for dessert. I’ve also been known to pair it with fresh berries or a drizzle of honey if I want to add a little extra the next day. For breakfast, I toss a few chopped nuts and a dusting of cinnamon on top—my kids think it’s fancy enough to call it “banana bread,” even though it’s totally different! I also love slicing it thin and stacking it like a layered parfait with yogurt and fruit. It’s surprisingly adaptable, and my family always asks for seconds. This cake has saved me more than once on busy mornings or when I need a cozy kitchen moment after a hectic day.
Top Tips for Perfecting Your Zucchini & Cream Cheese Swirl Cake
After making this countless times, I’ve picked up a few tricks that I swear by:
Over the years, I’ve learned to trust my nose in the oven and that sometimes, a little imperfection just adds charm. The key is not to overthink—this cake is forgiving, cozy, and simply delicious. It’s almost impossible to mess up, and that’s what makes it a staple for me. Plus, I’m constantly experimenting—next up, I plan to try adding a handful of blueberries or swapping the zucchini for grated carrot.
Storing and Reheating Tips
This cake stays fresh longer than you’d think. If you’re planning to keep it for a couple of days, wrap it tightly in plastic wrap or store it in an airtight container. At room temperature, it’s good for about two days—just keep it away from direct sunlight, or it might dry out. I’ve found that refrigerating it extends its life without sacrificing texture—just let it come to room temp before slicing if you want that cozy, bakery-soft crumb. Freezing works well, too: wrap slices individually in plastic wrap, then transfer to a zip-top bag. Thaw at room temp or warm briefly in the microwave for an instant treat. I wouldn’t recommend glazing until you’re ready to serve because the glaze can dull or melt during storage, but honestly, it’s equally tasty without it. The cream cheese swirl keeps beautifully, and I love that I can pull a slice straight from the fridge for a quick breakfast or snack.
Frequently Asked Questions
Final Thoughts
This zucchini and cream cheese swirl cake has definitely earned a place in my regular baking lineup. It’s not just because it tastes so good—I mean, that silky swirl and moist crumb are lovely—but because it’s one of those recipes that truly feels like a warm hug from the kitchen. It’s perfect for sharing with friends, serving at brunch, or sneaking a slice for yourself during a busy weekday. I love how forgiving it is—the batter comes together quickly, the ingredients are simple, and you can play around with flavor add-ins or toppings to make it your own. Honestly, once you get the hang of it, you’ll find excuses to bake this every week. I’d love to hear how yours turns out, so don’t forget to leave a comment or snap a photo! Happy baking, friends—this one’s a keeper.
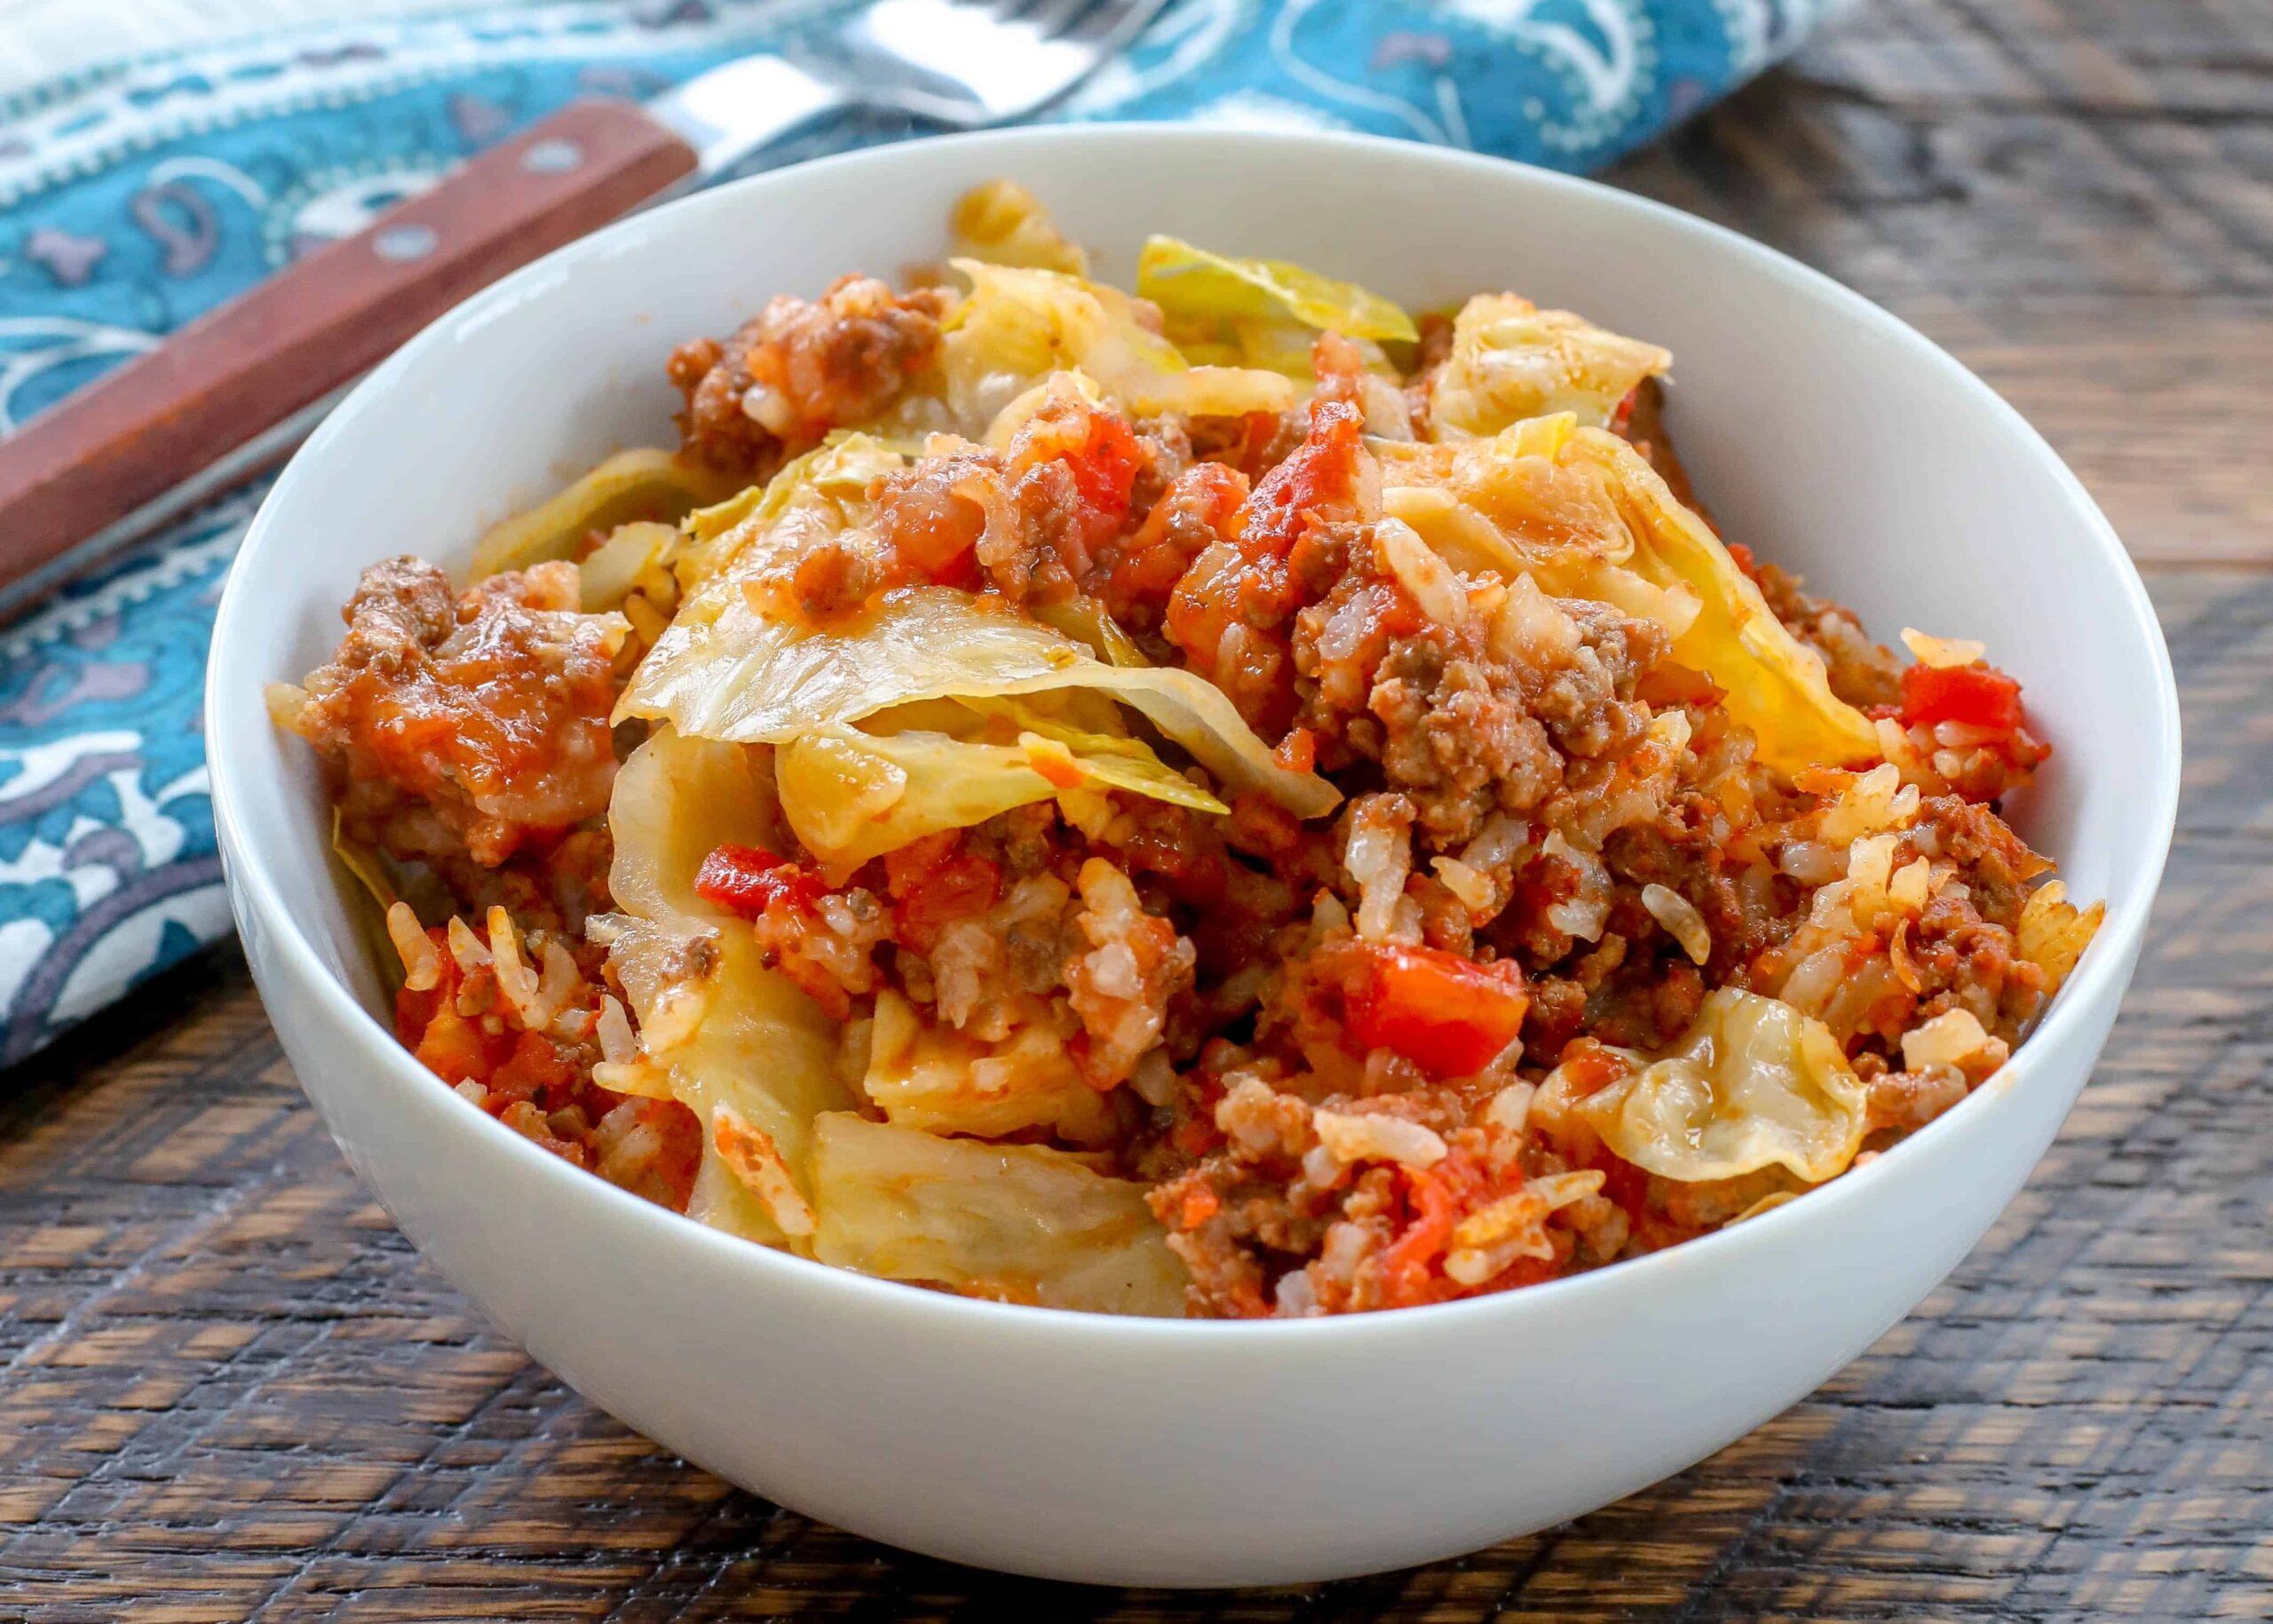
cabbage rolls
Ingredients
Method
- Preheat the oven to 350°F. Spread the cabbage across the bottom of a 9x13 dish. In a large skillet, over medium heat, cook the ground beef along with the chopped onion.
- Drain any grease from the pan and add the uncooked rice, chili powder, garlic powder, salt, and black pepper to the skillet with the meat. Add the crushed tomatoes and stir to combine. Spread the meat mixture over the cabbage in the baking dish.
- Mix together the tomato sauce, sugar, and vinegar and pour over the meat and cabbage. Cover with foil and bake for 90 minutes. Uncover and let rest for 5-10 minutes before serving. Enjoy!