Fun Stocking Gifts for Teens & Tweens
If I had to pick just one recipe that feels like a warm hug on a busy day, it’d be this zucchini swirl cake. I remember the first time I made it — my kids were clamoring for something sweet after school, and I only had a few minutes to whip up something special. The smell alone brings everyone to the kitchen, pretending they’re not silently judging how early I start baking. Truthfully, I love how this cake isn’t just delicious but super forgiving. I’ve tested it with everything from almond milk to a dash of cinnamon, and it’s never failed me. Plus, it’s one of those recipes that just looks impressive without any fancy techniques. The best part? My kids ask for this all the time, especially when I swirl in a bit of chocolate or berries. Trust me, you’ll want this on your regular rotation — it’s a lifesaver on busy nights or whenever you’re craving that cozy, homey flavor that sticks with you long after the last crumb is gone.
What is Zucchini Swirl Cake?
This zucchini swirl cake is basically my happy little secret for a moist, tender cake that’s packed with fresh zucchini but tastes like a decadent treat. Think of it as a mash-up between your favorite quick bread and a classic sponge — only with a clever, beautiful swirl that makes it look fancy even if you’re just making it in your pajamas. The thing I love most about this is how the zucchini acts like a natural moistener. I always do this when I want a slice of something sweet without the guilt or the extra fuss. It’s essentially a foolproof way to sneak a vegetable into dessert, and honestly, it’s a win-win — no one ever guesses what’s hiding inside until they taste that burst of flavor. Whether you call it a breakfast cake or a fancy snack, it’s versatile enough to serve anytime, and it always disappears fast!
Why you’ll love this recipe?
Okay, here’s the thing — I’ve made this zucchini swirl cake countless times and it never fails to impress. What I love most about this is how it combines effortless simplicity with big, comforting flavors. The zucchini keeps the cake super moist, so each bite melts in your mouth, and the swirl pattern? It’s like a little edible piece of art that’s so satisfying to cut into. Plus, the ingredients are budget-friendly and accessible, which means you can whip this up whenever the mood strikes without a grocery run. This cake is incredibly versatile, too. You can switch the filling — add some chopped nuts for crunch, a handful of berries for brightness, or even a dash of cinnamon for extra warmth. And don’t forget the glaze — lemon glaze, vanilla, or just a dusting of powdered sugar are all fantastic options. Honestly, what I love most about this is how cozy it feels — perfect when you want something sweet but don’t want to spend hours in the kitchen. It’s that ‘go-to’ recipe that I count on for family gatherings, last-minute guests, or just a cozy night in with a cup of tea.
How do I make Zucchini Swirl Cake?
Quick Overview
This cake is a blend of simple mixing, gentle folding, and a beautiful swirl of filling that turns an everyday batter into something eye-catching and delicious. First, you grate your zucchini, squeeze out as much moisture as possible (a trick I learned after countless soggy cakes), then prepare your batter with basic pantry ingredients. While the batter comes together quickly, the magic lies in swirling the filling through the batter before baking. It’s basically foolproof — I promise! The entire process from mixing to baking takes no longer than an hour, making it perfect for when you need a quick sweet fix that impresses everyone.
Ingredients
For the Main Batter:
– 1 ½ cups all-purpose flour (I usually grab organic, but regular works fine)
– 1 cup granulated sugar
– ½ teaspoon baking powder
– ½ teaspoon baking soda
– ¼ teaspoon salt
– 1 teaspoon vanilla extract
– ½ cup vegetable oil or melted butter
– 2 large eggs
– ½ cup plain yogurt or buttermilk (trust me, it makes it extra tender)
– 1 cup freshly grated zucchini (squeeze out excess moisture)
For the Filling:
– ½ cup cream cheese or mascarpone (for richness)
– 2 tablespoons sugar
– 1 teaspoon vanilla
– Optional: Lemon zest or cinnamon for flavor twists
For the Glaze:
– ½ cup powdered sugar
– 1-2 tablespoons milk or lemon juice
– A sprinkle of lemon zest or melted chocolate, if you like
Step-by-Step Instructions
Step 1: Preheat & Prep Pan
Set your oven to 350°F (175°C). Grease a 9-inch round cake pan or line it with parchment paper. I always spray mine generously with non-stick spray and dust lightly with flour — no sticking and easy removal!
Step 2: Mix Dry Ingredients
In a large bowl, whisk together the flour, sugar, baking powder, baking soda, and salt. I do this first to get everything well combined and to avoid lumps — trust me, it makes the mixture so much smoother later.
Step 3: Mix Wet Ingredients
In a separate bowl, beat the eggs with vanilla, then stir in the oil, yogurt, and grated zucchini. Make sure the eggs are at room temperature so everything blends smoothly. The zucchini should be grated finely and squeezed dry — excess moisture is the enemy of fluffy cakes!
Step 4: Combine
Gently fold the wet mixture into the dry ingredients just until no streaks remain. Overmixing will make the cake dense, and nobody wants that — lightly do the job and you’re golden.
Step 5: Prepare Filling
In a small bowl, whip together the cream cheese, sugar, vanilla, and any flavorings you fancy. It should be smooth and spreadable but not runny—if it’s too soft, pop it in the fridge for a few minutes.
Step 6: Layer & Swirl
Pour about half the batter into your prepared pan. Dollop spoonfuls of the filling across the batter, then add the rest of the batter on top. Use a toothpick or skewer to swirl the filling into the batter — no need to be perfect, just aim for a marbled effect. It’s fun watching the pattern develop!
Step 7: Bake
Pop it in the oven and bake for about 35-40 minutes, or until a toothpick inserted in the center comes out clean. Ovens vary, so keep an eye on it around the 35-minute mark. If the top is browning too quickly, loosely cover with foil.
Step 8: Cool & Glaze
Let the cake cool in the pan for 15 minutes, then transfer to a wire rack. Once completely cooled, drizzle with your chosen glaze. I like a simple powdered sugar and lemon juice combo — it adds a zing and keeps it light.
Step 9: Slice & Serve
Use a sharp serrated knife to cut into clean slices. Serve at room temperature or slightly chilled. This cake looks stunning on a cake stand, and I always add a sprinkle of extra zebra or chopped nuts on top for presentation. Plus, leftovers are perfect for breakfast — yes, I guiltlessly eat cake for breakfast!
What to Serve It With
This zucchini swirl cake is pretty versatile. For breakfast, pair it with a steaming cup of coffee or a chai tea latte. It’s equally divine for brunch alongside fresh fruit and a dollop of whipped cream — super classy but cozy at the same time. As a dessert, I love serving it with a drizzle of honey or extra glaze, maybe some whipped cream on the side. It’s such a crowd-pleaser that I often pack slices in lunchboxes or serve it with afternoon tea. My family loves it as a casual snack, especially when I sprinkle some chopped walnuts or dark chocolate chips into the batter. And if you want to get extra fancy, serve it warm with a dusting of powdered sugar and a scoop of vanilla ice cream. Trust me — it’s just that good.
Top Tips for Perfecting Your Zucchini Swirl Cake
Over the years, I’ve picked up a few tricks to make this recipe even better. First, when grating zucchini, I always do it into a clean kitchen towel and squeeze out every bit of moisture — a soggy cake is a no-go. I’ve tested baking at slightly higher and lower temps; 350°F seems to strike the perfect balance between a tender crumb and a golden crust. For the swirl, the key is to not overmix — just gently fold so the pattern remains distinct. When it comes to filling, I recommend room-temperature cream cheese for smoothness, but you can swap it for Greek yogurt or ricotta if you prefer a lighter touch. If you want a richer cake, add a tablespoon of melted butter to the batter; it enhances the flavor but keeps the texture moist. I’ve also experimented with different flavor twists — lemon zest, cinnamon, or even a splash of liqueur — and they all work beautifully. My biggest lesson? Don’t rush the cooling process. Let the cake sit for at least 20 minutes before slicing — it makes all the difference in getting clean slices and that perfect moist crumb.
Storing and Reheating Tips
This cake keeps surprisingly well. If you have leftovers, cover it tightly with plastic wrap or keep it in an airtight container. Room temperature storage is fine for 1-2 days, especially if it’s a warm day. For longer storage, I pop slices in the refrigerator — they stay fresh for up to 4 days, and I find the flavors actually deepen a little overnight. Just remember to bring it to room temp before serving; it tastes way better that way. If you want to make it even last longer, freeze it wrapped tightly with foil and a plastic bag — it’s good for up to 2 months. To reheat, gently warm slices in the microwave for about 20 seconds or in a low oven. I wouldn’t recommend glazing directly from the fridge; wait until it’s slightly warmed up to preserve that glossy, fresh look. Trust me, this cake is made to be enjoyed over days — it’s just as good the next morning with your coffee or as an afternoon treat!
Frequently Asked Questions
Final Thoughts
This zucchini swirl cake is one of those recipes that feels like a little bit of magic — simple, unassuming ingredients transformed into something so pretty and delicious it’s hard to believe it’s homemade. I love how adaptable it is, whether you want to add a sprinkle of cinnamon, some chopped walnuts, or turn it into muffins for a quick snack. Every time I make it, I get that warm, nostalgic feeling, thinking of family afternoons and lazy weekends. It’s become our little tradition, and I hope it becomes one in your home too. Remember, don’t stress about making it perfect — the imperfect swirls are what make it charming and unique. Happy baking! I can’t wait to hear how yours turns out or see your photos. Drop your comments below and share your favorite twists — I love seeing how other bakers put their spin on it!
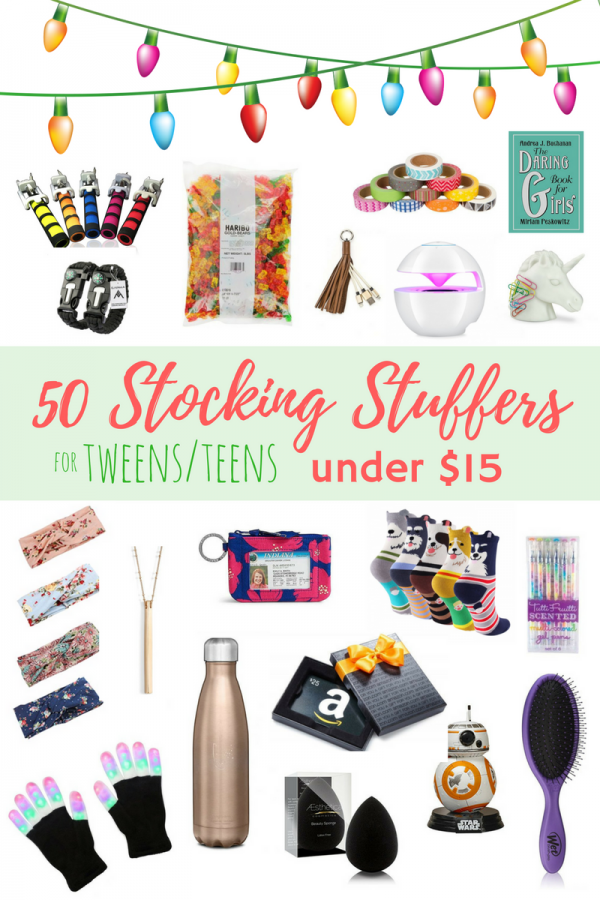
stocking stuffers
Ingredients
Method
- Combine peanut butter and marshmallows in a microwave-safe bowl and microwave for 1 minute.
- Stir the mixture until smooth and add chocolate chips.
- Spoon the mixture into mini cupcake liners and refrigerate for 15 minutes.