Revamping Furniture Easy DIY Guide
There’s something about warm, freshly baked bread that instantly makes my house feel cozier. I remember as a kid, my mom would always have a loaf ready on the counter—a bit of banana smudge on my fingers, the smell of cinnamon wafting through the air, and that feeling of comfort you get from knowing something sweet is just waiting to be enjoyed. Lately, I’ve been obsessed with this banana zucchini bread, not just because it’s incredible tasting but because it’s so versatile and forgiving to make. I always do this when I want a treat that’s cozy, a little healthy, and oh-so-satisfying. My kids ask for this all the time, especially when I sneak in that sneaky veggie—zucchini—and they never notice! Honestly, this one’s a lifesaver on busy nights or lazy weekends when I want something quick but oh so good. The best part? It disappears in minutes at my house, and I love knowing that I made something nourishing yet indulgent, with minimal fuss.
What is banana zucchini bread?
Think of this banana zucchini bread as a cozy hug wrapped in bread form. It’s essentially a moist, tender loaf that combines the natural sweetness of ripe bananas with the subtle, fresh flavor of zucchini. The magic here is in how the zucchini adds moisture without overpowering the banana’s sweet charm. The name itself is straightforward—banana for the fruit’s natural sweetness, zucchini for that nourishing boost, and bread because, well, it’s perfect sliced and served with a pat of butter or a drizzle of glaze. It’s a classic quick bread, meaning no yeast needed—just mix, pour, and bake—and you end up with a loaf that’s beautifully dense, yet light enough to enjoy for breakfast, a snack, or a dessert. Think of it as a healthier twist on your usual banana bread, but trust me, it’s just as decadent, especially when topped with that cinnamon glaze I love to drizzle on top.
Why you’ll love this recipe?
What I love most about this banana zucchini bread is how it hits all the right notes—moist, flavorful, and with just enough sweetness. The zucchini keeps it super juicy without turning it into a cake. Plus, it’s so forgiving—overmix the batter a little, and it’s still perfect. It’s incredibly budget-friendly; you probably already have the ingredients in your pantry and fridge right now. And if you’re like me, you’ll appreciate how versatile it is—straight out of the oven with butter, sliced thin for snacks, or even warmed up with a smear of cream cheese. For a dessert twist, I love adding chopped nuts or chocolate chips—they get all melty and fabulous. This recipe also makes your kitchen smell like cozy heaven, especially when the cinnamon glaze goes on. Plus, I’ve tested it with whole wheat flour, almond milk, and even maple syrup—each variation gives it a slightly different personality, but they all turn out amazing. Honestly, I can’t count how many times I’ve made this when friends pop over or when I need a little comfort during busy weeks. It’s so easy, so forgiving, and so utterly delicious—I swear, it’s become a family staple.
How do I make banana bread?
Quick Overview
This banana zucchini bread comes together in minutes—just mash bananas, grate zucchini, mix wet and dry ingredients separately, and then gently combine. The batter is naturally forgiving, so don’t worry if your zucchini is watery or your bananas aren’t perfectly ripe. After pouring the batter into a loaf pan, you swirl in your favorite filling if you like—think chopped nuts or mini chocolate chips—then bake until everything is just set and golden. The finishing touch is that luscious cinnamon glaze, which you pour on while the bread is still warm. Trust me, it’s so simple, and the reward is a loaf that’s perfectly moist, fragrant, and irresistibly good.
Ingredients
For the Main Batter:
- 3 ripe bananas, mashed—overripe bananas are best for sweetness and moisture
- 1 cup shredded zucchini—unsalted and excess moisture squeezed out (more on that later!)
- 2 large eggs—preferably at room temperature
- 1/3 cup honey or maple syrup—optional, for added sweetness
- 1/4 cup melted butter or neutral oil—like vegetable or canola
- 1 teaspoon vanilla extract—enhances sweetness
- 2 cups all-purpose flour (or whole wheat for a hearty twist)
- 1 teaspoon baking soda
- 1/2 teaspoon baking powder
- 1 teaspoon ground cinnamon—my secret ingredient for that cozy aroma
- 1/4 teaspoon salt
For the Filling:
- Chopped nuts, chocolate chips, or dried fruits—optional, but highly recommended
For the Glaze:
- 1 cup powdered sugar
- 2-3 tablespoons milk or cream
- 1/2 teaspoon ground cinnamon
- Extra vanilla or a splash of lemon juice for flavor—if you want
Step-by-Step Instructions
Step 1: Preheat & Prep Pan
Set your oven to 350°F (175°C). Grease a standard loaf pan with butter or line it with parchment paper—you want that easy release once it’s baked. I always do this when I’m making quick bread; it saves hassle and keeps the crust beautifully intact.
Step 2: Mix Dry Ingredients
In a bowl, whisk together the flour, baking soda, baking powder, cinnamon, and salt. This step ensures everything is evenly distributed and helps the bread rise evenly. I’ve made the mistake of skipping this, resulting in uneven baking—trust me, it’s worth mixing well!
Step 3: Mix Wet Ingredients
In a large bowl, mash the bananas with a fork until smooth. Add the eggs, honey, melted butter, and vanilla—whisk until everything’s combined and slightly frothy. I always test the temperature of the eggs first; it makes a tiny difference when blending, especially in colder mornings.
Step 4: Combine
Gradually add the dry ingredients to the wet mixture, folding gently with a spatula. Overmixing can toughen the bread, so I’m careful to just stir until the flour is barely incorporated. It’s okay if a few streaks remain—that’s what gives it that tender crumb!
Step 5: Prepare Filling
If you’re adding nuts, chocolate chips, or dried fruit, fold them into the batter now. I love using chopped walnuts or mini chocolate chips—both add richness and texture. For extra flavor, I sometimes sprinkle a little cinnamon or sea salt on top before baking.
Step 6: Layer & Swirl
Pour half the batter into your loaf pan. If you’re adding a swirl—like a smear of jam or a dusting of cinnamon sugar—spread a thin layer now, then top with the remaining batter. Use a knife to gently swirl the layers, creating a beautiful marbled effect. This step isn’t necessary but makes every slice look pretty.
Step 7: Bake
Place in the oven and bake for about 50-60 minutes. Check doneness by inserting a toothpick in the center—if it comes out clean, it’s ready. If it’s still wet, give it 5 more minutes. I’ve learned this one from experience—every oven varies a little, so keep an eye on it after 50 minutes.
Step 8: Cool & Glaze
Let the bread cool in the pan for about 15 minutes, then transfer to a wire rack. While still warm, drizzle with the cinnamon glaze. I love doing this when the bread is just warm enough to let the glaze seep into every crevice—it makes the whole house smell amazing.
Step 9: Slice & Serve
Once cooled completely, slice with a serrated knife. Serve with butter, cream cheese, or just as is—the crunchy crust, tender crumb, and sweet glaze make every bite heavenly. My family prefers it slightly warm, but it’s also fantastic at room temperature. Trust me, leftovers keep beautifully in an airtight container for a few days—if you’re lucky enough to have any leftover!
What to Serve It With
This banana zucchini bread is so versatile, I practically want to eat it all day long. For breakfast, I love slicing it thick and toasting it with a pat of butter or a dollop of Greek yogurt. It’s perfect with a steaming mug of coffee or tea—the rich aroma brightens up even the dullest mornings. On weekends, I’ll serve it as part of a brunch spread with fresh fruit and crisp bacon, making it feel a little more special. For dessert, I drizzle a little caramel or chocolate sauce over a warm slice—instant comfort food. And honestly, it’s a lifesaver when I want a quick, satisfying snack on busy days, especially when I cut it into mini muffins to grab on the go.
Top Tips for Perfecting Your Banana Zucchini Bread
Over the years, I’ve picked up some tricks that turned this from good to downright addictive. First, when prepping zucchini, I always grate it finely and then squeeze out as much water as possible—this keeps the bread moist without turning it soggy. I’ve tested different flours—whole wheat adds nuttiness, but I prefer a mix of whole wheat and all-purpose to keep it light. When mixing, I resist the urge to overstir; just fold until barely incorporated. That keeps the crumb tender and fluffy. For swirl patterns, I use a skewer or knife to gently pull through the batter—it creates that lovely marbling without blending the layers totally. As for swaps, I love substituting maple syrup for honey—adds a deeper flavor—and coconut oil instead of butter for a dairy-free option. My mistake? I once added too much zucchini and ended up with a slightly wetter loaf. Now, I pre-measure and drain the zucchini thoroughly. When baking, I rotate the pan halfway through for even browning. And the glaze? I like adding a splash of lemon juice or vanilla to brighten the flavor, but a dusting of powdered sugar works just as beautifully. Trust me, each tweak makes this bread even better, and I’ve learned from countless experiments—some messy, but always delicious.
Storing and Reheating Tips
This bread keeps wonderfully—my secret is wrapping it tightly in plastic wrap or storing it in an airtight container. At room temperature, it stays moist and fresh for about 2 days, but if you want to keep it longer, pop it in the fridge for up to a week. The coolness actually enhances the flavor, believe it or not. To freeze, wrap slices individually in plastic wrap, then place in a zip-top bag—perfect for busy mornings. Thaw at room temperature or pop it in the microwave for a quick warm-up. If you’re refrigerating it, wait to add the glaze until just before serving—that way, it doesn’t get soggy. For longer storage, the freezer is your friend, just make sure it’s well wrapped to prevent freezer burn. I’ve even frozen the whole loaf, then thawed slices as needed—heroes every time. When reheating, I pop slices in the microwave for about 10 seconds or toast them lightly so they regain that fresh-baked warmth. Honestly, it’s such an adaptable bread—regardless of how you store it, the flavor stays vibrant, and the moist crumb remains intact.
Frequently Asked Questions
Final Thoughts
This banana zucchini bread has truly become a family favorite—you get all the comforting, sweet goodness of banana bread with a veggie boost that sneaks in perfectly. It’s tender, moist, and holds up beautifully for days, even when you think it’d be better after a quick warm-up. Plus, it’s so forgiving—overripe bananas, watery zucchini, or a little extra mixing won’t ruin it. I love how adaptable it is, whether you add nuts, swap flours, or play with the glaze. It’s one of those recipes that reminds me why I love cooking at home—simple ingredients coming together to create something genuinely special. I hope you try it and find yourself reaching for this loaf whenever you need a little comforting sweetness. Happy baking! And I’d love to hear how yours turns out—don’t forget to leave a comment or share your tweaks. Enjoy every bite!
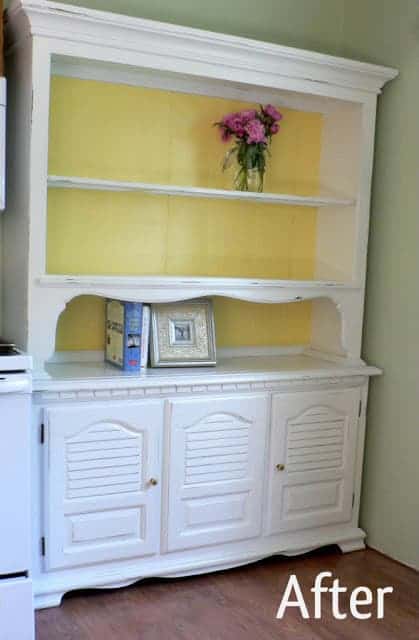
paint furniture
Ingredients
Method
- Remove hardware and clean the furniture thoroughly with a mild cleaner.
- Lightly sand the surface to create a better bond for the paint.
- Apply a primer with a brush or roller and let it dry completely.
- Paint the furniture with your chosen color, using at least two coats for good coverage.
- Distress the edges if desired, and apply a protective polyurethane finish.