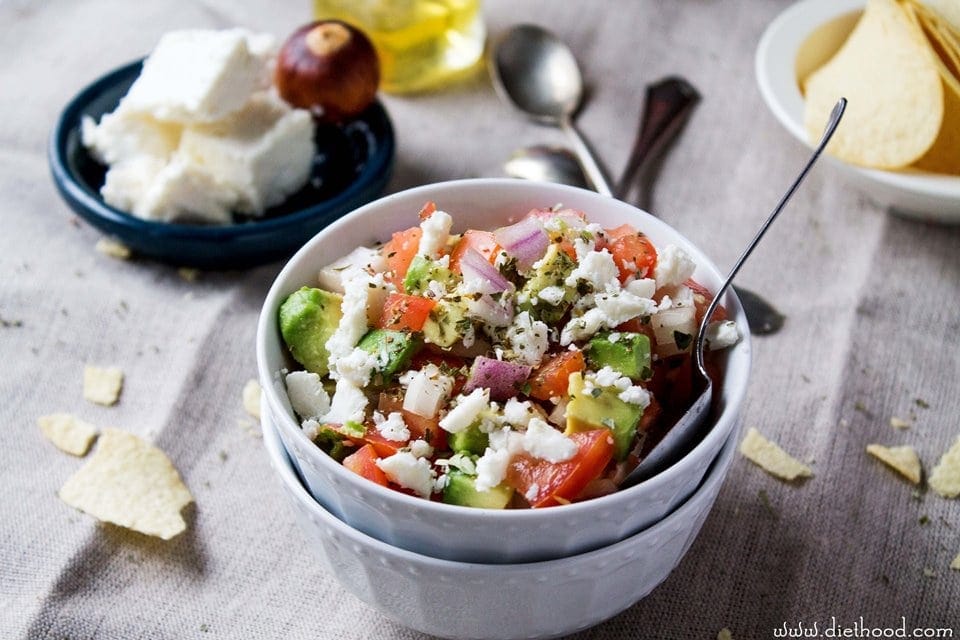
Creamy Avocado Feta Salsa Recipe
If you’ve ever had that moment where you’re craving something sweet but don’t want to spend hours baking — or you need a quick way to get veggies into your kids without their fuss — then I’ve got a little secret weapon for you. This chocolate zucchini bread? It’s one of those recipes I always turn to. It’s moist, rich, with just the right amount of sweetness, and the best part? Nobody ever guesses there’s zucchini lurking inside. I’ve made this countless times and it never fails to vanish from the counter in minutes at my house. The smell alone brings everyone rushing to the kitchen, eyes wide, asking, “Is it done yet?” Trust me, once you make this, it’s going to become a staple—whether for breakfast, snack, or that late-night treat when you want something cozy but don’t want to bake a whole cake. And honestly, it’s one of those recipes that somehow tastes even better the next day. Coffee, a slice, and a quiet moment — that’s what I picture every time I bake this.
What is chocolate Zucchini bread?
Think of it as a magic trick in the baking world. This is a simple, loaf-style bread that turns humble zucchini into something utterly delicious. It’s essentially a chocolate-flavored twist on classic zucchini bread—think moist, tender crumb with a rich cocoa flavor that feels like a treat but still sneaks in some veggie goodness. The name itself is pretty straightforward: it’s bread made with zucchini and infused with chocolate. The texture is similar to brownies but lighter and perfect for slicing into thick pieces. What I love most about this is how versatile it is—you can serve it for breakfast, enjoy it with a dollop of cream, or just eat a huge slice straight from the fridge. It’s one of those recipes that’s comfort in every bite, and over the years, I’ve adapted it countless ways to suit whatever’s in my pantry or mood.
Why you’ll love this recipe?
Oh, where do I start? Honestly, the best part of making this chocolate zucchini bread is how quickly it comes together, and that it always impresses everyone — even my pickiest eaters. Here’s why it’s a total keeper:
- Flavor:What are the benefits of chocolate chips and cocoa?
- Simplicity:I’ve tested this with calling kids into the kitchen and they love helping. It’s all about mixing, layering, and baking—no
- Budget-friendly ingredients: Zucchini is cheap when in season, and pantry staples like flour, sugar, cocoa, and chocolate chips are always there, making this a budget-friendly treat.
- Versatility: I’ve switched out dark chocolate for white, added nuts, or even tossed in a handful of dried cranberries. It’s a forgiving recipe that welcomes tweaks.
- For breakfast: A smear of butter or cream cheese, paired with a strong cup of coffee or hot vanilla chai. Honestly, I love it toasted, so the edges get slightly crispy, and the chocolate melts just a little.
- For brunch: Serve slices with fresh berries and a dollop of Greek yogurt or mascarpone. It feels fancy enough for weekend company but still simple!
- As dessert: Warm slices topped with a scoop of vanilla ice cream or whipped cream turn this straightforward bread into a decadent treat. A drizzle of caramel or extra melted chocolate? Yes, please.
- Cozy snack: It’s perfect when you’re curled up with a book or watching a movie — just slice and grab a mug of hot chocolate or herbal tea.
- Zucchini prep: Grating zucchini is easy, but squeezing out the excess moisture is a game-changer. Use a clean kitchen towel or cheesecloth — I’ve tested both — and it helps keep the bread moist but not wet or heavy. The drier the zucchini, the better!
- Mixing advice: Overmixing can turn your loaf dense, so fold gently and just until you don’t see dry flour pockets. It may look a bit lumpy, but that’s okay—texture is what makes it tender and moist.
- Swirl customization: When layering the batter, don’t be afraid to dollop and swirl in different directions. Play around with patterns — it makes each loaf uniquely beautiful and impressive.
- Ingredient swaps: I’ve used coconut sugar instead of white, and it turns out lovely with a more subtle caramel flavor. Whole wheat flour works, too, just add a little more moisture (maybe an extra tablespoon of oil). For those avoiding dairy, almond milk and coconut oil do the trick without sacrificing flavor.
- Baking tips: Always check a few minutes before the timer ends, as ovens vary. And placing the rack in the middle ensures even baking. If the top is browning too fast, just tent with foil — that’s a tip I learned after a few hiccups!
- Glaze variations: Swap powdered sugar for cocoa powder mixed with a touch of melted butter for a richer ganache; or sprinkle with shredded coconut or chopped nuts on top of the glaze for extra texture. Be creative—your family will love the little extra touches.
What I really love about it is how it feels like comfort food but with a sneaky veggie boost. Plus, it’s honestly better than a lot of store-bought sweets because you know exactly what’s in it—and no weird preservatives or additives.
How to Make Chocolate Zucchini Bread
Quick Overview
This recipe starts with grating zucchini and mixing it with a moist, cocoa-infused batter. The trick is not to overmix; just fold everything until combined. You’ll pour half the batter into your loaf pan, sprinkle on some chocolate chips, then layer the rest of the batter over the top. A swirl of extra chocolate on top makes it irresistible. Bake until a toothpick inserted in the center comes out clean—about 55 minutes at 350°F (175°C). Once baked, let it cool a bit before slicing. Trust me, patience is key here—this bread gets moister and even tastier after a few hours or overnight. It’s super simple, mostly a one-bowl affair, and it’s ready to eat before you know it. The best part? Every slice tastes like you’ve spent ages perfecting it, but it’s actually quick and easy!
Ingredients
For the Main Batter:
– 2 cups grated zucchini (about 2 small zucchinis, shredded and excess moisture squeezed out)
– 1 ½ cups all-purpose flour
– ½ cup unsweetened cocoa powder
– 1 teaspoon baking soda
– ½ teaspoon salt
– 1 cup granulated sugar
– ½ cup vegetable oil (or melted coconut oil for a hint of tropical aroma)
– 3 large eggs
– 1 teaspoon vanilla extract
– ½ cup chocolate chips (plus extra for the top, if you like an oozing finish)
For the Filling:
– Yes, just the chocolate chips! You can add nuts or dried fruit if you want. Sometimes I toss in a handful of chopped walnuts for extra crunch.
For the Glaze (optional but delightful):
– ½ cup powdered sugar
– 1-2 teaspoons milk or cream
– A splash of vanilla or a drizzle of melted chocolate for extra decadence
Step-by-Step Instructions
Step 1: Preheat & Prep Pan
I always start by preheating my oven to 350°F (175°C). Grease a standard 9-by-5 inch loaf pan with butter or non-stick spray, then dust with a little flour. Lining it with parchment paper makes it even easier to lift out — don’t skip that step if you’re worried about sticking. While the oven heats, grate your zucchini, sprinkle it with a tiny pinch of salt, and set it aside for a few minutes. I like to squeeze out as much moisture as I can—I’ve learned this trick after years of making bread that turns out too wet or heavy. Trust me, moisture control is key to moist but not soggy bread.
Step 2: Mix Dry Ingredients
In a large bowl, whisk together the flour, cocoa powder, baking soda, salt, and sugar. Mixing dry ingredients separately helps everything blend evenly. You’ll notice the dry mixture looks rich and fudgy — which is what you want to mimic that brownie-like texture. This step is important because it ensures the leavening and cocoa are evenly distributed, preventing clumps or uneven baking.
Step 3: Mix Wet Ingredients
In another bowl, whisk the eggs, oil, and vanilla. I always do this first before adding the zucchini because it helps emulsify everything nicely. Then, gently fold in the squeezed zucchini—try not to overmix here; otherwise, you’ll end up with dense bread instead of fluffy and tender. If you see any streaks of zucchini, that’s fine; as long as it’s evenly distributed, you’re good to go.
Step 4: Combine
Pour the wet mixture into the dry ingredients and fold with a spatula until just combined. Overmixing can make the bread gummy, and nobody wants that. It’s okay if there are a few lumps — that’s what keeps it moist! Gently fold in the chocolate chips, saving some for sprinkling on top later.
Step 5: Prepare Filling
Pour half of the batter into your prepared pan. Sprinkle a handful of chocolate chips over the batter, then pour the remaining batter on top. To make the swirl pattern more eye-catching, I gently drag a knife through the batter in swirling motions. This method gives you beautiful ribbons of chocolate inside the bread and makes each slice interesting to look at. If you’re feeling extra indulgent, sprinkle some more chips over the top before baking.
Step 6: Layer & Swirl
This is where the magic happens! Gently swirl a knife through the batter to create streaks of chocolate that will melt into loveliness during baking. Think of it as marbling—just a few gentle swipes will do. Avoid overswirling or pressing down too hard; you want those beautiful streaks without blending everything into a muddy mess.
Step 7: Bake
Pop it into your preheated oven and bake for about 55 minutes. Keep an eye on it around the 50-minute mark — every oven is slightly different. You’ll know it’s done when a toothpick inserted in the center comes out clean or with just a few moist crumbs. If the top gets too dark early on, loosely tent it with foil for the remainder of baking. I like to check the bread with a thermometer; it should be about 200°F (93°C) in the center for perfect doneness.
Step 8: Cool & Glaze
Once out of the oven, let it cool in the pan for at least 15 minutes. Then, transfer it to a wire rack (lay a clean towel underneath, just in case). If you’re adding glaze, now’s the time — a simple powdered sugar drizzle or a quick chocolate ganache works beautifully. I wait until it’s just slightly warm so the glaze drizzles smoothly but doesn’t run all over the place. The smell when it’s cooling is divine — just like a warm bakery.
Step 9: Slice & Serve
Using a serrated knife, cut into thick slices — patience makes all the difference here. I prefer to let it cool completely first, but honestly, I’ve been known to sneak a piece still warm, and it’s gooey and fantastic. Serve it plain, with a little dollop of whipped cream, or alongside a glass of cold milk. My family loves it as a breakfast treat, but I won’t judge if you whisk out a fork at coffee time and dig in with a mug of tea. This bread is so good it disappears quickly, so I usually make a double batch!
What to Serve It With
This chocolate zucchini bread is just a star on its own, but I like to pair it with a few different things depending on the occasion:
Personally, I love making mini toasts of this for my kids’ school snacks, with a smear of peanut butter or nutella. It’s their favorite—and honestly, I don’t mind sneaking a piece myself!
Top Tips for Perfecting Your Chocolate Zucchini Bread
Like with anything, a few little tricks make all the difference:
Personally, I’ve learned that the key is patience and not rushing the cooling process; that first slice is always worth the wait, and I swear, the flavors deepen overnight.
Storing and Reheating Tips
This bread keeps beautifully on the counter for about 2 days wrapped in foil or stored in an airtight container. I tend to slice and keep what I’m not immediately snacking on—just make sure to keep it covered to stay moist. If I want it to keep longer, I toss slices into a resealable bag and pop them into the fridge. They stay fresh for about 4 days and can be reheated in the microwave for 15-20 seconds, just enough to warm the inside without making it dry. Freezing leftovers is also a smart move: wrap slices tightly in plastic wrap, then foil, and they’ll last up to a month. Thaw at room temperature before slicing, and you’ll almost think you baked fresh bread again. If you add glaze later, hold off until just before serving—moisture and shine are key for that finishing touch.
Frequently Asked Questions
Final Thoughts
If you’re looking for that perfect, fuss-free, guaranteed crowd-pleasing treat, this chocolate zucchini bread is it. Over the years, I’ve made it a hundred times — tweaking a little here, swapping a little there — and each time, it reminds me why baking is such a joy. The combination of moist chocolate, tender zucchini, and that hint of sweetness just hits all the right notes. Plus, the fact that I can sneak in vegetables makes me feel better about indulging. My kids ask for this all the time, and honestly, I don’t mind baking a double batch because it’s gone before I know it. So go ahead, grab your zucchinis—they’re waiting—and start baking. I’d love to hear how yours turns out! Drop a comment, share your tweaks, or snap a photo of your masterpiece. Happy baking!
Ingredients
Method
- Combine. In a medium bowl, combine the tomatoes, avocado, onion, garlic, parsley, oregano, oil, vinegar, salt, and pepper. Mix it all together. Give it a taste and add more salt and pepper, if needed.
- Finish and serve. Add feta, and gently mix it in. Serve right away or cover and chill for 2 hours in the fridge.