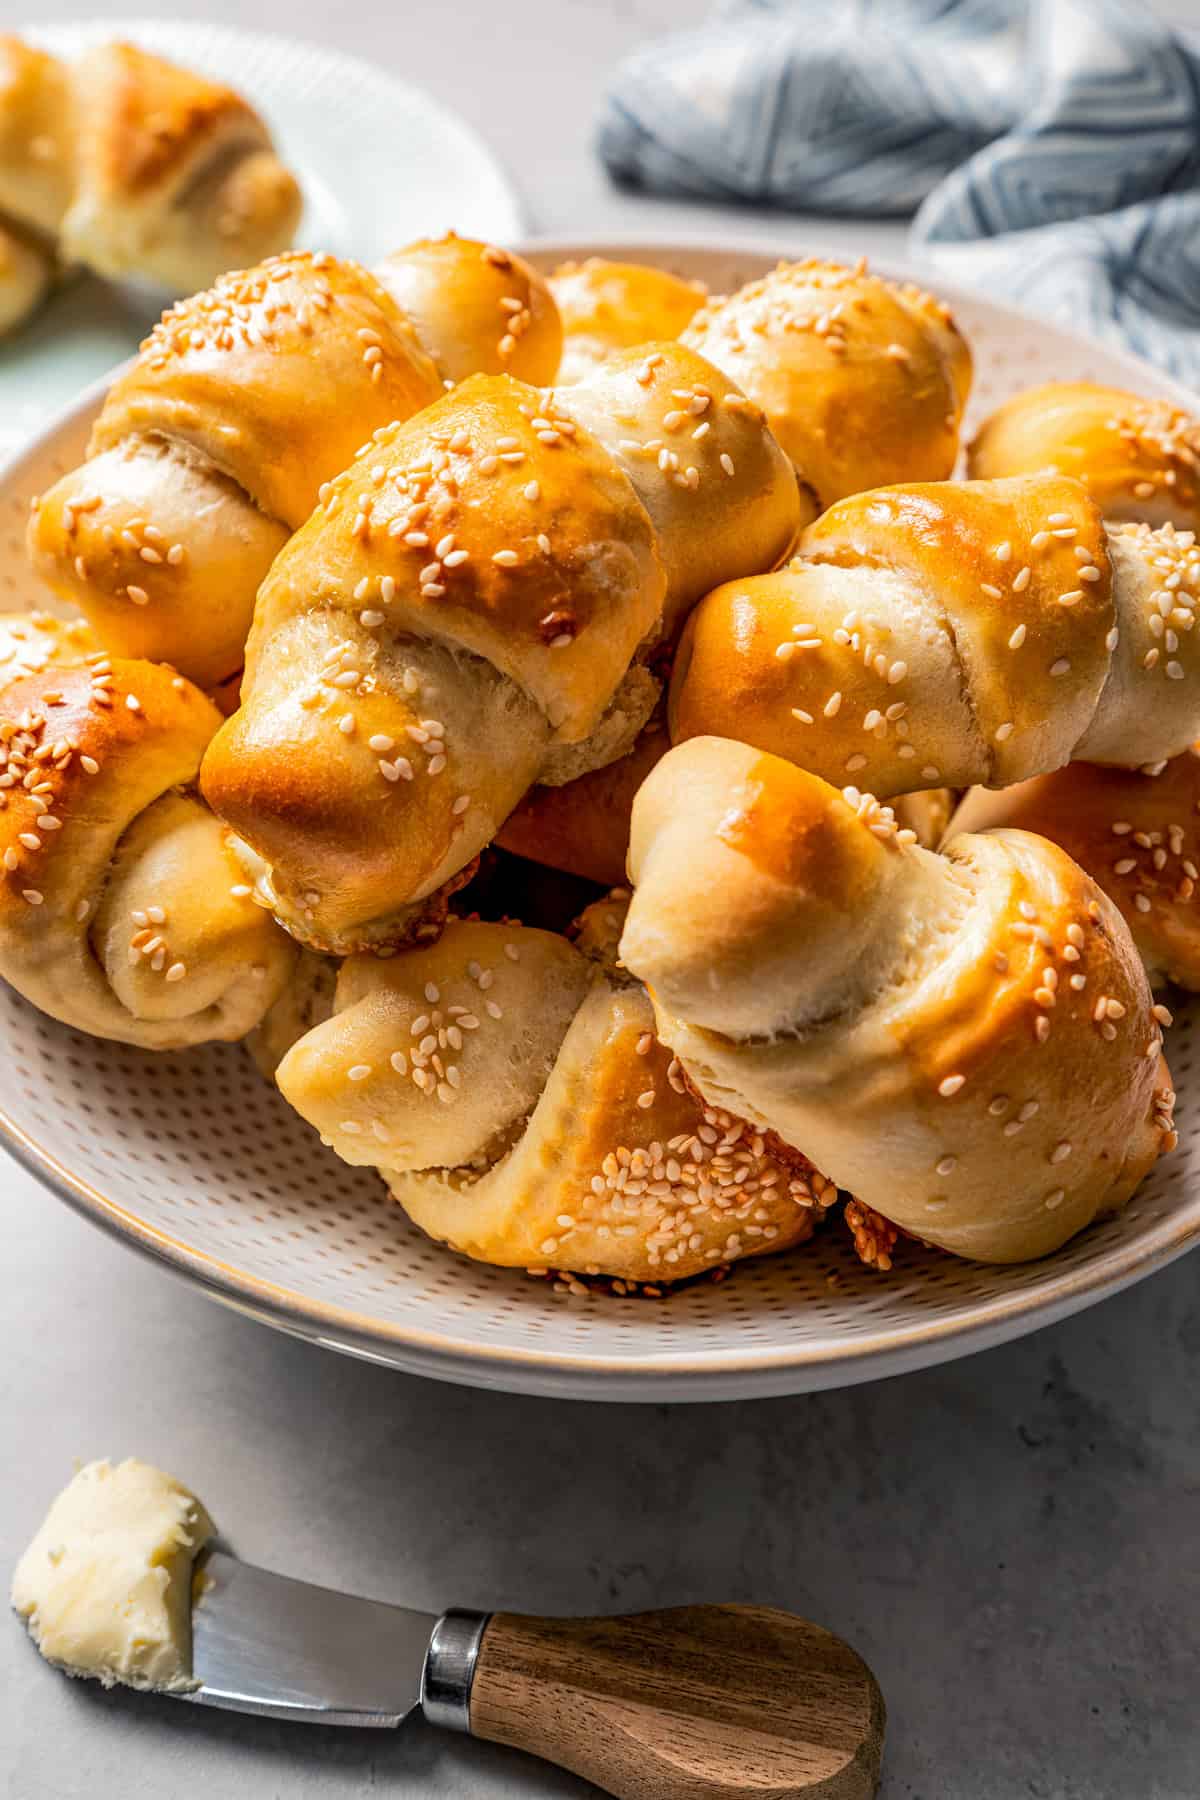
Easy Kiflice Pastries with Sesame Seeds
There’s just something about the smell of banana bread that feels like a warm hug, right? Growing up, my grandma’s kitchen was filled with this exact cozy aroma—bananas, cinnamon, and just a hint of vanilla floating around as she baked. I always do this when I want a little piece of home — whip up a loaf of my zucchini banana bread with a luscious cream cheese swirl. It sounds fancy, but trust me, it’s incredibly easy and forgiving, like a big, comforting hug in bread form. Plus, the sneaky zucchini makes it a bit healthier without sacrificing any flavor. My kids ask for this all the time, especially on those mornings when we’re all rushing out the door, and I need something sweet that’s also real food. It’s the kind of recipe that just sticks with you — messy mornings, family gatherings, or rainy afternoons when a warm slice and a cup of tea are all you need to turn the day around. Honestly, I’ve made this countless times and it never fails to bring smiles around my kitchen table—hope it does the same for you!
What is Zucchini Banana Bread?
Think of this Zucchini Banana Bread as a cozy mash-up of two beloved baked goods—classic banana bread’s moist, tender crumb blending effortlessly with the fresh, lightly earthy notes of zucchini. It’s essentially a quick bread that’s perfect for breakfast, a snack, or a sweet finish to any meal. The name might sound odd at first — zucchini in bread? But don’t knock it till you try it. The zucchini adds moisture and a subtle veggie boost, making the bread even more satisfying without overpowering the banana’s sweet aroma. I love that this recipe is endlessly adaptable, too. Want to swap in walnuts or chocolate chips? Go ahead! Prefer a gluten-free version? I’ve tested it with almond flour, and it’s just as delightful. Think of it as a friendly, no-fuss recipe that’s as happy to be breakfast as it is a cozy afternoon treat. Plus, that cream cheese swirl? It’s my secret weapon for an extra special touch that turns a humble loaf into a showstopper.
Why you’ll love this recipe?
Honestly, what I love most about this zucchini banana bread is how it makes me feel—comforted, a little nostalgic, and always satisfied. The flavor is just unbeatable; the ripe bananas give it that sweet, caramel-y aroma, while the zucchini keeps it moist and tender, so there’s no dry crumb in sight. The smell when it’s baking? Pure heaven. Plus, it’s so simple to make. I’ve tested this with pretty much whatever I’ve had on hand, from almond milk instead of regular, which made it even creamier, to sliced nuts sprinkled on top for extra crunch. Budget-wise, it’s super friendly—main ingredients you probably already own, and no fancy equipment needed. What I most appreciate is how versatile it is. Serve it plain in the morning, serve slices with a dollop of yogurt for brunch, or throw a drizzle of honey on a warm piece as a dessert. It’s the kind of recipe that’s a real lifesaver on busy nights or when friends pop over unexpectedly. Honestly, once you try it, I bet it’ll become a staple in your kitchen, too.
How do you make Zucchini Banana Bread?
Quick Overview
This recipe comes together in just a few steps, making it perfect for those days when you want something baked but don’t want to spend hours in the kitchen. Start by grating the zucchini (no peeling needed—just give it a good squeeze to remove excess moisture). Mix your dry ingredients in one bowl and your wet ingredients in another, then fold everything together gently. The batter is moist but not runny. Swirl in the softened cream cheese with a touch of vanilla and sugar, then layer it into the batter before baking. In about 50 minutes, you’ll have a beautiful, golden loaf with a delightful cream cheese swirl through the middle. Let it cool a bit, and you’re ready to slice—trust me, the smell alone is enough to make everyone in the house stop what they’re doing!
Ingredients
For the Main Batter:
- 1 ½ cups all-purpose flour (or a gluten-free blend if you prefer)
- 1 teaspoon baking soda
- ½ teaspoon salt
- 1 teaspoon cinnamon (optional but highly recommended)
- 1 cup mashed ripe bananas (about 2-3 bananas depending on size)
- ½ cup granulated sugar (adjust to taste)
- ¼ cup brown sugar for deeper flavor
- ½ cup vegetable oil or melted coconut oil
- 3 large eggs (or flax eggs for vegan option)
- 1 teaspoon vanilla extract
- 1 cup grated zucchini, excess moisture squeezed out
For the Filling:
- 4 oz cream cheese, softened
- 2 tablespoons granulated sugar
- ½ teaspoon vanilla extract
For the Glaze:
- Optional: powdered sugar mixed with a splash of milk or lemon juice for drizzle
Step-by-Step Instructions
Step 1: Preheat & Prep Pan
Set your oven to 350°F (175°C). Grease a standard loaf pan with butter or non-stick spray and line it with parchment paper if you like for easy removal. Giving the pan a quick spray helps the bread slide out smoothly and keeps the crust from sticking. Set everything nearby; this recipe comes together pretty quickly once you start mixing.
Step 2: Mix Dry Ingredients
In a large bowl, whisk together the flour, baking soda, salt, and cinnamon. Doing this helps distribute everything evenly so your bread bakes uniformly. Think of it as setting the foundation—it makes all the difference in the final texture.
Step 3: Mix Wet Ingredients
In another bowl, mash the bananas until they’re smooth—no big chunks! Add the sugars, oil, eggs, and vanilla. Whisk until everything’s well incorporated and slightly frothy. The mixture should smell sweet and banana-y, and it’ll look a little glossy—that’s perfect. I always test this with almond milk too, and it’s crazy how creamy it gets without losing any flavor.
Step 4: Combine
Pour the wet ingredients into the dry and fold gently until just combined. Don’t overmix—this keeps the bread tender. If you overmix, it can turn dense or chewy, and nobody wants that. Just stir until no streaks of flour remain but the batter is still lumpy.
Step 5: Prepare Filling
In a small bowl, beat the cream cheese with sugar and vanilla until smooth. I like to keep this a bit soft, so I leave it out for about 15 minutes before mixing—it makes spreading easier. You can also add a pinch of lemon zest for a subtle brightness or a handful of chopped nuts for crunch.
Step 6: Layer & Swirl
Pour half of the batter into your prepared pan. Dollop the cream cheese mixture on top in small spoonfuls, then pour the remaining batter over. Using a skewer or butterknife, swirl the batter and cream cheese together—don’t overdo it, just enough to create beautiful marbling. My secret? I start swirling from the center out and then go back in circles. The look’s almost as satisfying as the taste.
Step 7: Bake
Pop it in the oven and bake for about 50-55 minutes, or until a toothpick inserted comes out clean. Check around the 50-minute mark—every oven bakes a little differently. If the top gets too brown too quickly, tent it with foil and keep baking. The smell alone will make your whole house smell like a bakery!
Step 8: Cool & Glaze
Let the bread cool in the pan for about 15 minutes before transferring to a wire rack. This helps the structure set and prevents it from falling apart. If you’re adding a glaze, wait until it’s mostly cool, then drizzle over the top for a pretty finish and extra sweetness.
Step 9: Slice & Serve
This bread slices best when completely cooled. Use a serrated knife, and cut gently—warm bread tends to be a little moister, so patience pays off. Serve slices on their own, with a smear of butter, or even a drizzle of honey. I love having it in the mornings with a steaming mug of coffee or tea—nothing beats that cozy start. And when I sneak a slice in the afternoon? It’s still just as good. Honestly, I think this might be my all-time favorite quick bread—and I hope it becomes yours, too!
What to Serve It With
This zucchini banana bread is so versatile, and I love thinking of all the ways to enjoy it. In the morning, it’s perfect toasted with a pat of butter and a cup of dark roast coffee—bright, sweet, and just enough boost to kickstart your day. I often slice it a bit thicker and serve it as part of a brunch spread with fresh fruit, yogurt, and maybe even a little scrambled eggs. It also makes a fantastic dessert—warm slices topped with a dollop of whipped cream or a drizzle of caramel sauce. My family loves it with a glass of cold milk or a cup of chai latte, especially when I’ve added chocolate chips or chopped nuts for extra crunch. And for casual snacking, I pack a few slices for school lunches. It’s the kind of baked good that feels like home no matter where you’re enjoying it. The best part? It disappears in minutes at my house, especially when I serve it warm!
Top Tips for Perfecting Your Zucchini Banana Bread
After lots of trial and error, here are my top tips to get this bread just right:
- Zucchini Prep: When grating zucchini, I always use the fine side of my box grater. Then I squeeze out as much moisture as I can—this keeps the bread from getting soggy. I keep the grated zucchini in a clean kitchen towel and give it a good squeeze until almost no moisture drips out. If you forget this step, you might end up with a dense loaf. Trust me on this one!
- Mixing Advice: Incorporate dry and wet ingredients gently. Overmixing is the enemy—it creates tunnels and makes the bread dense. Just fold until everything looks combined, and stop. If you want a lighter crumb, I sometimes fold in a splash of sparkling water for extra lift.
- Swirl Customization: For beautiful marbling, pour half of the batter, dollop the cream cheese mixture randomly, then pour the rest. Use a toothpick or skewer to swirl in a figure-eight pattern or circles for a more artistic look. Keep the swirl gentle—this keeps the beautiful marbling when baked.
- Ingredient Swaps: Want to make it vegan? Use flax eggs and a plant-based butter alternative. Instead of sugar, try maple syrup or honey (if not vegan). Just remember, natural sweeteners can change the moisture content, so I recommend testing with small batches first.
- Baking Tips: Oven temps vary. If your loaf starts browning too quickly, tent it with foil after 20-30 minutes. Check for doneness with a toothpick—it should come out clean but also feel a bit moist—like a gentle tug. Overbaking can dry it out quickly, so keep an eye on the timer.
- Glaze Variations: Mix powdered sugar with citrus juice or milk for different flavor profiles. A splash of lemon or orange juice adds brightness and pairs beautifully with the banana’s sweetness. Drizzle right after cooling for that shiny, inviting finish.
From experimenting, I found that a gentle touch in mixing, a mindful bake time, and a creative swirl pattern are what make this bread look as good as it tastes. Trust me—once you get the hang of it, you’ll be making this in your sleep. The flexibility in ingredients means you can really make it your own, tailored to your favorite flavors and dietary needs.
Storing and Reheating Tips
This bread keeps well, but a few tricks help it stay fresh and tasty:
- Room Temperature: Wrap the cooled loaf tightly in plastic wrap or store in an airtight container. It’s best enjoyed within 2-3 days. If you toast a slice later, it’s even better—warm and crispy outside, soft inside.
- Refrigerator Storage: Keep slices in an airtight container or resealable bag for up to a week. This works especially well if you plan to serve it over a few days. Just reheat slices briefly in the microwave or oven to revive that fresh-baked feel.
- Freezer Instructions: Wrap individual slices tightly with plastic wrap, then place into a freezer-safe bag. Freeze for up to 3 months. To thaw, leave at room temp or lightly warm in the oven—your choice. It’s perfect for grabbing a quick, wholesome snack anytime.
- Glaze Timing: If you want that glossy, shiny look, add a quick glaze after the bread has cooled completely. Applying glaze when the bread is still warm can cause it to slide off or become sticky, so patience pays off here.
All in all, this bread’s a winner for make-ahead breakfast or afternoon treats. It only gets better with a little storage love, and I promise, reheating doesn’t ruin its cozy charm.
Frequently Asked Questions
Final Thoughts
This zucchini banana bread with a cream cheese swirl is one of those recipes that just feels like a hug from the oven. It’s imperfectly perfect—moist, sweet, a little earthy, and beautifully marbled with cream cheese. I love how forgiving it is; you can swap ingredients, add extras, or keep it simple. It’s become a staple in my house, a go-to when I want to bake something nourishing but also a little indulgent. And I honestly believe that once you try this, it’ll be one of those recipes you keep coming back to—because what’s better than a sweet, satisfying loaf that makes everyone’s day a little brighter? So go ahead, grab those bananas and zucchini, and give this a try. I’d love to hear how yours turns out! Feel free to leave a comment or share your own tweaks—I’m always experimenting in my kitchen, and food tastes best when shared with friends. Happy baking!
kiflice pastries
Ingredients
Method
- Activate the yeast. In a bowl, stir together yeast, sugar, and water. Set it in a warm place to activate, until it gets thick and foamy, about 15 to 20 minutes.
- Combine the other ingredients. In the meantime, add flour to your mixer's bowl. Make a well in the middle, and add warm milk, vegetable oil, salt, and eggs. Don't mix until you've added in the prepared yeast.
- Mix in the yeast mixture. Pour the yeast mixture into the flour mixture. Using a large spoon, mix it all together to combine.
- Knead the dough. Then, attach the dough hook to your stand mixer and finish kneading for about 2 to 3 minutes, or until the dough starts to separate from the bowl. If the dough is too dry, add a tablespoon of milk, if it's too wet add more flour, 1 tablespoon at a time. The dough shouldn't be too sticky, but you also don't want it to be dry.
- Shape the dough into a ball. Spray a large mixing bowl with cooking spray and sprinkle it with a bit of flour to prevent sticking. Transfer the prepared dough to the oiled bowl, and fold the dough into a ball. Add a little more flour to the bowl and a sprinkle of flour on top of the dough ball.
- Rise. Cover with plastic wrap and let rise for 30 minutes. It's best (and faster) to let the dough rise in a warmer spot.
- Make the filling. Combine the feta cheese and ricotta cheese in a bowl; set aside for later.
- Preheat the oven to 400°F.
- Divide and shape the dough. Turn the dough over to a flour-dusted work area and fold it on all sides; then, cut it in half. Cut each half in 3 parts so you have a total of 6 pieces. Fold all the pieces into small balls. Keep them covered.
- Roll out the dough. Take a ball of dough and lightly punch it down to spread and then roll it out into a round circle the size of about a medium pizza. Make sure to flour your work area often so the dough does not stick.
- Slice. Cut the dough into 8 to 12 slices, depending on the dough’s diameter or how big you want your rolls.
- Fill the rolls. Add ½ to 1 tablespoon of the ricotta/feta cheese mixture to each slice. Place the filling at the top of the slice, right in the center. Keep the filling modest—if you overfill, it’ll likely ooze out while baking.
- Roll them up. Pull the sides of the widest part at the top and tuck them inward, right over the filling, and continue to roll. Repeat with the rest of the dough.
- Bake. Transfer the rolls to baking sheets and place a pat of butter on top of each roll. Bake for 5 minutes at 400°F. Meanwhile, combine the eggs and water in a small bowl and beat to combine. Remove the kifli from the oven and brush with the egg glaze. Sprinkle with sesame seeds and continue to bake for 11 to 13 more minutes or until golden.
- Finish and serve. Once the kifli are out of the oven, you can top them with a small pat of butter (totally optional, but so good!). Transfer them to a wire rack to cool slightly. They're best enjoyed fresh, but they also store well for days.