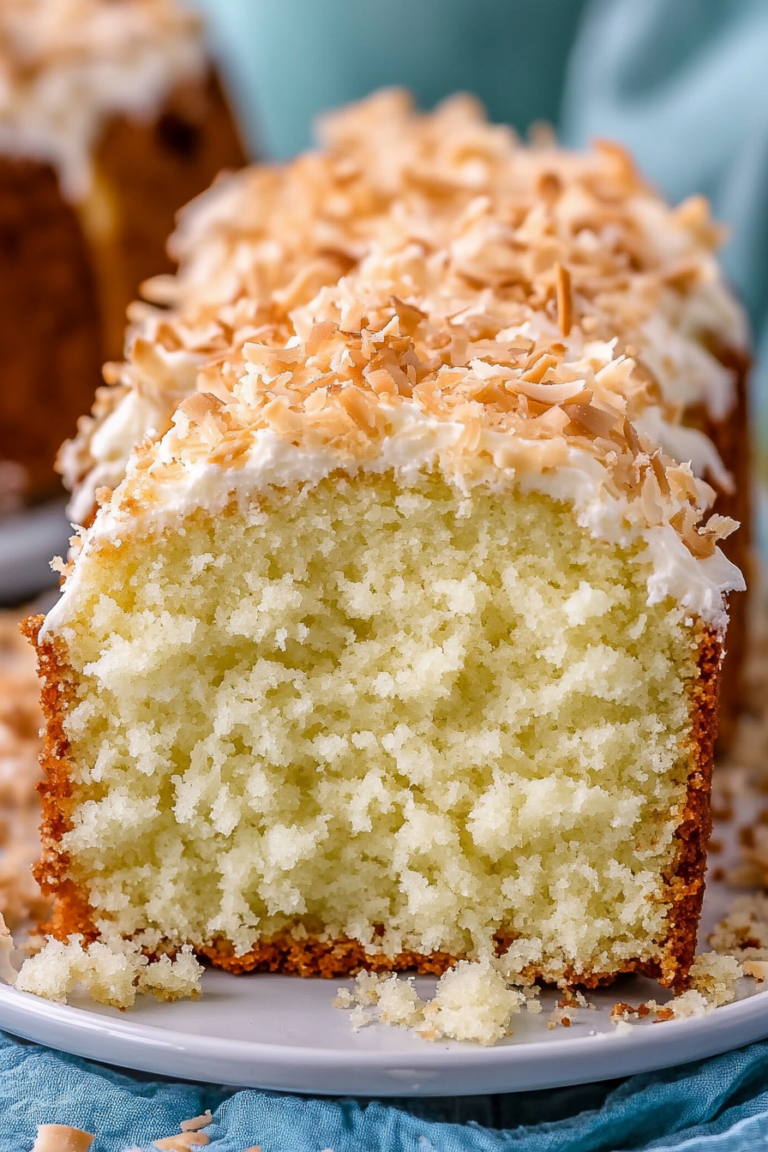
Simple Coconut Cream Pie Recipe
Honestly, there’s something about the smell of fresh zucchini bread waking up the whole house that feels like a warm hug. Maybe it’s the way the bread stays moist and tender, or how it’s secretly packed with veggies that your kids will never see coming. I always do this when I want something cozy yet bright—like a slice of sunshine in the morning. It’s almost like my version of a breakfast cake, but with a fresh, sneaky veggie twist. I’ll admit, I’ve made countless batches of this zucchini loaf, tweaking ingredients here and there, and I still get excited each time I pop it in the oven. My kids ask for this all the time, and honestly, it’s perfect for so many occasions. Whether it’s a lazy weekend brunch or a quick weekday breakfast when I’m running around just trying to keep everyone fed, this loaf always saves the day. And don’t even get me started on the lemon glaze—it’s just the right touch of sweetness and zest to make each bite extra special. If you’re looking for a recipe that combines comfort, freshness, and a little bit of muffin-top magic, stick around—I’m sharing every little tip I’ve learned along the way.
What is a Zucchini breakfast loaf?
Think of this zucchini breakfast loaf as a muffin-meets-bread hybrid—something that’s hearty enough to slice up and toast but soft enough to enjoy with a big spoonful of yogurt or jam. It’s essentially a moist, tender cake that’s bursting with grated zucchini, a hint of lemon, and warm spices. The name might throw you off a little because it sounds fancy, but honestly, it’s just my way of sneaking extra veggies into a breakfast everyone loves. The whole idea started when I wanted to make something wholesome for my mornings, but I didn’t want to fuss over complicated recipes or make a big cake. This loaf is a nod to those homey, all-in-one recipes grandma used to make—comforting and familiar but with a little healthy twist. I love how it’s versatile, too. You can dress it up with nuts, add a drizzle of honey, or keep it simple with just a sprinkle of sugar on top. Whatever your mood, this zucchini loaf adapts, and trust me, it’s impossible to resist.
Why you’ll love this recipe?
What I love most about this zucchini breakfast loaf is how it’s both comforting and a little sneaky—because your family will think they’re eating dessert, but it’s really breakfast! The flavor is light and bright, thanks to the lemon zest and juice, which keeps it from feeling heavy. It’s so easy to make that I almost feel guilty—no fancy equipment required, just a bowl, a spoon, and a little patience while it bakes. Plus, the ingredients are budget-friendly, and I usually have most of them on hand, making this a lifesaver on busy mornings. The best part? It’s incredibly versatile. You can add a handful of chopped nuts or dried fruit for extra texture, or switch up the citrus with orange zest if you’re feeling fancy. I also love that it stays moist for days—I’ve tested it with almond milk instead of regular milk, and it actually made it even creamier! This is perfect when you’re craving something sweet at 10 p.m. but don’t want to bake a whole cake. And honestly, my kids ask for seconds, thirds, sometimes even fourths. It’s a keeper, and I think you’ll love it just as much as I do.
How do I make Zucchini Breakfast Loaf?
Quick Overview
This loaf comes together quickly, with simple steps that don’t require any special skills or gadgets. Grate the zucchini ahead of time, so it’s well-drained and moisture is squeezed out—the secret to keeping your bread tender. The batter mixes up in one bowl, then layered with a zesty lemon glaze that’s more like a finishing touch. Baking times are forgiving, and I usually add a few extra minutes if I want a crunchier top. All in all, this recipe is a straightforward, one-bowl wonder that’s perfect for making ahead or whipping up last minute. It’s a project that feels satisfying enough to brag about but easy enough that you won’t be stressed in the kitchen.
Ingredients
For the Main Batter:
– 2 cups grated zucchini (about 2 medium zucchinis)
– 1 1/2 cups all-purpose flour (or a gluten-free blend if you prefer)
– 1 teaspoon baking powder
– 1/2 teaspoon baking soda
– 1/2 teaspoon salt
– 1 teaspoon ground cinnamon
– 1/2 teaspoon ground nutmeg
– 1/2 cup granulated sugar
– 1/4 cup light brown sugar (for a richer flavor)
– 1/3 cup vegetable oil (or applesauce for a healthier twist)
– 3 large eggs (room temperature makes a difference)
– Zest and juice of 1 big lemon (trust me, this brightens everything!)
For the Filling:
– 1/2 cup chopped walnuts or pecans (optional, but so good)
– 1/4 cup dried cranberries or raisins (for a sweet chewy pop)
For the Glaze:
– 1 cup powdered sugar
– 2-3 tablespoons lemon juice
– Optional: a touch of honey or vanilla extract for extra flavor
Step-by-Step Instructions
Step 1: Preheat & Prep Pan
Set your oven to 350°F (175°C). Grease a standard loaf pan with butter or non-stick spray, then lightly dust it with flour or line it with parchment paper. I always do this ahead, so I’m ready to go once the batter is mixed. Plus, this loaf tends to get eaten fast, so I want to make sure it slides out easily. When your oven’s warm, you’re ready to mix!
Step 2: Mix Dry Ingredients
In a big mixing bowl, whisk together flour, baking powder, baking soda, salt, cinnamon, and nutmeg. This step is crucial—it evenly distributes the leavening agents and spices, so the bread rises beautifully and tastes just right.
Step 3: Mix Wet Ingredients
In another bowl, whisk together eggs, sugars, oil, lemon zest, and lemon juice. It should be smooth, slightly frothy, and fragrant. I always taste the lemon mixture before adding it in—trust me, a little extra zest enhances the brightness like nothing else.
Step 4: Combine
Pour the wet into the dry ingredients, gently folding with a spatula just until everything’s combined. Don’t overmix! A few lumps are fine—they make the bread tender. If you overmix, it can become dense and rubbery, and nobody wants that.
Step 5: Prepare Filling
If you’re adding nuts or dried fruit, stir them into the batter on the side. I love adding a handful of chopped walnuts—adds a crunchy contrast that I crave. You can also swirl in some jam or chocolate chips if that’s your thing.
Step 6: Layer & Swirl
Pour half the batter into your loaf pan, spread evenly, sprinkle your filling, then layer with the rest of the batter. If you want a pretty marbled effect, take a skewer or butter knife and gently swirl through the top to create ribbons of filling. Don’t overdo it; just a few gentle swirls will do the trick!
Step 7: Bake
Bake for 50-60 minutes, or until a toothpick inserted in the center comes out clean. Keep an eye on it around the 50-minute mark; if the top is browning too quickly, tent it with foil. The smell alone is enough to make everyone come running, trust me.
Step 8: Cool & Glaze
Let the loaf cool in the pan for about 10 minutes before transferring it to a wire rack. Once cooled slightly, drizzle with your lemon glaze—mix powdered sugar with lemon juice until smooth. Pour over the loaf and wait a few minutes for the glaze to set. This step takes it from good to irresistible!
Step 9: Slice & Serve
Slice when it’s just a little warm for maximum tenderness. I like to serve this with a dollop of yogurt or a spread of butter. It’s gorgeous on a brunch table or packaged up for a quick breakfast on-the-go. And if you’re feeling fancy, add some fresh fruit on the side!
What to Serve It With
Honestly, this loaf is so flexible—you can serve it in countless ways. For breakfast, I love it with a steaming cup of coffee or a sharp citrus tea. My kids love it toasted, with a smear of cream cheese or jam, especially on weekend mornings. When I host brunch, I arrange slices on a platter with fresh berries and a drizzle of honey—looks stunning and tastes even better. This loaf also makes a lovely dessert when topped with whipped cream or a scoop of vanilla ice cream. Or, for a cozy snack, I’ll cubed it into crumbles and sprinkle it over yogurt bowls. I’ve even taken slices along on picnics—trust me, it keeps well and always gets eaten.
Top Tips for Perfecting Your Zucchini Breakfast Loaf
Over the years, I’ve learned a few tricks to make this recipe truly shine. First, always squeeze out excess moisture from the grated zucchini—wet zucchini can make your bread dense and heavy. I do this by wrapping it in a clean kitchen towel and pressing out the water—this little step makes a big difference. When mixing the batter, be gentle; overmixing introduces too much gluten, which can toughen the loaf. Instead, fold the ingredients just until combined. For the swirl effect, take your time—you want it pretty, not chaotic. Using a skewer or toothpick helps create pretty ribbons of filling. If you want to switch things up, try swapping out walnuts for almonds or adding a pinch of cardamom for an aromatic twist. For baking, keep an eye on the top—if it’s browning too fast, tent it with foil. And finally, I tested this with coconut sugar and maple syrup, which gave a lovely caramel undertone, so don’t hesitate to experiment. Each tweak adds a new layer of flavor and keeps this recipe fresh and fun to make.
Storing and Reheating Tips
This loaf keeps well for several days, which is kind of rare for baked goods. At room temperature, I recommend wrapping it tightly in plastic wrap or storing it in an airtight container. It stays fresh and moist for up to 3 days, but if you want to keep it longer, pop it into the fridge—just be sure to bring it to room temp or give it a quick toast before eating. For longer storage, slice it up and freeze individual pieces, wrapped well in plastic or foil. To reheat, I usually pop a slice in the microwave for about 20 seconds, or toast it lightly. The glaze can be added later if you’re saving it for later—you don’t want it to get soggy. I’ve learned that the flavor actually deepens after a day or two, making leftovers just as good (if not better) as fresh. A few minutes in the oven at 350°F can revive the loaf if it feels a little dry. Trust me—this one’s a keeper and freezer-friendly too!
Frequently Asked Questions
Final Thoughts
Really, this zucchini breakfast loaf has become my little kitchen staple. It’s a perfect way to start the day, sneak in some veggies without arguing, and enjoy a soft, flavorful slice with a cup of coffee. The lemon glaze really elevates it from simple to special, and it’s a recipe I’ve handed down to friends and family, always with the same warm smile. If you love baking something heartfelt that’s also a little wholesome, give this one a try. I promise, you’ll be hooked from the first bite—just like I was. Feel free to play with the add-ins, switch up the citrus, or make it your own. And hey, I’d love to hear how yours turns out—leave a comment or snap a pic! Happy baking, and enjoy every crumb of this cozy, tangy, veggie-packed treat!

coconut cream pie
Ingredients
Method
- In a small bowl, combine the melted butter with graham cracker crumbs. Mix well until each crumb is coated.
- Press the graham cracker mixture into a 7-inch pie plate, evenly covering the bottom and sides.
- In a large bowl, whisk together the pudding mix and cold milk until smooth, about 2 minutes.
- Stir in 1 cup of whipped topping and 3/4 cup toasted coconut into the pudding mixture.
- Pour the pudding mixture into the prepared crust.
- Refrigerate for at least 4 hours until set.
- Top the pie with remaining whipped topping, and sprinkle with the remaining toasted coconut.
- Chill until ready to serve.